OAuth 2.0
บทนำ
Casdoor รองรับการใช้ Access Token เพื่อตรวจสอบสิทธิ์ของลูกค้า ในส่วนนี้ เราจะแสดงวิธีการได้รับ Access Token วิธีการตรวจสอบ Access Token และวิธีการใช้ Access Token
วิธีการได้รับ Access Token
มีสองวิธีในการได้รับ Access Token: คุณสามารถใช้ Casdoor SDKs สำหรับข้อมูลเพิ่มเติม กรุณาดูที่เอกสาร SDK ที่นี่ เราจะแสดงวิธีการใช้ API เพื่อรับ Access Token
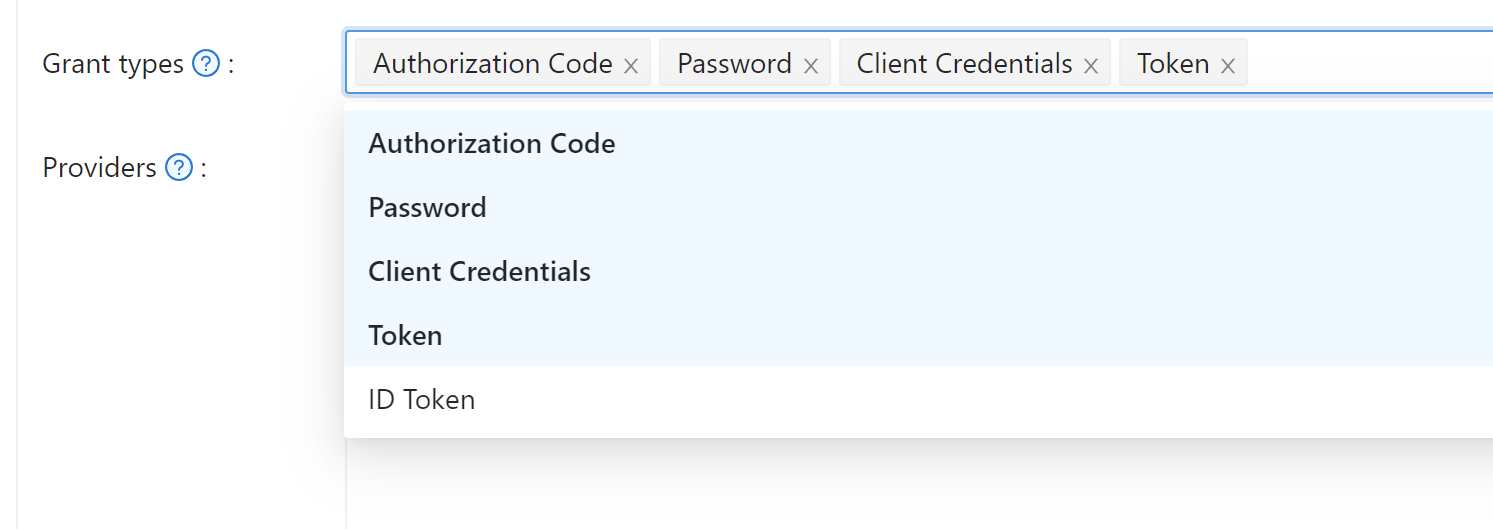
Casdoor รองรับ OAuth grant types สี่ประเภท: Authorization Code Grant, Implicit Grant, Resource Owner Password Credentials Grant, และ Client Credentials Grant
ด้วยเหตุผลด้านความปลอดภัย Casdoor app มีโหมด authorization code เปิดใช้งานโดยค่าเริ่มต้น หากคุณต้องการใช้โหมดอื่นๆ กรุณาไปที่แอปที่เหมาะสมเพื่อตั้งค่า
Authorization Code Grant
ก่อนอื่น เปลี่ยนเส้นทางผู้ใช้ของคุณไปที่:
https://<CASDOOR_HOST>/login/oauth/authorize?
client_id=CLIENT_ID&
redirect_uri=REDIRECT_URI&
response_type=code&
scope=openid&
state=STATE
ขอบเขตที่มีให้
| ชื่อ | คำอธิบาย |
|---|---|
| openid (no scope) | sub (id ของผู้ใช้), iss (ผู้ออก), และ aud (ผู้รับ) |
| profile | ข้อมูลโปรไฟล์ผู้ใช้ รวมถึงชื่อ, displayName และ avatar |
| ที่อยู่อีเมลของผู้ใช้ | |
| address | ที่อยู่ของผู้ใช้ |
| phone | หมายเลขโทรศัพท์ของผู้ใช้ |
แอปพลิเคชัน OAuth ของคุณสามารถขอขอบเขตในการเปลี่ยนเส้นทางเริ่มต้น คุณสามารถระบุขอบเขตหลายอย่างโดยแยกด้วยช่องว่างโดยใช้ %20:
https://<CASDOOR_HOST>/login/oauth/authorize?
client_id=...&
scope=openid%20email
สำหรับรายละเอียดเพิ่มเติม กรุณาดูที่ มาตรฐาน OIDC
หลังจากผู้ใช้ของคุณได้รับการตรวจสอบสิทธิ์กับ Casdoor Casdoor จะเปลี่ยนเส้นทางพวกเขาไปที่:
https://REDIRECT_URI?code=CODE&state=STATE
ตอนนี้ที่คุณได้รับ authorization code แล้ว ทำการส่งคำขอ POST ไปที่:
https://<CASDOOR_HOST>/api/login/oauth/access_token
ในแอปพลิเคชันแบ็กเอนด์ของคุณ:
{
    "grant_type": "authorization_code",
    "client_id": ClientId,
    "client_secret": ClientSecret,
    "code": Code,
}
คุณจะได้รับคำตอบดังนี้:
{
    "access_token": "eyJhb...",
    "id_token": "eyJhb...",
    "refresh_token": "eyJhb...",
    "token_type": "Bearer",
    "expires_in": 10080,
    "scope": "openid"
}
Casdoor ยังรองรับคุณสมบัติ PKCE เมื่อได้รับ authorization code คุณสามารถเพิ่มสองพารามิเตอร์เพื่อเปิดใช้งาน PKCE:
&code_challenge_method=S256&code_challenge=YOUR_CHANNELLENGE
เมื่อได้รับโทเค็น คุณต้องส่งพารามิเตอร์ code_verifier เพื่อตรวจสอบ PKCE ควรทราบว่าเมื่อเปิดใช้งาน PKCE Client_Secret ไม่จำเป็นต้องมี แต่ถ้าคุณส่งมันไป มันต้องเป็นค่าที่ถูกต้อง
Implicit Grant
บางทีแอปพลิเคชันของคุณอาจไม่มีแบ็กเอนด์ และคุณต้องการใช้ Implicit Grant ก่อนอื่น คุณต้องแน่ใจว่าคุณได้เปิดใช้งาน Implicit Grant แล้วเปลี่ยนเส้นทางผู้ใช้ของคุณไปที่:
https://<CASDOOR_HOST>/login/oauth/authorize?client_id=CLIENT_ID&redirect_uri=REDIRECT_URI&response_type=token&scope=openid&state=STATE
หลังจากผู้ใช้ของคุณได้รับการตรวจสอบสิทธิ์กับ Casdoor Casdoor จะเปลี่ยนเส้นทางพวกเขาไปที่:
https://REDIRECT_URI/#access_token=ACCESS_TOKEN
Casdoor ยังรองรับ id_token เป็น response_type ซึ่งเป็นคุณสมบัติของ OpenID
Device Grant
Maybe your devices have limited input capabilities or lack a suitable browser, and you need to use Device Grant. First, you need to make sure you have Device Grant enabled, the request device_authorization_endpoint in OIDC discover, then use QR code or text to show verification_uri and lead user to enter login page.
Second, you should request token endpoint to get Access Token with parameter define in rfc8628.
Resource Owner Password Credentials Grant
หากแอปพลิเคชันของคุณไม่มีฟรอนต์เอนด์ที่เปลี่ยนเส้นทางผู้ใช้ไปยัง Casdoor คุณอาจต้องการสิ่งนี้
ก่อนอื่น คุณต้องแน่ใจว่าคุณได้เปิดใช้งาน Password Credentials Grant และส่งคำขอ POST ไปที่:
https://<CASDOOR_HOST>/api/login/oauth/access_token
{
    "grant_type": "password",
    "client_id": ClientId,
    "client_secret": ClientSecret,
    "username": Username,
    "password": Password,
}
คุณจะได้รับคำตอบดังนี้:
{
    "access_token": "eyJhb...",
    "id_token": "eyJhb...",
    "refresh_token": "eyJhb...",
    "token_type": "Bearer",
    "expires_in": 10080,
    "scope": "openid"
}
Client Credentials Grant
คุณยังสามารถใช้ Client Credentials Grant เมื่อแอปพลิเคชันของคุณไม่มีฟรอนต์เอนด์
ก่อนอื่น คุณต้องแน่ใจว่าคุณได้เปิดใช้งาน Client Credentials Grant และส่งคำขอ POST ไปที่ https://<CASDOOR_HOST>/api/login/oauth/access_token:
{
    "grant_type": "client_credentials",
    "client_id": ClientId,
    "client_secret": ClientSecret,
}
คุณจะได้รับคำตอบดังนี้:
{
    "access_token": "eyJhb...",
    "id_token": "eyJhb...",
    "refresh_token": "eyJhb...",
    "token_type": "Bearer",
    "expires_in": 10080,
    "scope": "openid"
}
สำคัญที่จะต้องทราบว่า AccessToken ที่ได้รับในลักษณะนี้แตกต่างจากสามอันแรกตรงที่มันสอดคล้องกับแอปพลิเคชันมากกว่าผู้ใช้
Refresh Token
บางทีคุณอาจต้องการอัปเดต Access Token ของคุณ แล้วคุณสามารถใช้ refreshToken ที่คุณได้รับข้างต้น
ก่อนอื่น คุณต้องตั้งเวลาหมดอายุของ Refresh Token ในแอปพลิเคชัน (ค่าเริ่มต้นคือ 0 ชั่วโมง) และส่งคำขอ POST ไปที่ https://<CASDOOR_HOST>/api/login/oauth/refresh_token
{
    "grant_type": "refresh_token",
    "refresh_token": REFRESH_TOKEN,
    "scope": SCOPE,
    "client_id": ClientId,
    "client_secret": ClientSecret,
}
คุณจะได้รับคำตอบเช่นนี้:
{
    "access_token": "eyJhb...",
    "id_token": "eyJhb...",
    "refresh_token": "eyJhb...",
    "token_type": "Bearer",
    "expires_in": 10080,
    "scope": "openid"
}
วิธีการตรวจสอบ Access Token
Casdoor ปัจจุบันรองรับ endpoint token introspection endpoint นี้ได้รับการป้องกันด้วย Basic Authentication (ClientId:ClientSecret)
POST /api/login/oauth/introspect HTTP/1.1
Host: CASDOOR_HOST
Accept: application/json
Content-Type: application/x-www-form-urlencoded
Authorization: Basic Y2xpZW50X2lkOmNsaWVudF9zZWNyZXQ=

token=ACCESS_TOKEN&token_type_hint=access_token
คุณจะได้รับคำตอบดังนี้:
{
    "active": true,
    "client_id": "c58c...",
    "username": "admin",
    "token_type": "Bearer",
    "exp": 1647138242,
    "iat": 1646533442,
    "nbf": 1646533442,
    "sub": "7a6b4a8a-b731-48da-bc44-36ae27338817",
    "aud": [
        "c58c..."
    ],
    "iss": "http://localhost:8000"
}
วิธีการใช้ AccessToken
คุณสามารถใช้ AccessToken เพื่อเข้าถึง Casdoor APIs ที่ต้องการการตรวจสอบสิทธิ์
ตัวอย่างเช่น มีสองวิธีที่แตกต่างกันในการขอ /api/userinfo
ประเภทที่ 1: พารามิเตอร์คิวรี
https://<CASDOOR_HOST>/api/userinfo?accessToken=<your_access_token>
ประเภทที่ 2: โทเค็น HTTP Bearer
https://<CASDOOR_HOST>/api/userinfo with the header: "Authorization: Bearer <your_access_token>"
Casdoor จะแยกวิเคราะห์ access_token และคืนข้อมูลผู้ใช้ที่สอดคล้องกับ scope คุณจะได้รับคำตอบเดียวกัน ซึ่งดูเหมือนนี้:
{
    "sub": "7a6b4a8a-b731-48da-bc44-36ae27338817",
    "iss": "http://localhost:8000",
    "aud": "c58c..."
}
หากคุณคาดหวังข้อมูลผู้ใช้เพิ่มเติม ให้เพิ่ม scope เมื่อได้รับ AccessToken ในขั้นตอน Authorization Code Grant
Accessing OAuth Provider Tokens
When users authenticate through OAuth providers (GitHub, Google, etc.), you can access the provider's original access token to make API calls to the third-party service on their behalf. This token is stored in the user's originalToken field.
The token is available through the /api/get-account endpoint:
{
  "status": "ok",
  "data": {
    "name": "user123",
    "originalToken": "ya29.a0AfH6SMBx...",
    ...
  }
}
The originalToken is visible only when the user requests their own account or when the requester is an admin. For other requests, it is masked for privacy.
This allows your application to interact with third-party APIs (e.g., GitHub API, Google Drive API) using the provider's access token without requiring additional OAuth flows.
ความแตกต่างระหว่าง APIs userinfo และ get-account
/api/userinfo: API นี้คืนข้อมูลผู้ใช้เป็นส่วนหนึ่งของโปรโตคอล OIDC มันให้ข้อมูลจำกัด รวมเฉพาะข้อมูลพื้นฐานที่กำหนดในมาตรฐาน OIDC สำหรับรายการขอบเขตที่มีให้ที่ Casdoor รองรับ กรุณาดูที่ส่วน ขอบเขตที่มีให้/api/get-account: API นี้ดึงข้อมูลวัตถุผู้ใช้สำหรับบัญชีที่เข้าสู่ระบบในปัจจุบัน It is a Casdoor-specific API that allows you to obtain all the information of the user in Casdoor, including the OAuth provider's access token when applicable.