Custom SAML
Casdoor can act as a Service Provider (SP) and connect to any SAML 2.0 Identity Provider (IdP).
1. Configure your IdP
In your IdP (e.g. Google Workspace, Azure AD, Okta), register Casdoor as an SP with:
- ACS URL:
https://<your-casdoor-domain>/api/acs(e.g.https://door.example.com/api/acs). This endpoint accepts POST only. - Entity ID (SP Entity ID): use the same URL as the ACS URL.
Replace <your-casdoor-domain> with your Casdoor host (e.g. http://localhost:8000 → http://localhost:8000/api/acs).
2. Get IdP metadata
From your IdP, obtain the metadata XML (EntityID, SSO endpoint, etc.). Some IdPs (e.g. Keycloak) need SP details before providing metadata.
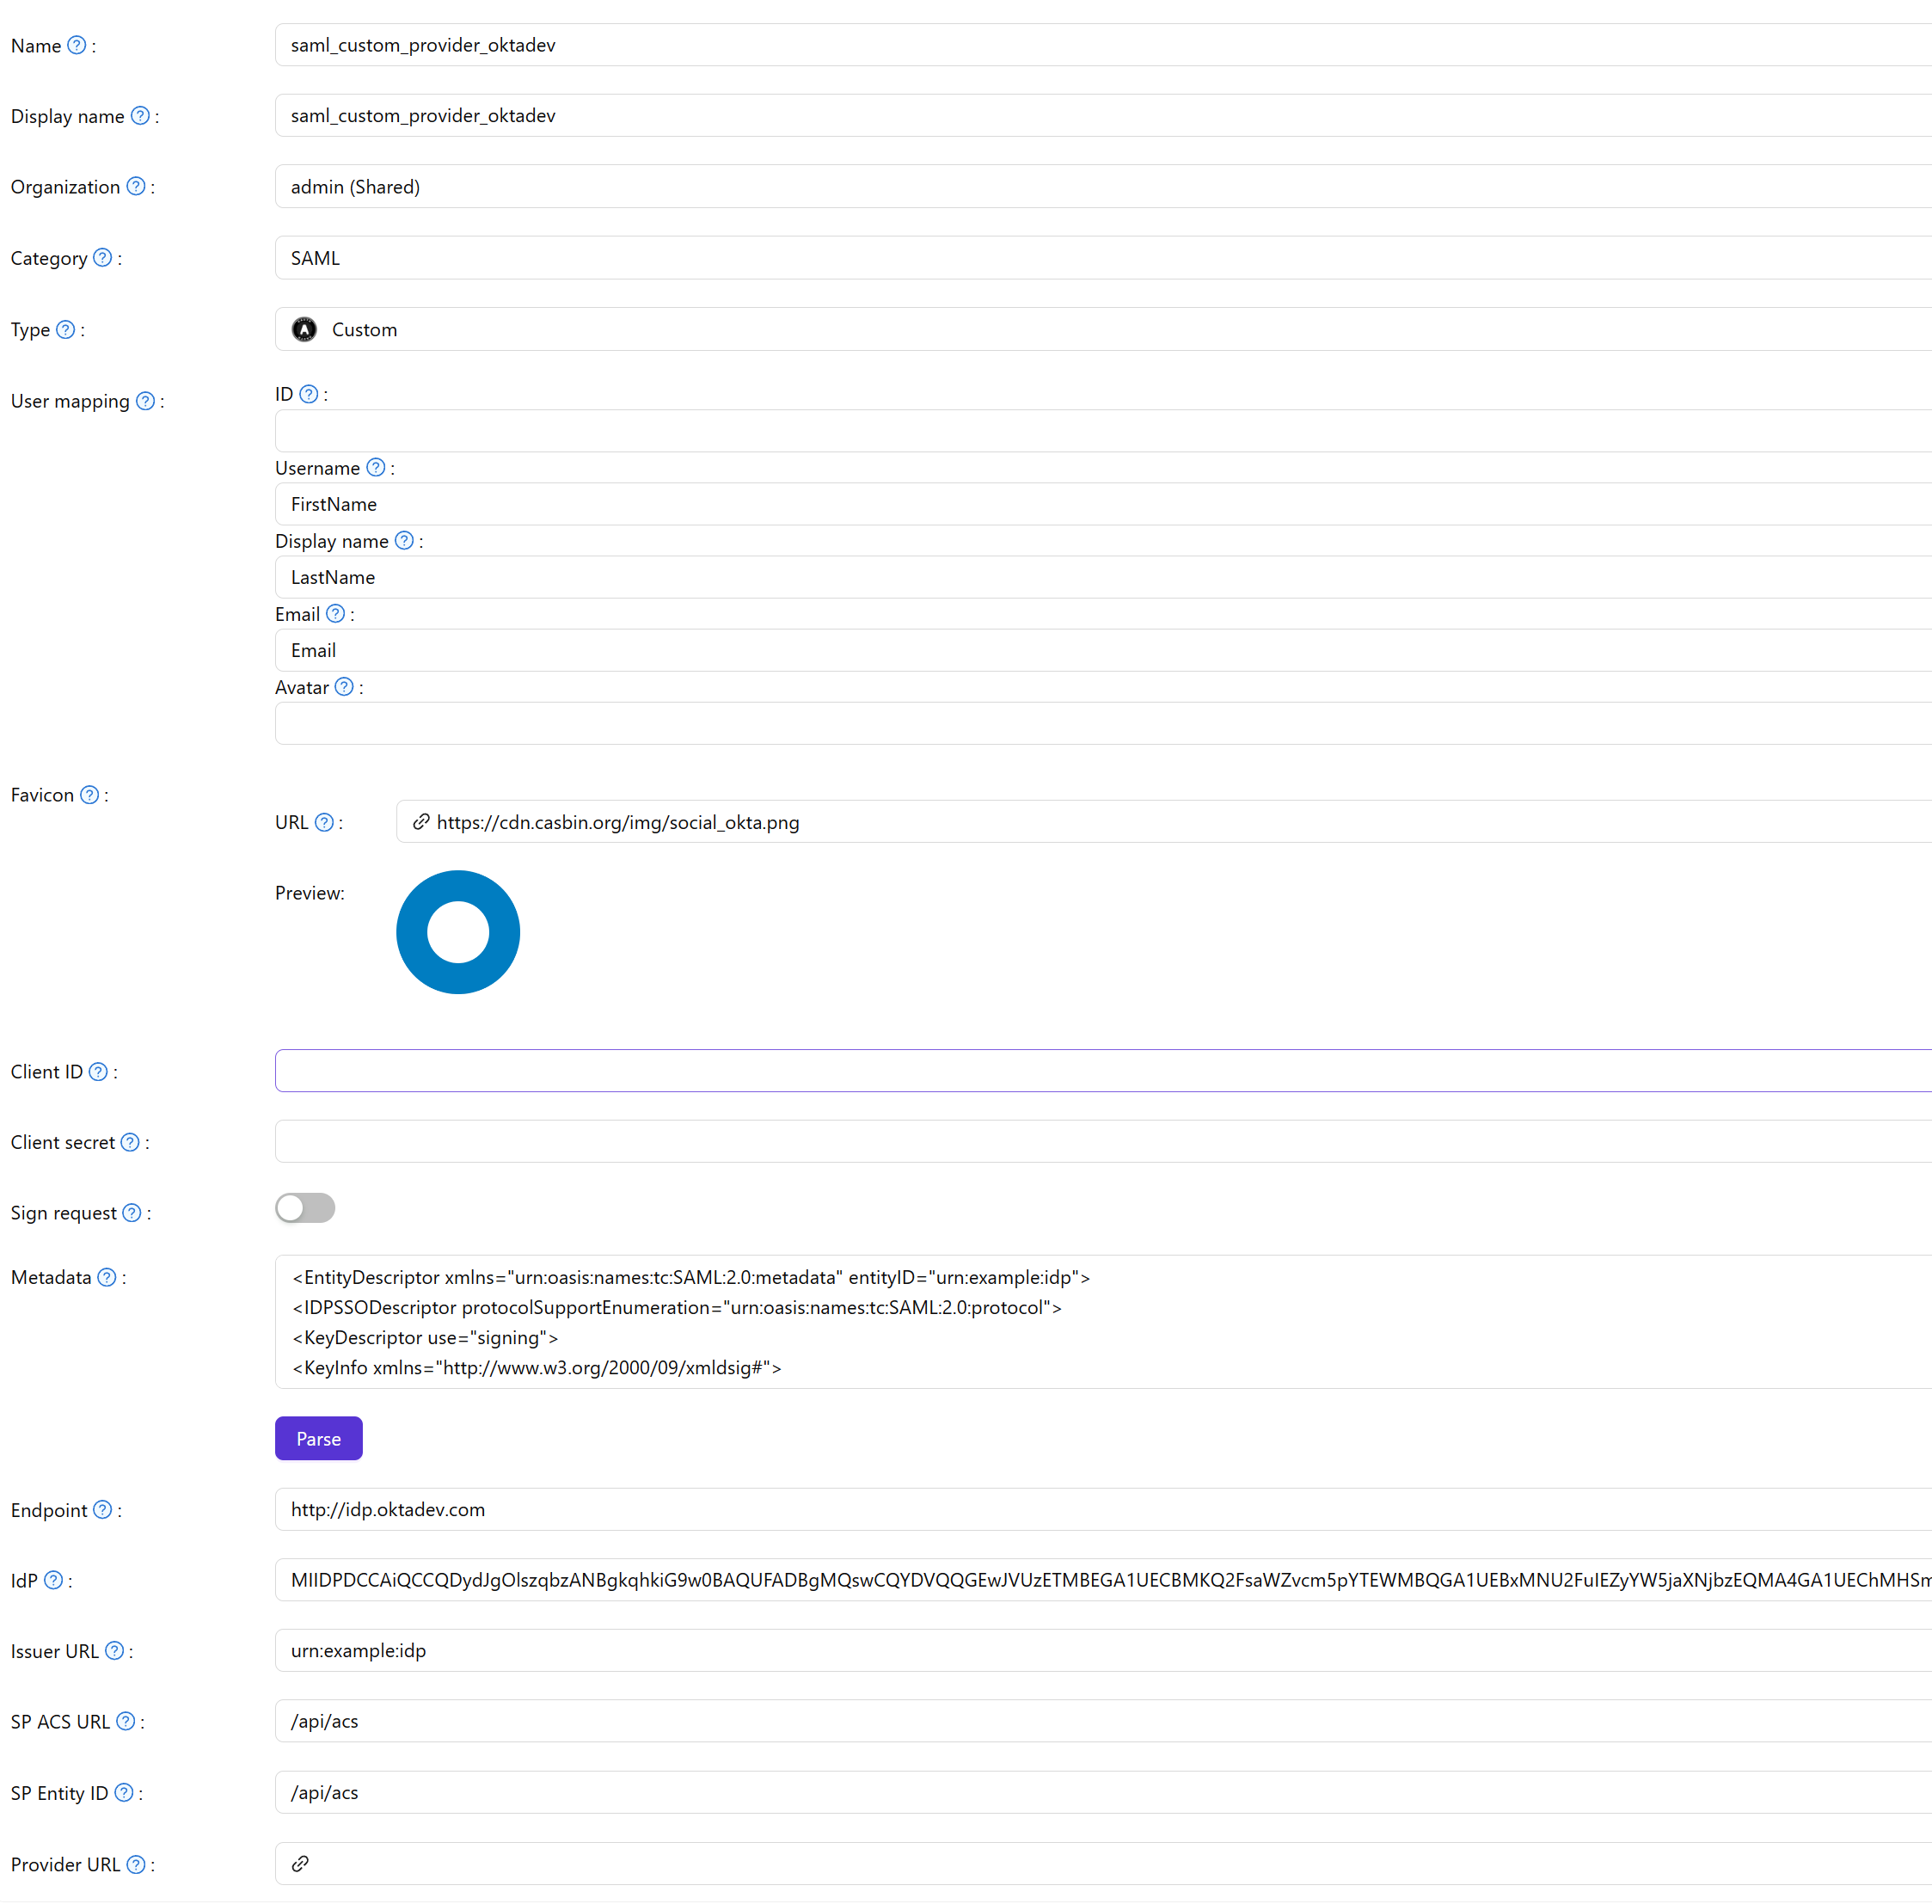
3. Configure the SAML Custom provider in Casdoor
Providers → Add. Set Category to SAML, Type to Custom. Set Favicon URL (IdP logo) and paste the IdP Metadata. Click Parse to fill Endpoint, IdP, Issuer URL, SP ACS URL, and SP Entity ID. Save.
| Champ | Description |
|---|---|
| Category | SAML |
| Type | Personnalisé |
| Favicon URL | IdP logo URL |
| Metadata | IdP metadata XML |
Add the SAML provider to the application’s Providers list.
