APISIX
目前,有两种方法可以使用Casdoor通过APISIX插件连接到APISIX并保护APISIX后面的API:使用APISIX的Casdoor插件或使用APISIX的OIDC插件。
通过 APISIX 的 Casdoor 插件连接 Casdoor
这个插件,authz-casdoor,可以保护APISIX后面的API,强制每一个请求都要经过身份验证,而无需修改API的代码。
如何启用它?
Specify this plugin when creating the route and fill the required fields. Example:
curl "http://127.0.0.1:9180/apisix/admin/routes/1" -H "X-API-KEY: edd1c9f034335f136f87ad84b625c8f1" -X PUT -d '
{
  "methods": ["GET"],
  "uri": "/anything/*",
  "plugins": {
    "authz-casdoor": {
        "endpoint_addr":"http://localhost:8000",
        "callback_url":"http://localhost:9080/anything/callback",
        "client_id":"7ceb9b7fda4a9061ec1c",
        "client_secret":"3416238e1edf915eac08b8fe345b2b95cdba7e04"
    }
  },
  "upstream": {
    "type": "roundrobin",
    "nodes": {
      "httpbin.org:80": 1
    }
  }
}'
在这个例子中,我们使用APISIX的管理员API,创建了一个指向"httpbin.org:80"的路由"/anything/*",并启用了"authz-casdoor"插件。 此路由现在已在Casdoor的身份验证保护之下。
属性
| 名称 | 类型 | 申请标准 | 默认 | 有效期 | 描述 |
|---|---|---|---|---|---|
| endpoint_addr | 字符串 | 必填 | Casdoor的URL。 | ||
| client_id | 字符串 | 必填 | Casdoor中的客户端ID。 | ||
| client_secret | 字符串 | 必填 | Casdoor中的客户端密钥。 | ||
| callback_url | 字符串 | 必填 | 用于接收状态和代码的回调URL。 |
endpoint_addr 和 callback_url 不应以“/”结尾
The "authz-casdoor" plugin has four parameters.
第一个是“callback_url”。 这是OAuth2中的回调URL。 应强调的是,这个回调URL 必须属于您为路由指定的"uri"。 For example, in this example, http://localhost:9080/anything/callback obviously belongs to "/anything/*". 只有通过这种方式,插件才能拦截并利用对callback_url的访问(这样插件就可以获取OAuth2中的代码和状态)。 callback_url的逻辑完全由插件实现,因此无需修改服务器来实现此回调。
第二个参数 "endpoint_addr" 显然是 Casdoor 的 URL。 The third and fourth parameters are "client_id" and "client_secret", obtained from Casdoor when registering an application.
它是如何工作的?
Suppose a new user who has never visited this route before is going to visit it (http://localhost:9080/anything/d?param1=foo¶m2=bar). 考虑到"authz-casdoor"已启用,此访问将首先由"authz-casdoor"插件处理。 在检查会话并确认该用户尚未通过身份验证后,将会拦截此次访问。 保留用户想要访问的原始URL,他们将被重定向到Casdoor的登录页面。
在成功使用用户名和密码(或他们使用的任何其他方法)登录后,Casdoor会将此用户重定向到带有GET参数“code”和“state”的“callback_url”。 因为"callback_url"是由插件知道的,所以当这次对"callback_url"的访问被拦截时,将会触发OAuth2中的"Authorization code Grant Flow"逻辑。 这意味着插件将请求访问令牌以确认此用户是否真的已登录。 经过这个确认后,插件将会把用户重定向到他们想要访问的原始URL,这个URL是我们之前保存的。 已登录的状态也将保留在会话中。
Next time this user wants to visit the URL behind this route (for example, http://localhost:9080/anything/d), after discovering that this user has been authenticated previously, this plugin won't redirect this user anymore. 这样,用户可以在不受干扰的情况下访问此路由下的任何内容。
通过 APISIX 的 OIDC 插件连接 Casdoor
Casdoor可以使用OIDC协议连接到APISIX,本文档将向您展示如何操作。
以下是配置中使用的一些名称:
CASDOOR_HOSTNAME:部署Casdoor服务器的域名或IP。
APISIX_HOSTNAME: 部署 APISIX 的域名或 IP。
步骤1:部署Casdoor和APISIX
Deploy Casdoor and APISIX. After deployment, ensure:
- 可以登录并正常使用Casdoor。
- 将Casdoor的
origin值 (conf/app.conf) 设置为CASDOOR_HOSTNAME。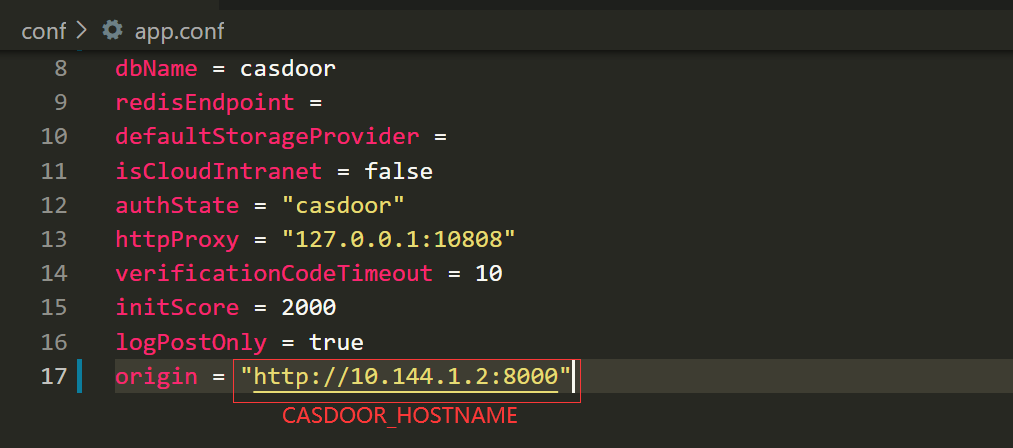
步骤2:配置Casdoor应用程序
- 创建一个新的Casdoor应用程序,或使用一个已经存在的。
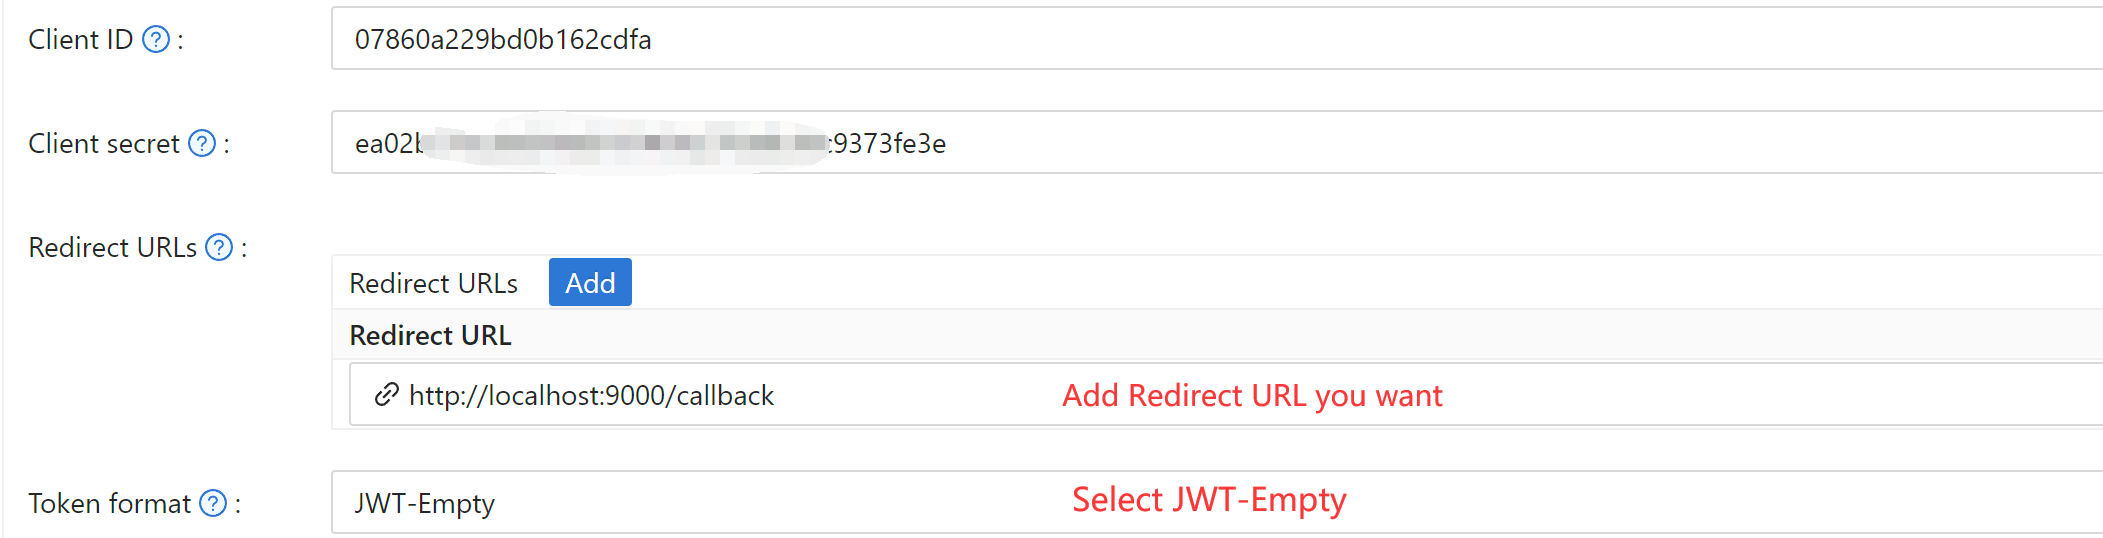
- 添加一个重定向URL:
http://APISIX_HOSTNAME/REDIRECTWHATYOUWANT,并将REDIRECTWHATYOUWANT替换为所需的重定向URL。 - 选择 "JWT-Empty" 作为令牌格式选项。
- 添加所需的提供商并配置其他设置。
 Note Client ID and Client Secret for the next step. OIDC discovery:
 http://<CASDOOR_HOSTNAME>/.well-known/openid-configuration.
步骤3:配置APISIX
APISIX 拥有官方 OIDC 支持,由 lua-resety-openidc 实现。
Customize settings per APISIX OIDC. Example routing:
# 使用您自己的X-Api-Key
$ curl -X POST APISIX_HOSTNAME/apisix/admin/routes -H "X-Api-Key: edd1c9f034335f136f87ad84b625c8f1" -d '{
  "uri": "/get",
  "name": "apisix_casdoor_test",
  "plugins": {
    "openid-connect": {
      "client_id": "客户端ID",
      "client_secret": "客户端密钥",
      "discovery": "http://CASDOOR_HOSTNAME/.well-known/openid-configuration",
      "introspection_endpoint_auth_method": "client_secret_basic",
      "logout_path": "/logout",
      "realm": "master",
      "redirect_uri": "http://APISIX_HOSTNAME/REDIRECTWHATYOUWANT",
      "bearer_only": false,
      "set_id_token_header": false,
      "access_token_in_authorization_header": true,
      "set_access_token_header": true,
      "set_userinfo_header": false,
      "realm": "master"
    }
  },
  "upstream": {
    "type": "roundrobin",
    "nodes": {
      "httpbin.org:80": 1
    }
  }
}'
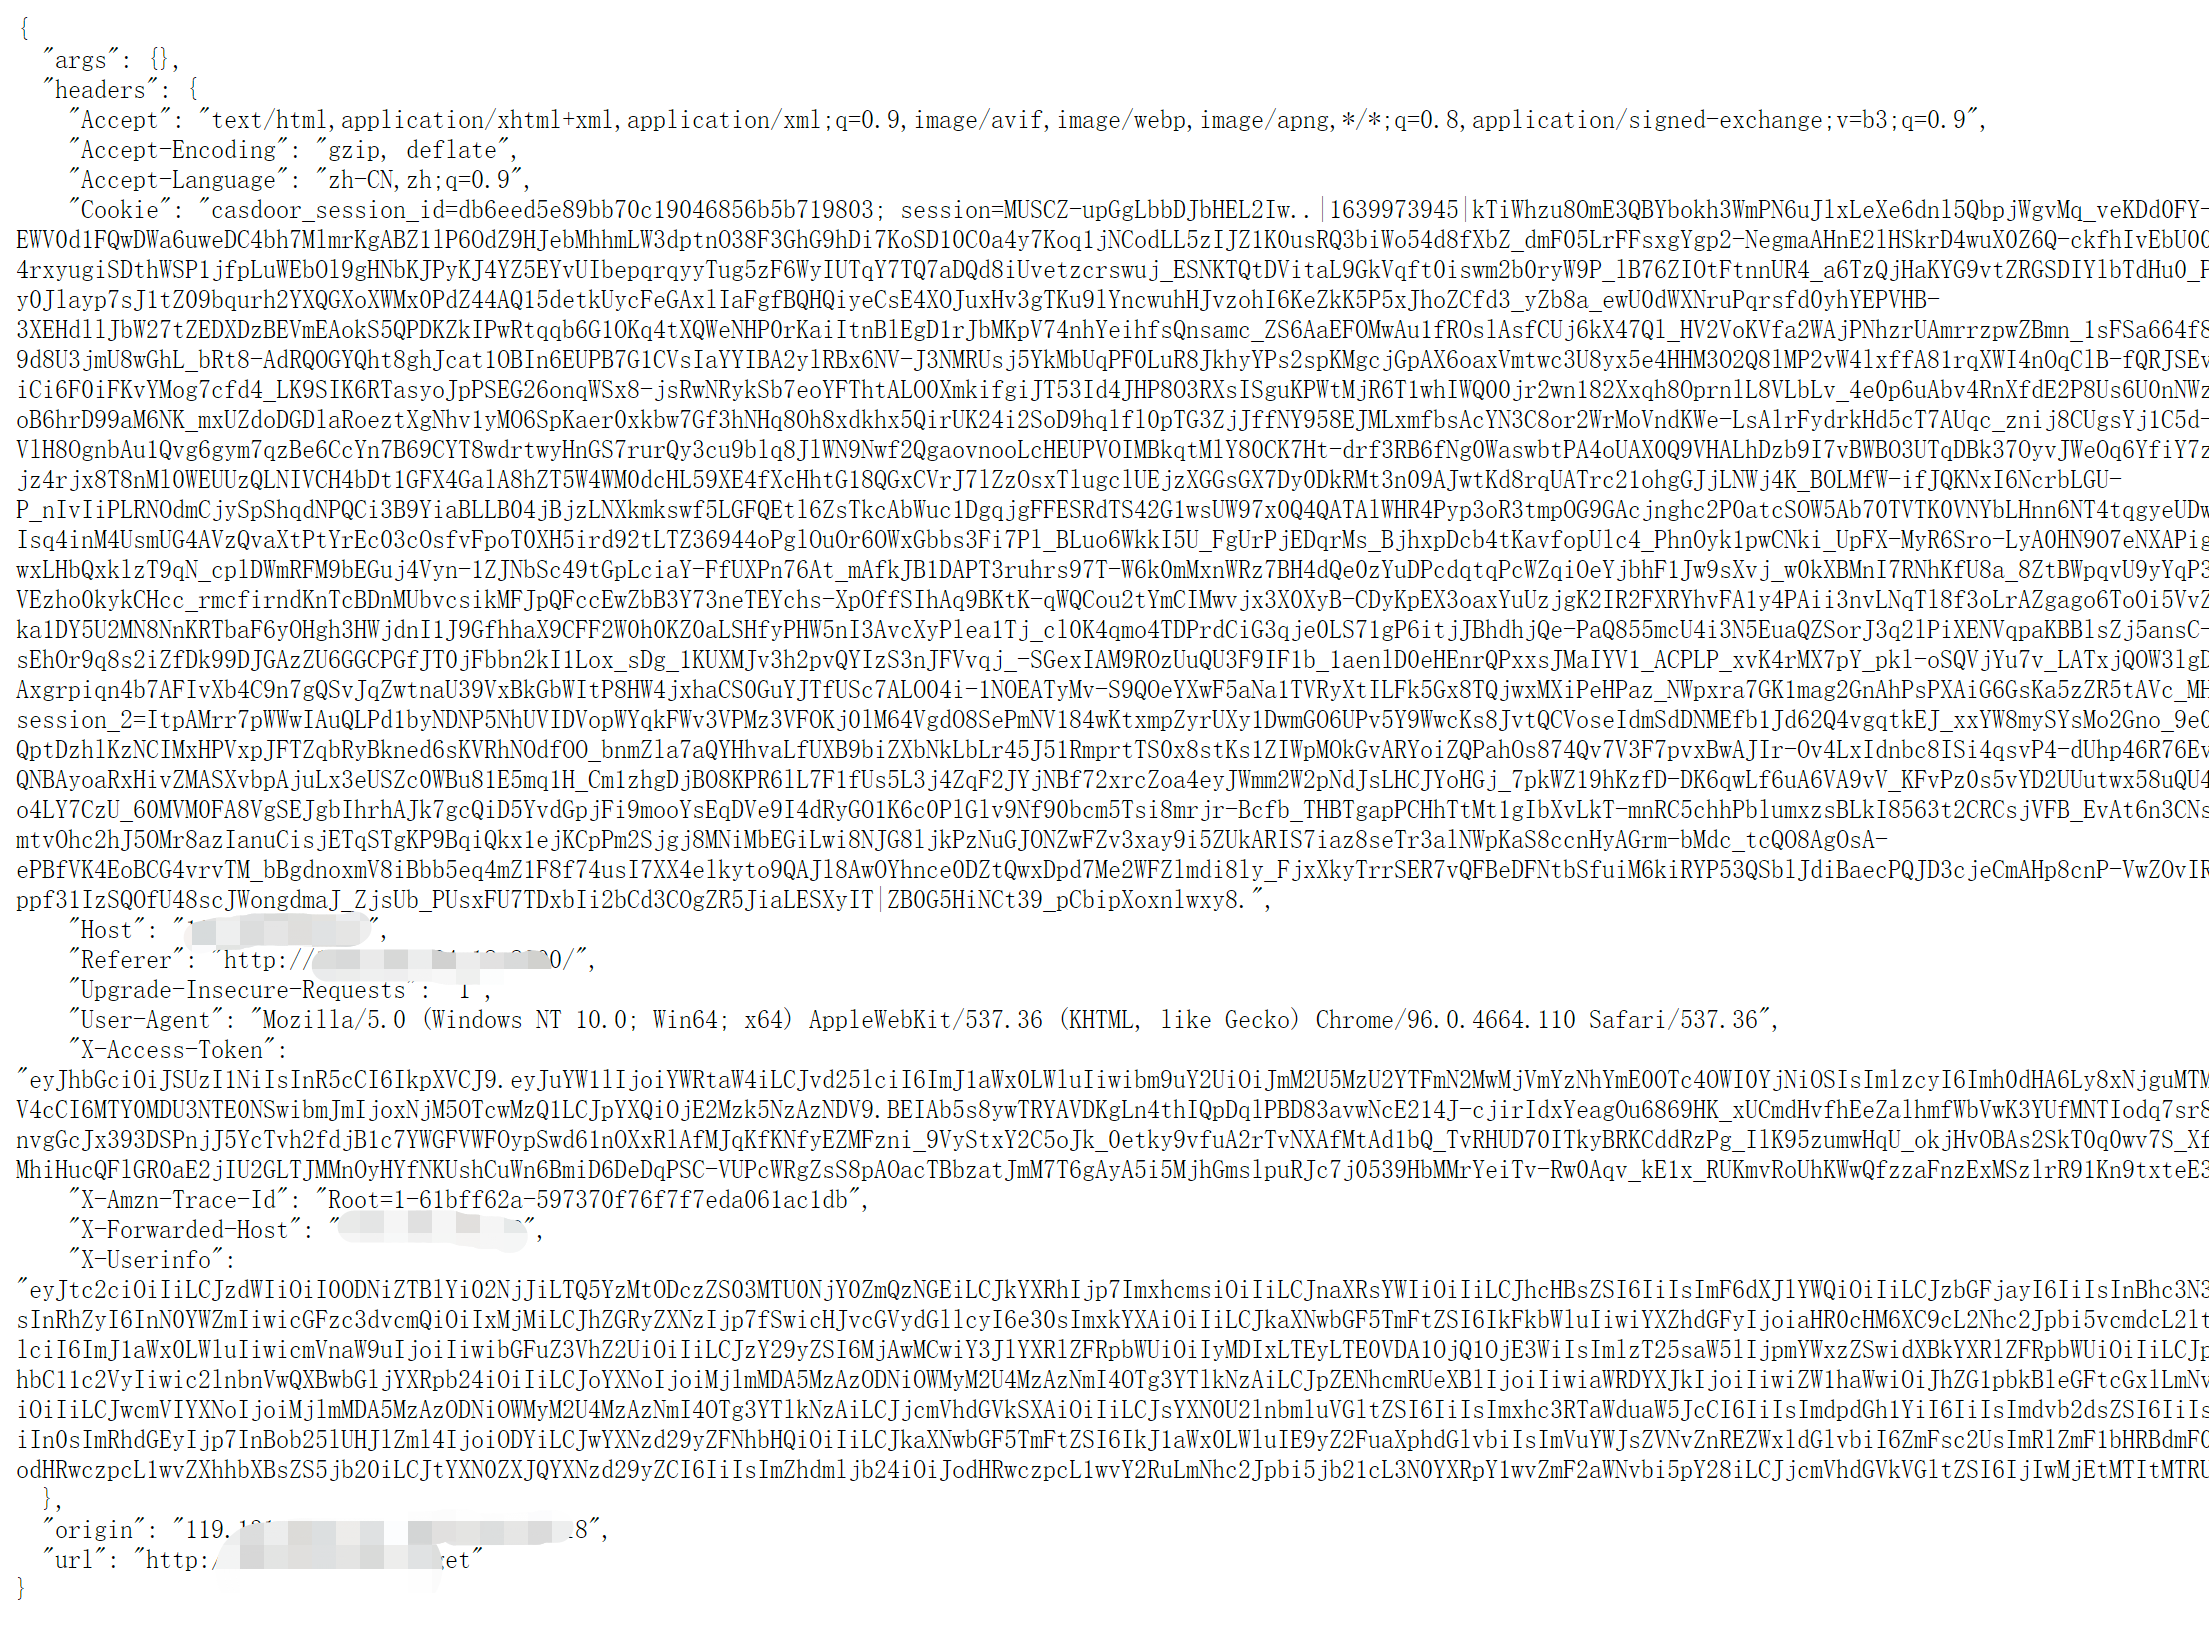
Visit http://APISIX_HOSTNAME/get; the browser redirects to the Casdoor login page. After login, the request is forwarded to httpbin.org as in the screenshot.