Casdoor SDKs
Overview
Casdoor SDKs extend standard OIDC with user management, resource uploads, and other features. They take a bit more setup than a generic OIDC client but give you the full Casdoor API.
Frontend SDKs — For web (JavaScript, React, Vue, etc.) and mobile (Android, iOS, React Native, Flutter).
Backend SDKs — For Go, Java, Node.js, Python, PHP, .NET, Rust, C++, and more.
For a frontend/backend split, use a frontend SDK (e.g. casdoor-js-sdk, casdoor-react-sdk, casdoor-vue-sdk) in the UI and a backend SDK for token validation and API calls. For a traditional server-rendered app (JSP, PHP), a backend SDK may be enough. Example: casdoor-python-vue-sdk-example.
| 移动SDK | 描述 | SDK 代码库 | 示例 |
|---|---|---|---|
| Android SDK | 适用于Android应用 | casdoor-android-sdk | casdoor-android-example |
| iOS SDK | 针对iOS应用程序 | casdoor-ios-sdk | casdoor-ios-example |
| React Native SDK | 对于React Native应用程序 | casdoor-react-native-sdk | casdoor-react-native-example |
| Flutter SDK | 适用于Flutter应用 | casdoor-flutter-sdk | casdoor-flutter-example |
| Firebase SDK | 适用于Google Firebase应用 | casdoor-firebase-example | |
| Unity游戏SDK | 适用于Unity 2D/3D PC/移动游戏 | casdoor-dotnet-sdk | casdoor-unity-example |
| uni-app SDK | 对于uni-app应用程序 | casdoor-uniapp-sdk | casdoor-uniapp-example |
| 桌面版SDK | 描述 | SDK代码 | 示例 |
|---|---|---|---|
| Electron SDK | 对于Electron应用 | casdoor-js-sdk | casdoor-electron-example |
| .NET 桌面 SDK | 适用于 .NET 桌面应用 | casdoor-dotnet-sdk | WPF: casdoor-dotnet-desktop-example WinForms: casdoor-dotnet-winform-example Avalonia UI: casdoor-dotnet-avalonia-example |
| C/C++ SDK | 用于C/C++桌面应用程序 | casdoor-cpp-sdk | casdoor-cpp-qt-example |
| Web前端SDK | 描述 | SDK 代码 | 示例代码 |
|---|---|---|---|
| Javascript SDK | 对于传统的非SPA网站 | casdoor-js-sdk | Nodejs 后端:casdoor-raw-js-example Go 后端:casdoor-go-react-sdk-example |
| 仅前端的SDK | 仅用于前端的SPA网站 | casdoor-js-sdk | casdoor-react-only-example |
| React SDK | 适用于React网站 | casdoor-react-sdk | Nodejs 后端:casdoor-nodejs-react-example Java 后端:casdoor-spring-security-react-example |
| Next.js SDK | 针对Next.js网站 | nextjs-auth | |
| Nuxt SDK | 对于Nuxt网站 | nuxt-auth | |
| Vue SDK | For Vue websites | casdoor-vue-sdk | casdoor-python-vue-sdk-example |
| Angular SDK | For Angular websites | casdoor-angular-sdk | casdoor-nodejs-angular-example |
| Flutter SDK | For Flutter Web websites | casdoor-flutter-sdk | casdoor-flutter-example |
| ASP.NET SDK | For ASP.NET Blazor WASM websites | Blazor.BFF.OpenIDConnect.Template | casdoor-dotnet-blazorwasm-oidc-example |
| Firebase SDK | 适用于 Google Firebase 应用 | casdoor-firebase-example |
Pair the frontend with a backend SDK in your server’s language:
| Web后端SDK | 描述 | Sdk 代码 | 示例代码 |
|---|---|---|---|
| Go SDK | 对于Go后端 | casdoor-go-sdk | casdoor-go-react-sdk-example |
| Java SDK | 针对Java后端 | casdoor-java-sdk | casdoor-spring-boot-starter, casdoor-spring-boot-example, casdoor-spring-security-react-example |
| Node.js SDK | 针对Node.js后端 | casdoor-nodejs-sdk | casdoor-nodejs-react-example |
| Python SDK | 针对Python后端 | casdoor-python-sdk | Flask: casdoor-python-vue-sdk-example Django: casdoor-django-js-sdk-example FastAPI: casdoor-fastapi-js-sdk-example |
| PHP SDK | 针对PHP后端 | casdoor-php-sdk | wordpress-casdoor-plugin |
| .NET SDK | 针对ASP.NET后端 | casdoor-dotnet-sdk | casdoor-dotnet-sdk-example |
| Rust SDK | 针对Rust后端 | casdoor-rust-sdk | casdoor-rust-example |
| C/C++ SDK | 针对 C/C++ 后端 | casdoor-cpp-sdk | casdoor-cpp-qt-example |
| Dart SDK | 针对Dart后端 | casdoor-dart-sdk | |
| Ruby SDK | 针对Ruby后端 | casdoor-ruby-sdk |
All official SDKs: https://github.com/orgs/casdoor/repositories?q=sdk&type=all&language=&sort=.
Using the SDK
1. 后端 SDK 配置
On startup, call the SDK’s init function with your Casdoor endpoint, client ID, client secret, and (for JWT validation) the public key. Example with casdoor-go-sdk: https://github.com/casbin/casnode/blob/6d4c55f5c9a3c4bd8c85f2493abad3553b9c7ac0/controllers/account.go#L51-L64
var CasdoorEndpoint = "https://door.casdoor.com"
var ClientId = "541738959670d221d59d"
var ClientSecret = "66863369a64a5863827cf949bab70ed560ba24bf"
var CasdoorOrganization = "casbin"
var CasdoorApplication = "app-casnode"

//go:embed token_jwt_key.pem
var JwtPublicKey string

func init() {
    auth.InitConfig(CasdoorEndpoint, ClientId, ClientSecret, JwtPublicKey, CasdoorOrganization, CasdoorApplication)
}
InitConfig() 的所有参�数解释为:
| 参数 | 必须 | 描述 |
|---|---|---|
| 端点 | 是 | Casdoor 服务器 URL,例如 https://door.casdoor.com 或 http://localhost:8000 |
| clientId | 是 | Casdoor应用程序的客户端ID |
| clientSecret | 是 | Casdoor应用程序的客户端密钥 |
| jwtPublicKey | 是 | Casdoor应用程序的证书的公钥 |
| 组织名称 | Yes | Casdoor组织的名称 |
| 应用程序名称 | 不 | Casdoor应用程序的名称 |
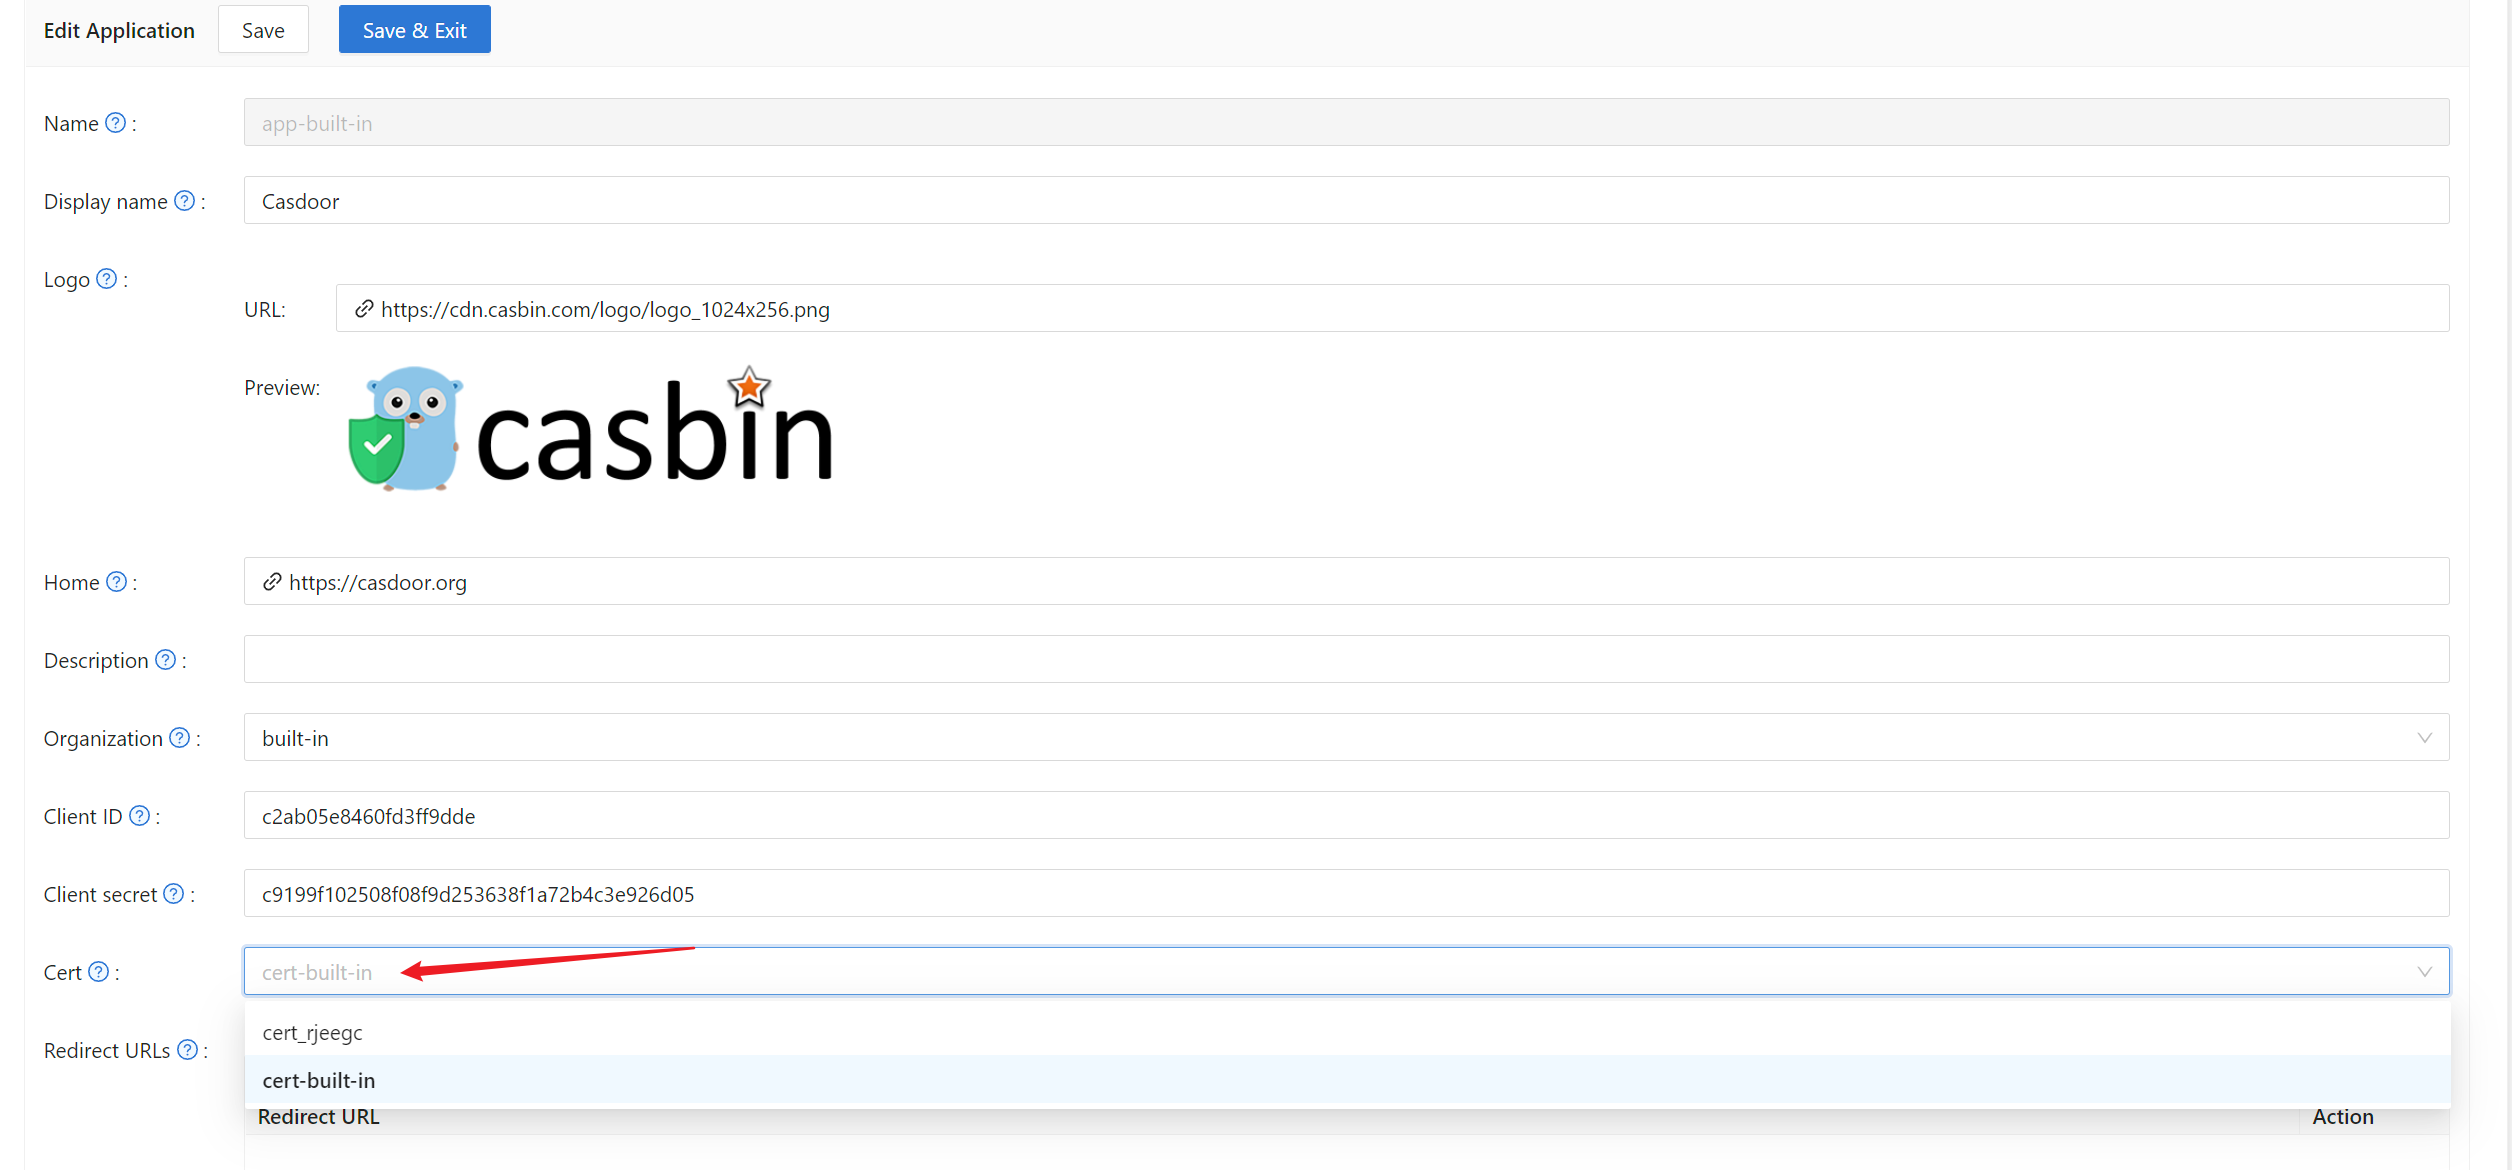
jwtPublicKey 可以在 Certs 页面中进行管理。

Copy or download the public key from the certificate edit page for use in the SDK.
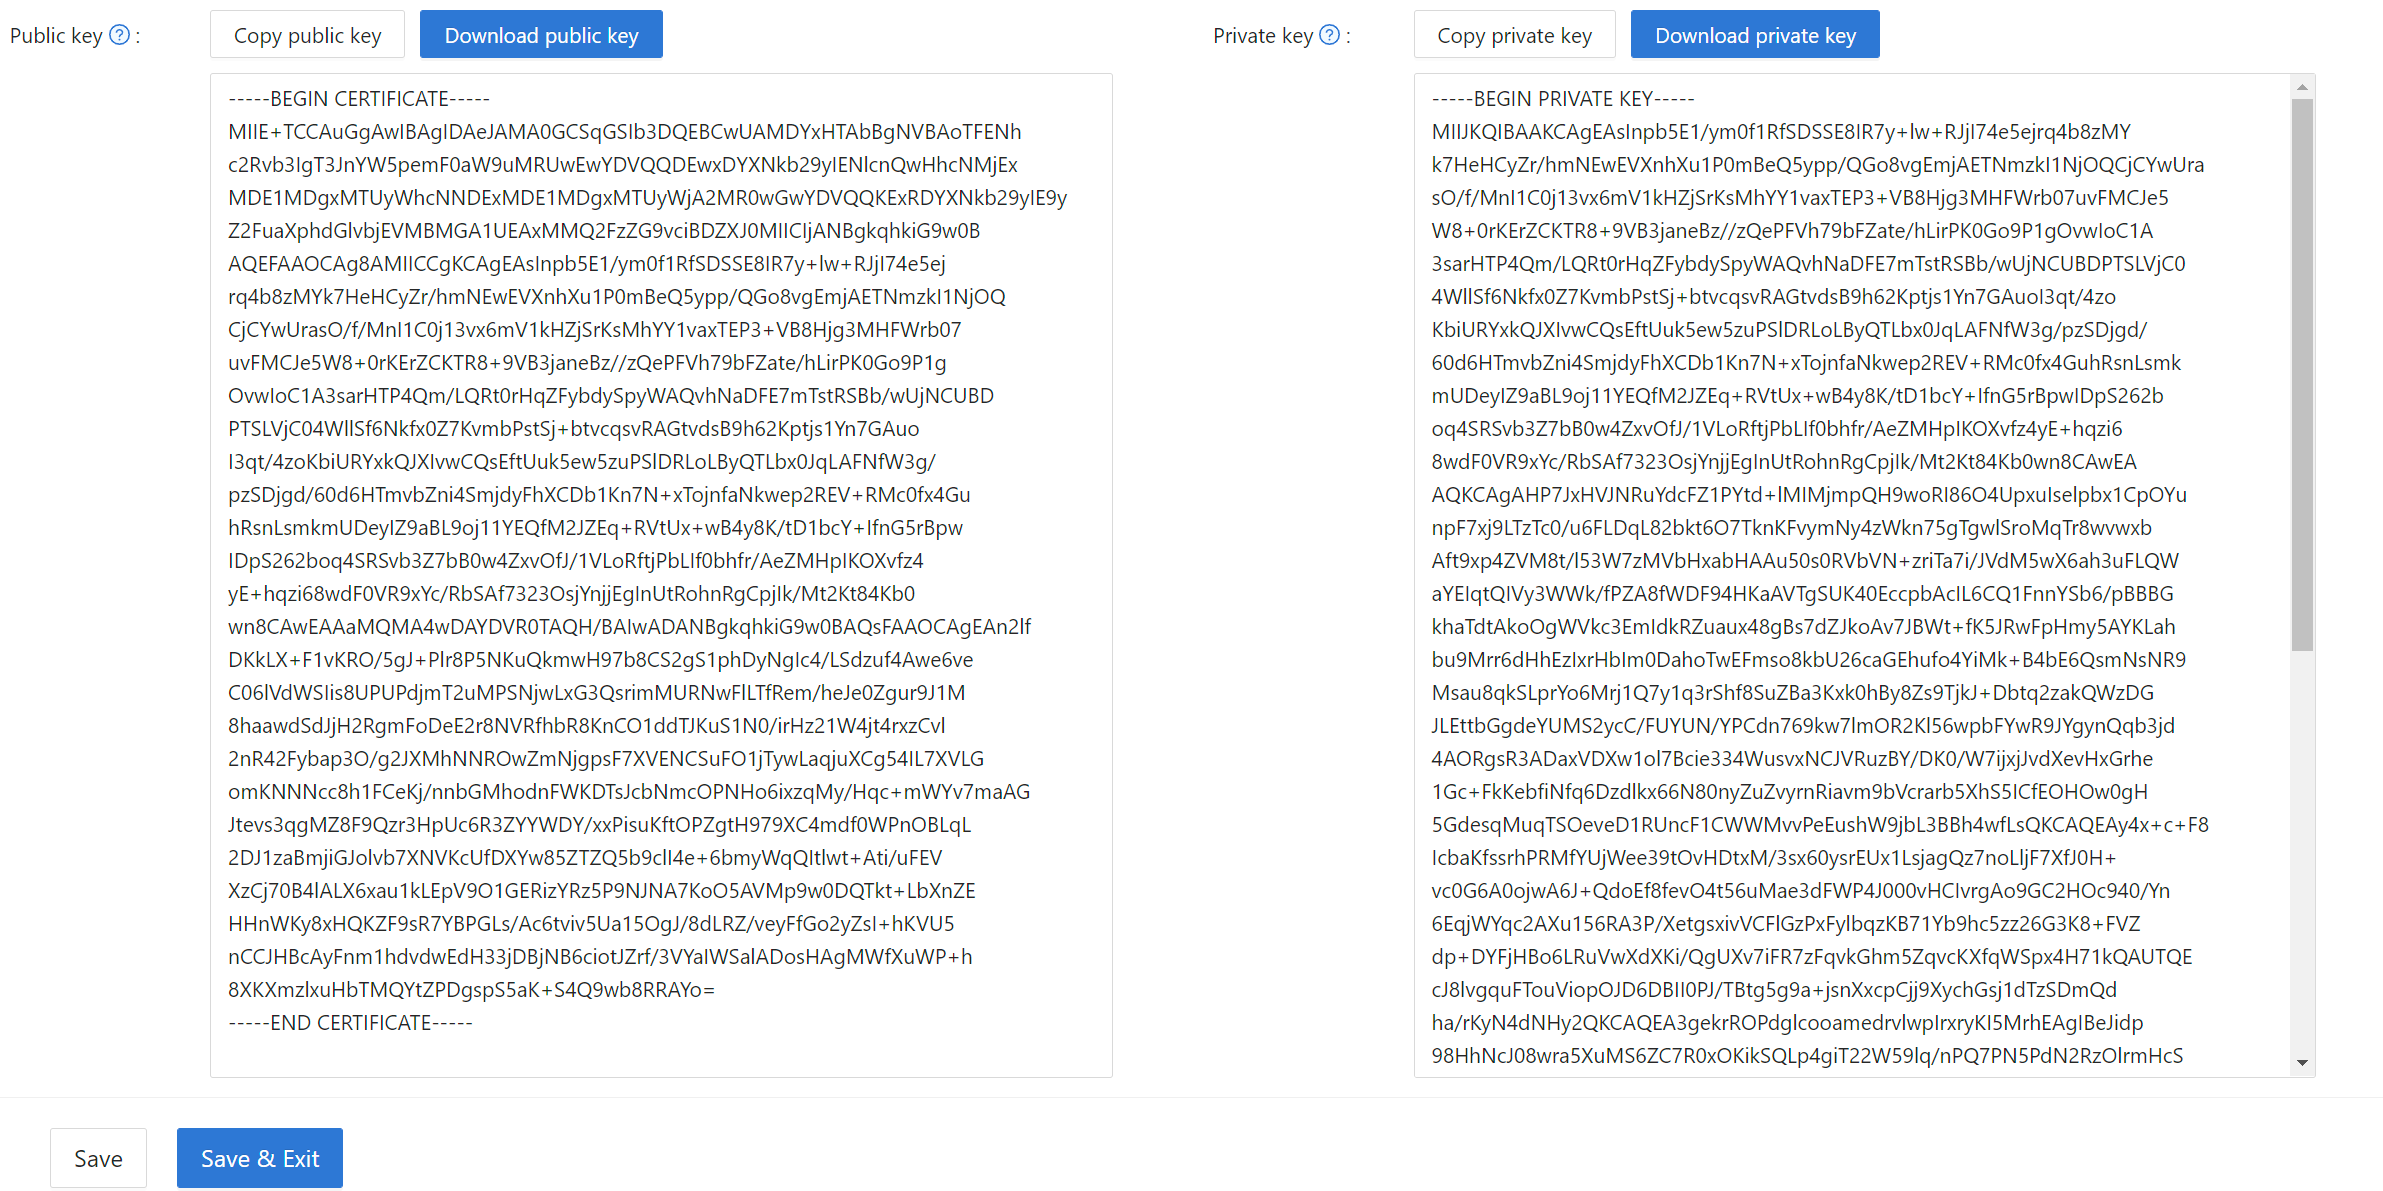
Then select the cert on the application edit page.
2. 前端配置
首先,通过 NPM 或 Yarn安装 casdoor-js-sdk
npm install casdoor-js-sdk
或者:
yarn add casdoor-js-sdk
然后定义以下实用功能(在全局JS文件中更好,比如 Setting.js):
import Sdk from "casdoor-js-sdk";

export function initCasdoorSdk(config) {
  CasdoorSdk = new Sdk(config);
}

export function getSignupUrl() {
  return CasdoorSdk.getSignupUrl();
}

export function getSigninUrl() {
  return CasdoorSdk.getSigninUrl();
}

export function getUserProfileUrl(userName, account) {
  return CasdoorSdk.getUserProfileUrl(userName, account);
}

export function getMyProfileUrl(account) {
  return CasdoorSdk.getMyProfileUrl(account);
}

export function getMyResourcesUrl(account) {
  return CasdoorSdk.getMyProfileUrl(account).replace("/account?", "/resources?");
}

export function signin() {
  return CasdoorSdk.signin(ServerUrl);
}

export function showMessage(type, text) {
  if (type === "") {
    return;
  } else if (type === "success") {
    message.success(text);
  } else if (type === "error") {
    message.error(text);
  }
}

export function goToLink(link) {
  window.location.href = link;
}
In your frontend entry file (e.g. index.js or app.js in React), initialize the casdoor-js-sdk by calling InitConfig() with the required parameters. 前4个参数应该使用与 Casdoor 后端SDK 相同的值。 最后一个参数 重定向路径 是从Cassdoor的登录页面返回的重定向URL的相对路径。
const config = {
  serverUrl: "https://door.casdoor.com",
  clientId: "014ae4bd048734ca2dea",
  organizationName: "casbin",
  appName: "app-casnode",
  redirectPath: "/callback",
};

xxx.initCasdoorSdk(config);
(Optional) This example uses React; the /callback route is handled by the component below, which forwards the call to the backend. Skip this if your callback goes directly to the backend (e.g. JSP or PHP).
import React from "react";
import {Button, Result, Spin} from "antd";
import {withRouter} from "react-router-dom";
import * as Setting from "./Setting";

class AuthCallback extends React.Component {
  constructor(props) {
    super(props);
    this.state = {
      classes: props,
      msg: null,
    };
  }

  componentWillMount() {
    this.login();
  }

  login() {
    Setting.signin().then((res) => {
      if (res.status === "ok") {
        Setting.showMessage("success", `Logged in successfully`);
        Setting.goToLink("/");
      } else {
        this.setState({
          msg: res.msg,
        });
      }
    });
  }

  render() {
    return (
      <div style={{textAlign: "center"}}>
        {this.state.msg === null ? (
          <Spin
            size="large"
            tip="Signing in..."
            style={{paddingTop: "10%"}}
          />
        ) : (
          <div style={{display: "inline"}}>
            <Result
              status="error"
              title="Login Error"
              subTitle={this.state.msg}
              extra={[
                <Button type="primary" key="details">
                  Details
                </Button>,
                <Button key="help">Help</Button>,
              ]}
            />
          </div>
        )}
      </div>
    );
  }
}

export default withRouter(AuthCallback);
3. 获取登录 URL
Show "Sign up" and "Sign in" buttons or links to users; URLs can be obtained from the frontend or backend. See Login URLs.
4. 获取并验证token
步骤如下:
- 用户点击登录URL并重定向到Casdoor的登录页面,如
https://door.casbin.com/login/oauth/authorize?client_id=014ae4bd048734ca2dea&response_type=code&redirect_uri=https%3A%2F%2Fforum.casbin.com%2Fcallback&scope=read&state=app-casnode - 用户输入用户名和密码,并点击登录(或者选择第三方登录,例如通过GitHub进行登录)
- 该用户被重定向到您的应用,使用Casto发行的授权码(例如:
https://forum.casbin.com?code=xxx&state=yyy), 您的应用程序的后端需要将授权码与访问令牌交换,并验证访问令牌是否有效和由Casdoor签发。 函数GetOAuthToken()和ParseJwtToken()由Casdoor后端SDK提供。
以下代码显示如何获取并验证访问令牌。 For a real example of Casnode (a forum website written in Go), see: https://github.com/casbin/casnode/blob/6d4c55f5c9a3c4bd8c85f2493abad3553b9c7ac0/controllers/account.go#L51-L64
// 从重定向 URL 的 GET 参数中获取代码和状态
code := c.Input().Get("code")
state := c.Input().Get("state")

// 用代码和状态交换token
token, err := auth.GetOAuthToken(code, state)
if err != nil {
    panic(err)
}

// 验证访问令牌
claims, err := auth.ParseJwtToken(token.AccessToken)
if err != nil {
    panic(err)
}
如果 ParseJwtToken() 结束时没有错误,那么用户已成功登录到应用程序。 返回的 claims 可以稍后用来识别用户。
4. 用token识别用户
这一部分实际上是您的应用程序本身的业务逻辑,而不是OIDC、OAuth 或Cassdoor的一部分。 我们只是提供正确做法,因为许多人不知道该怎么做。
在Cassdoor中,访问令牌通常与ID令牌相同。 他们是一样的。 因此,访问令牌包含登录用户的所有信息。
由 ParseJwtToken() 返回的变量 claims 被定义为:
Type Claims struct
    User
    AccessToken string `json:"accessToken"
    jwt.RegisteredClaims
}
User: User 对象,包含登录用户的所有信息,请参见定义:/docs/basic/core-concepts#userAccessToken: token信息jwt.RegisteredClaim: JWT需要一些其他值。
这时,应用程序通常有两种方法记住用户会话: session and JWT。
Session
设置Session的方法因语言和框架而大不相同。 例如,Casnode 使用 Beego web 框架 并通过调用设置会话: c.SetSessionUser()。
token, err := auth.GetOAuthToken(code, state)
if err != nil {
    panic(err)
}

claims, err := auth.ParseJwtToken(token.AccessToken)
if err != nil {
    panic(err)
}

claims.AccessToken = token.AccessToken
c.SetSessionUser(claims) // 设置会话
JWT
从 Casdoor 返回的 accessToken 实际上是一个 JWT。 因此,如果您的应用程序使用 JWT 来保持用户session,只需直接为它使用访问令牌:
- 将访问令牌发送到前端,在本地存储浏览器等地方保存。
- 让浏览器为每一个请求发送访问令牌到后端。
- 调用
ParseJwtToken()或使用您自己的函数来验证token ,通过后端提供的已登录用户信息。
5. (可选) 与用户表的互动
这一部分是由 Castor Public API 提供的,而不是OIDC 或 OAuth 的一部分。
Casdoor Backend SDK 提供了许多辅助功能,不仅限于:
GetUser(name string): 通过用户名获取用户。GetUsers(): 获取所有用户。AddUser(): 添加一个用户。UpdateUser(): 更新一个用户。DeleteUser(): 删除一个用户。CheckUserPassword(auth.User): 检查用户的密码。
这些函数是通过对 Castor Public API 调用 RESTful API 实现的。 If a function is not in the Casdoor Backend SDK, call the Public API directly.
6. (Optional) Manage Applications via SDK
Casdoor SDKs also provide functions to manage applications programmatically:
AddApplication(): create a new application.GetApplication(name string): get an application by name.GetApplications(): get all applications.UpdateApplication(): update an application.DeleteApplication(): delete an application.
When creating applications via SDK using AddApplication(), Casdoor automatically initializes essential fields with sensible defaults. This includes signup items (ID, Username, Display name, Password, Confirm password, Email, Phone, Agreement), signin items, and signin methods. This ensures applications created programmatically work correctly in the UI without requiring manual configuration of these basic settings.