กำหนดเอง
Casdoor รองรับการกำหนดค่า SAML Custom Provider และคุณสามารถใช้ Casdoor เป็น Service Provider (SP) เพื่อเชื่อมต่อกับ Identity Provider (IDP) ใด ๆ ที่รองรับโปรโตคอล SAML 2.0
ขั้นตอนที่ 1 Configure your Identity Provider
When setting up your Identity Provider (such as Google Workspace, Azure AD, Okta, or any other SAML 2.0 compatible IdP), you'll need to provide the following Casdoor SP information:
ACS URL (Assertion Consumer Service URL):
https://<your-casdoor-domain>/api/acs- Example:
https://door.example.com/api/acs - This endpoint only accepts POST requests
- Example:
Entity ID (SP Entity ID):
https://<your-casdoor-domain>/api/acs- Use the same URL as your ACS URL
Replace <your-casdoor-domain> with your actual Casdoor domain. For example, if your Casdoor instance is running at http://localhost:8000, use http://localhost:8000/api/acs for both values.
ขั้นตอนที่ 2 รับข้อมูล metadata ของ IDP
After configuring your IdP, obtain the metadata, which is an XML document that describes the configuration information of the services provided by the IdP. ต้องรวมข้อมูลเช่น EntityID, SSO Endpoint ฯลฯ
บาง IDP เช่น Keycloak ต้องการข้อมูล SP เพื่อให้บริการ metadata You can refer to the document Keycloak.
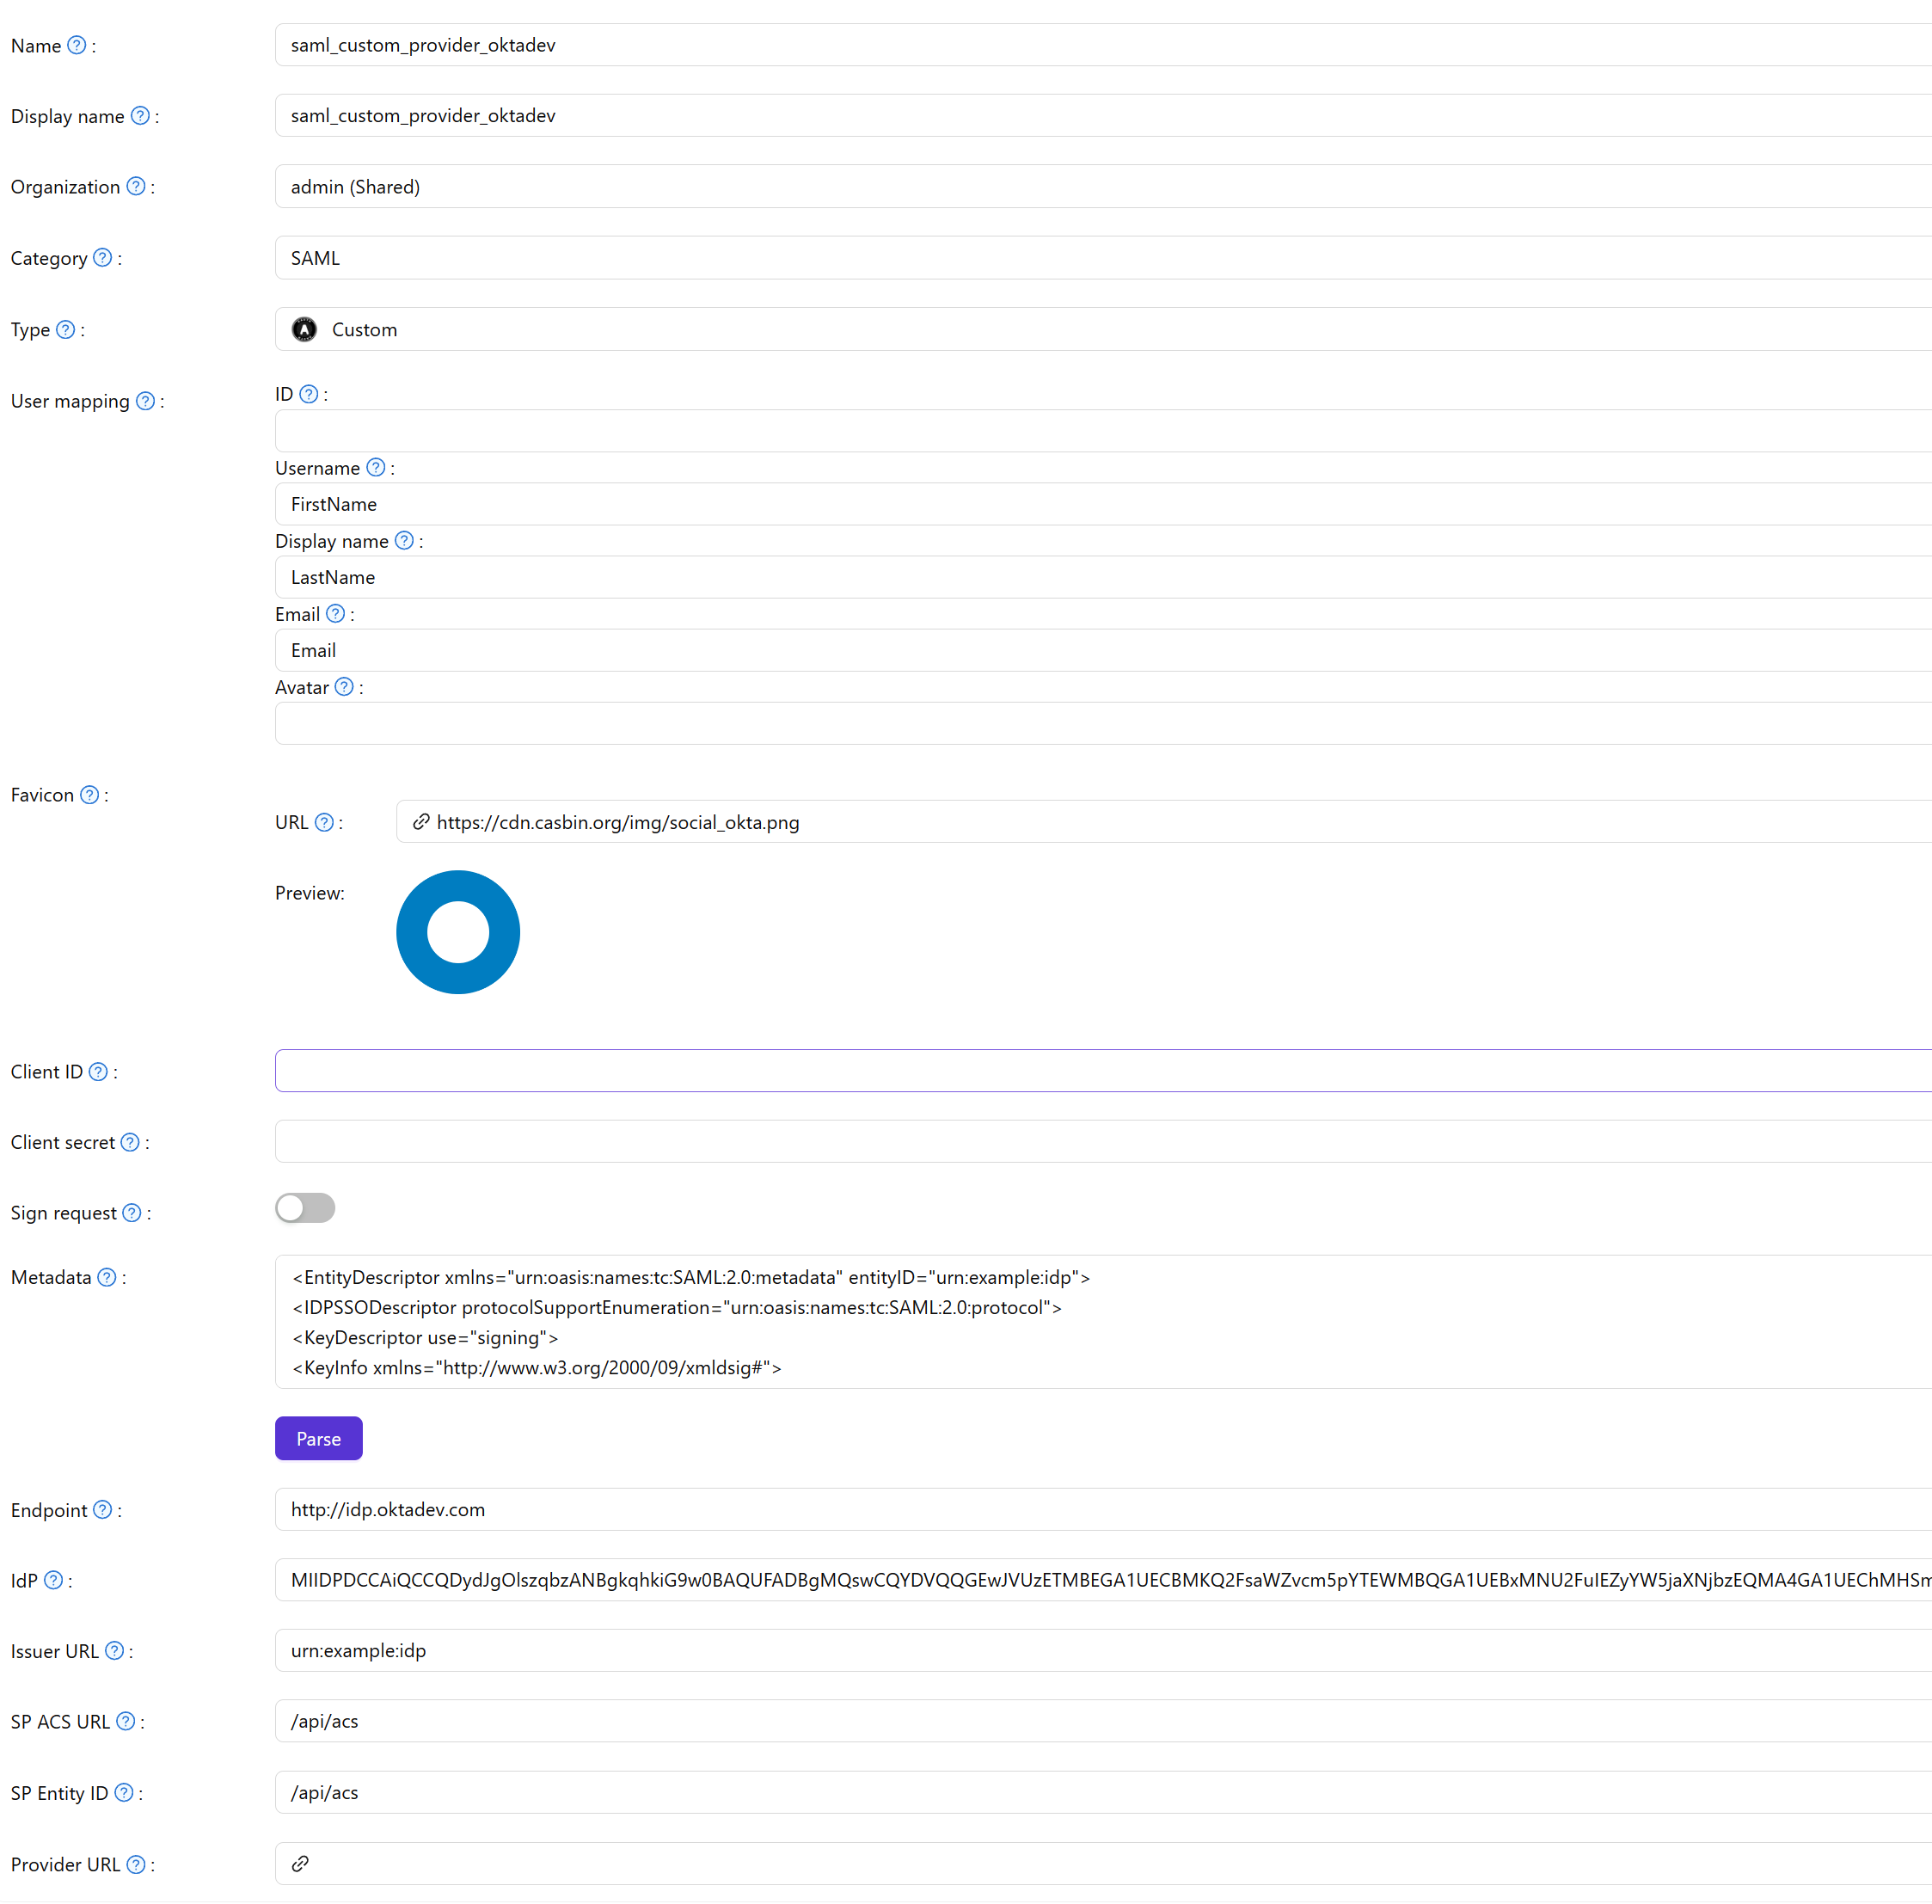
Step3. กำหนดค่า SAML Custom Provider
After obtaining the metadata from your IdP, create a SAML Custom Provider in Casdoor and fill in the necessary information.
| ฟิลด์ | คำอธิบาย |
|---|---|
| Category | เลือก SAML |
| Type | เลือก กำหนดเอง |
| Favicon.URL | URL ของโลโก้ IDP |
| Metadata | ข้อมูล metadata ของ IDP |
Then click Parse button, and fields Endpoint, IdP, Issuer URL, SP ACS URL and SP Entity ID will be automatically parsed.
Finally, add the SAML Custom Provider to Providers of the application. 