Spring Security filter (OIDC)
This guide integrates Casdoor with your application using Spring Security Filter and OIDC.
Étape 1 : Déployez Casdoor
Deploy the Casdoor server. After deployment, confirm:
- The Casdoor server is running at
http://localhost:8000. - The Casdoor login page is at
http://localhost:7001. - Test login with credentials
adminand123.
Après avoir vérifié ces étapes, suivez les étapes ci-dessous pour intégrer Casdoor à votre application.
Step 2: Configure the Casdoor application
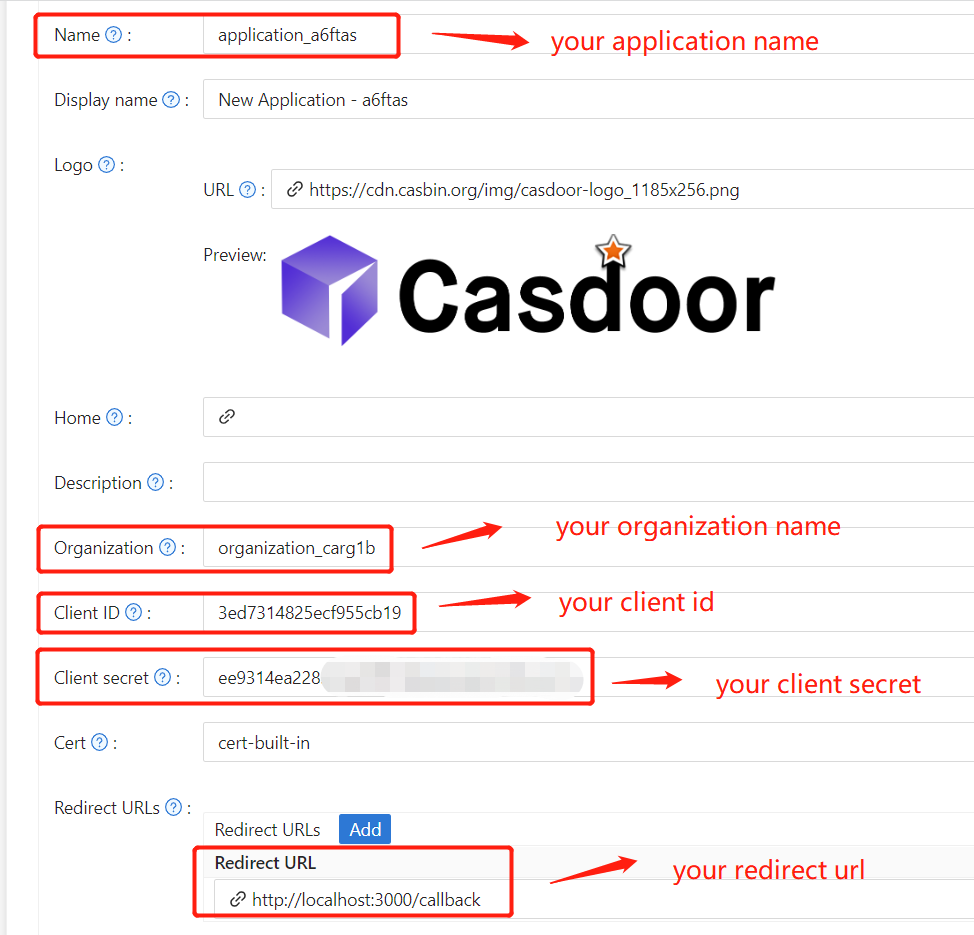
- Create or edit a Casdoor application and add your redirect URL (see next section for how to get it).
- Obtenez votre
Certificatsur la page d'édition du certificat.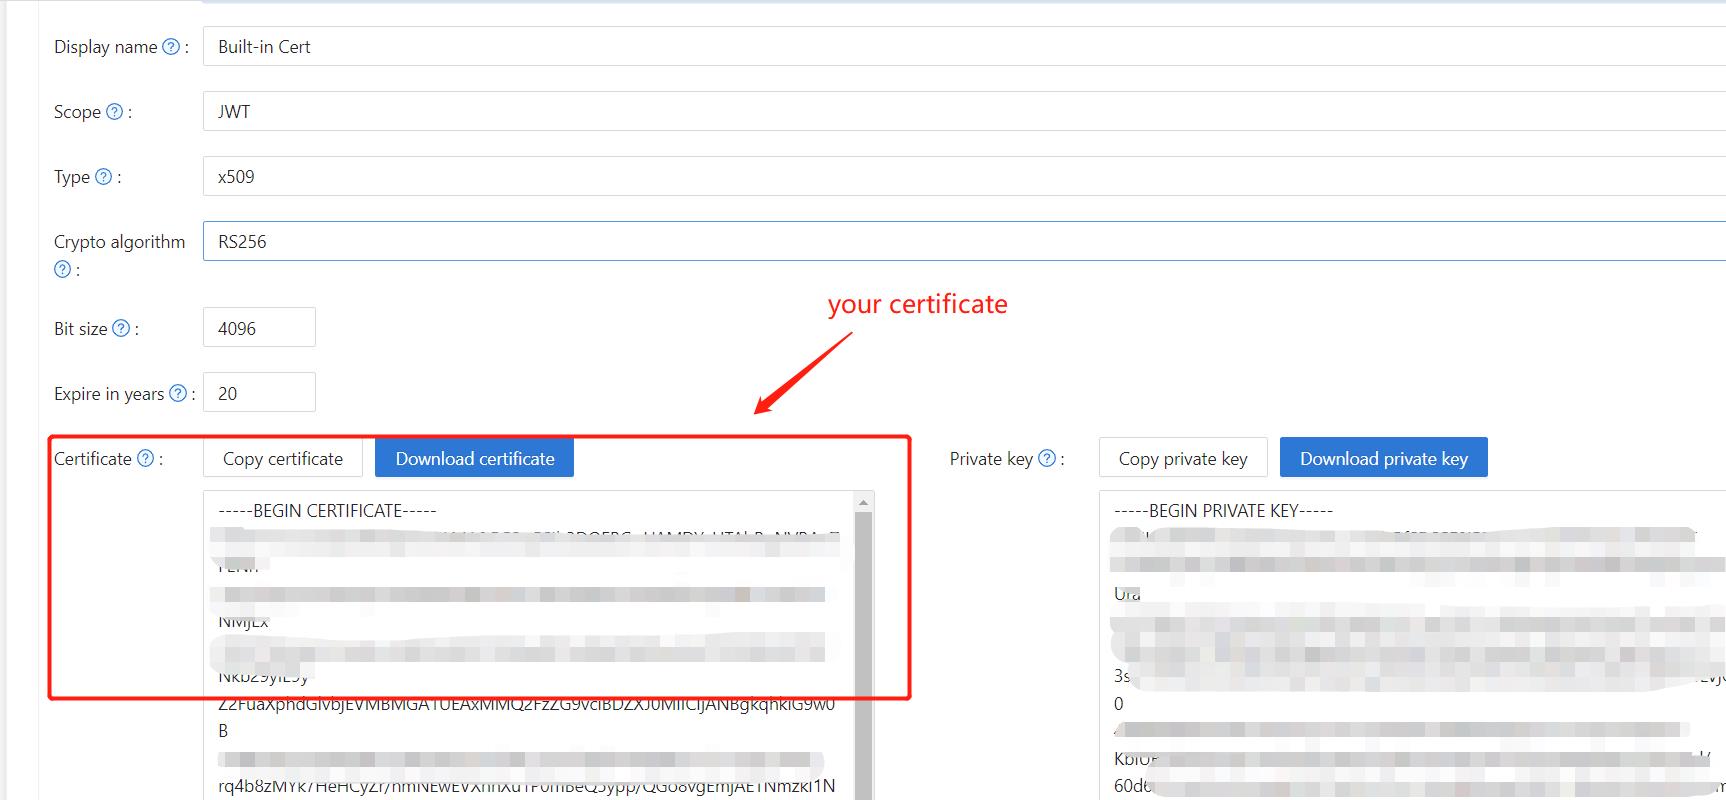
- Ajoutez le fournisseur et les autres paramètres selon les besoins.
Note Application Name, Organization Name, Redirect URL, Client ID, Client Secret, and Certificate from the application page for the next step.
Étape 3 : Configurez Spring Security
Customize the Spring Security filter to process tokens:
Replace the placeholders with your own Casdoor instance (Client ID, Client secret, etc.).
server:
  port: 8080
casdoor:
  endpoint: http://CASDOOR_HOSTNAME:8000
  client-id: <Client ID>
  client-secret: <Client Secret>
  certificate: <Certificate>
  organization-name: <Organization Name>
  application-name: <Application Name>
  redirect-url: http://FRONTEND_HOSTNAME/callback
Default <FRONTEND_HOSTNAME> is localhost:3000; redirect URL is http://localhost:3000/callback. Add this redirect URL in the Casdoor application.
Étape 4 : Configurez le Frontend
Install casdoor-js-sdk and configure it as follows:
-
Installez
casdoor-js-sdk.npm i casdoor-js-sdk
# or
yarn add casdoor-js-sdk -
Configurez
SDK.import Sdk from "casdoor-js-sdk";
// Serverurl is the URL where spring security is deployed
export const ServerUrl = "http://BACKEND_HOSTNAME:8080";
const sdkConfig = {
serverUrl: "http://CASDOOR_HOSTNAME:8000",
clientId: "<your client id>",
appName: "<your application name>",
organizationName: "<your organization name>",
redirectPath: "/callback",
};
export const CasdoorSDK = new Sdk(sdkConfig);
Étape 5 : Mettez en place une démo
-
Créez une application Spring Boot.
-
Ajoutez quelques configurations pour gérer JWT.
@EnableWebSecurity
public class SecurityConfig {

    private final JwtTokenFilter jwtTokenFilter;

    public SecurityConfig(JwtTokenFilter jwtTokenFilter) {
        this.jwtTokenFilter = jwtTokenFilter;
    }

    @Bean
    public SecurityFilterChain securityFilterChain(HttpSecurity http) throws Exception {
        // enable CORS and disable CSRF
        http = http.cors(corsConfig -> corsConfig
                .configurationSource(configurationSource())
        ).csrf().disable();

        // set session management to stateless
        http = http
                .sessionManagement()
                .sessionCreationPolicy(SessionCreationPolicy.STATELESS)
                .and();

        // set permissions on endpoints
        http.authorizeHttpRequests(authorize -> authorize
                .mvcMatchers("/api/redirect-url", "/api/signin").permitAll()
                .mvcMatchers("/api/**").authenticated()
        );

        // set unauthorized requests exception handler
        http = http
                .exceptionHandling()
                .authenticationEntryPoint(
                        (request, response, ex) -> ResponseUtils.fail(response, "unauthorized")
                )
                .and();

        // add JWT token filter
        http.addFilterBefore(
                jwtTokenFilter,
                UsernamePasswordAuthenticationFilter.class
        );
        return http.build();
    }

    // ...


} -
Ajoutez un simple filtre JWT pour intercepter les requêtes qui nécessitent une vérification de token.
@Component
public class JwtTokenFilter extends OncePerRequestFilter {

    private final CasdoorAuthService casdoorAuthService;

    public JwtTokenFilter(CasdoorAuthService casdoorAuthService) {
        this.casdoorAuthService = casdoorAuthService;
    }

    @Override
    protected void doFilterInternal(HttpServletRequest request,
                                    HttpServletResponse response,
                                    FilterChain chain)
            throws ServletException, IOException {
        // get authorization header and validate
        final String header = request.getHeader(HttpHeaders.AUTHORIZATION);
        if (!StringUtils.hasText(header) || !header.startsWith("Bearer ")) {
            chain.doFilter(request, response);
            return;
        }

        // get jwt token and validate
        final String token = header.split(" ")[1].trim();

        // get user identity and set it on the spring security context
        UserDetails userDetails = null;
        try {
            CasdoorUser casdoorUser = casdoorAuthService.parseJwtToken(token);
            userDetails = new CustomUserDetails(casdoorUser);
        } catch (CasdoorAuthException exception) {
            logger.error("casdoor auth exception", exception);
            chain.doFilter(request, response);
            return;
        }

        UsernamePasswordAuthenticationToken authentication = new UsernamePasswordAuthenticationToken(
                userDetails,
                null,
                AuthorityUtils.createAuthorityList("ROLE_casdoor")
        );

        authentication.setDetails(
                new WebAuthenticationDetailsSource().buildDetails(request)
        );

        SecurityContextHolder.getContext().setAuthentication(authentication);
        chain.doFilter(request, response);
    }

}
Lorsque l'utilisateur accède à l'interface nécessitant une authentification,
JwtTokenFilterobtiendra le token de l'en-tête de la requêteAuthorizationet le vérifiera. -
Définissez un
Controllerpour gérer lorsque l'utilisateur se connecte à Casdoor. Après la connexion de l'utilisateur, il sera redirigé vers le serveur et portera lecodeet lestate. Le serveur doit alors vérifier l'identité de l'utilisateur auprès de Casdoor et obtenir letokenà travers ces deux paramètres.@RestController
public class UserController {
private static final Logger logger = LoggerFactory.getLogger(UserController.class);
private final CasdoorAuthService casdoorAuthService;
// ...
@PostMapping("/api/signin")
public Result signin(@RequestParam("code") String code, @RequestParam("state") String state) {
try {
String token = casdoorAuthService.getOAuthToken(code, state);
return Result.success(token);
} catch (CasdoorAuthException exception) {
logger.error("casdoor auth exception", exception);
return Result.failure(exception.getMessage());
}
}
// ...
}
Étape 6 : Essayez la démo
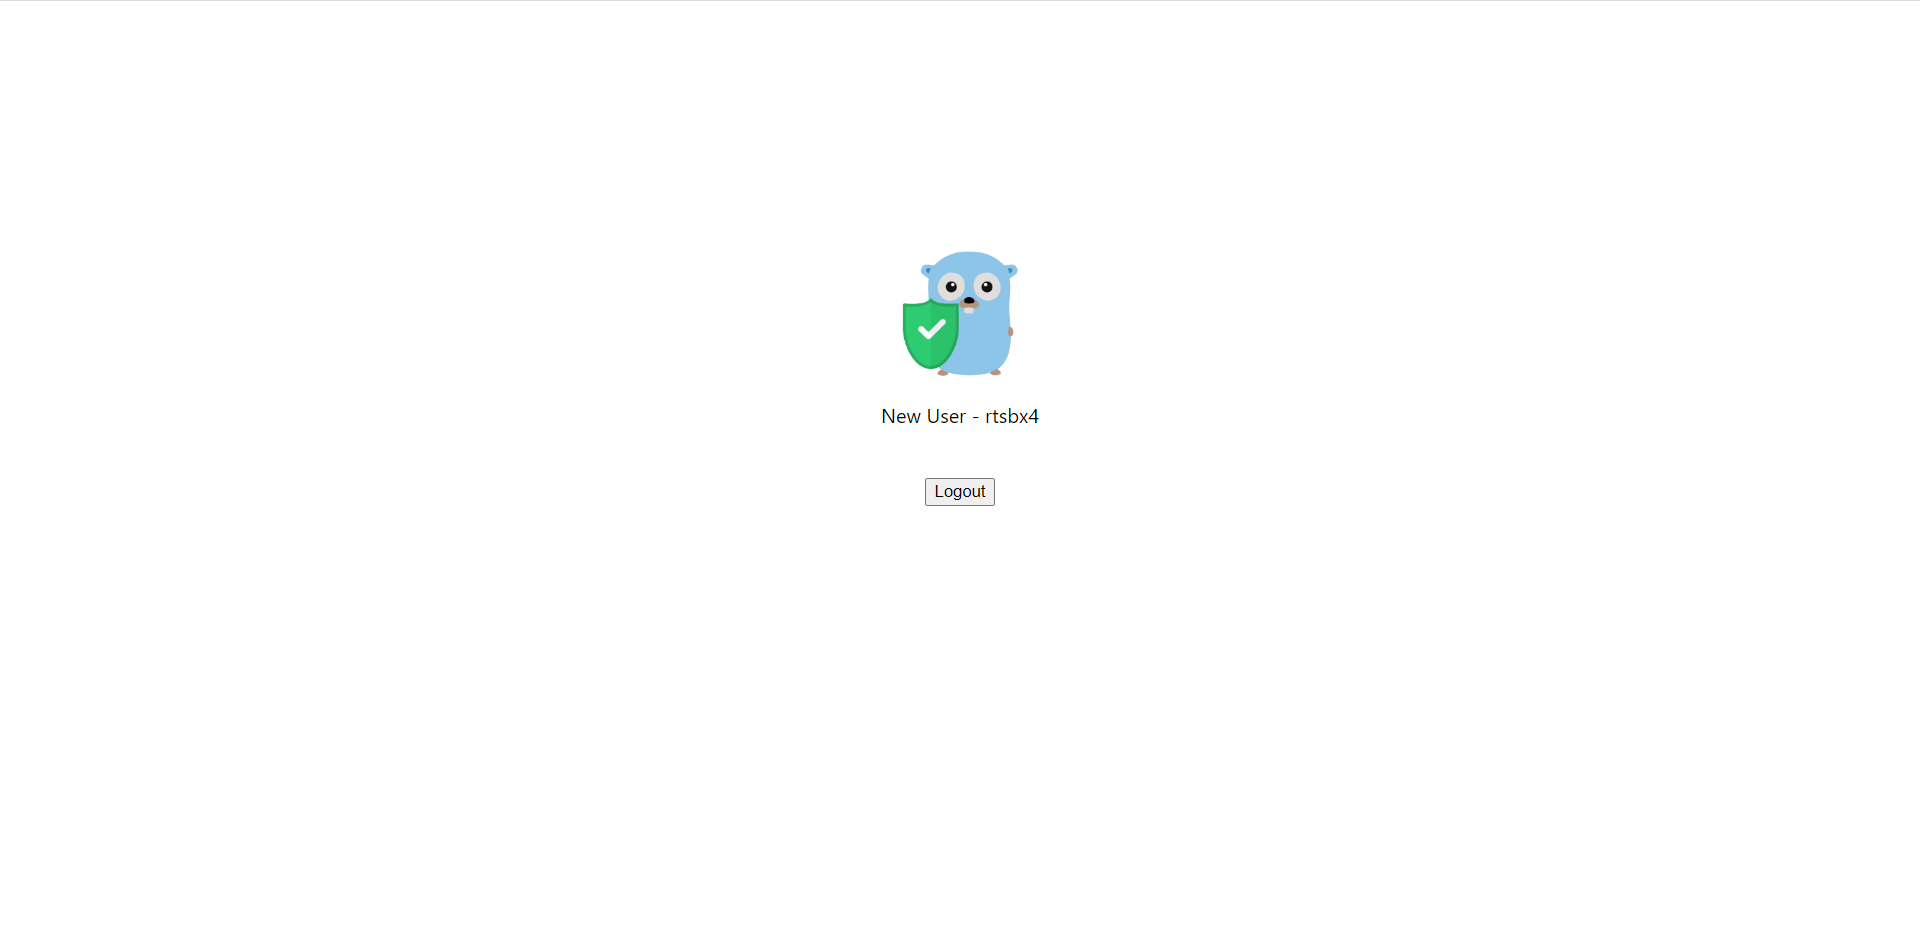
Open the frontend in a browser. When not logged in, a login button is shown; clicking it redirects to the Casdoor login page.
Si vous visitez votre page racine,
Cliquez sur le bouton Connexion Casdoor, et la page vous redirigera vers la page de connexion de Casdoor. 
After login, the app redirects to /.