Spring Security filter (OIDC)
This guide integrates Casdoor with your application using Spring Security Filter and OIDC.
ステップ1: Casdoorをデプロイする
Deploy the Casdoor server. After deployment, confirm:
- The Casdoor server is running at
http://localhost:8000. - The Casdoor login page is at
http://localhost:7001. - Test login with credentials
adminand123.
これらのステップを確認した後、以下のステップに従ってアプリケーションにCasdoorを統合してください。
Step 2: Configure the Casdoor application
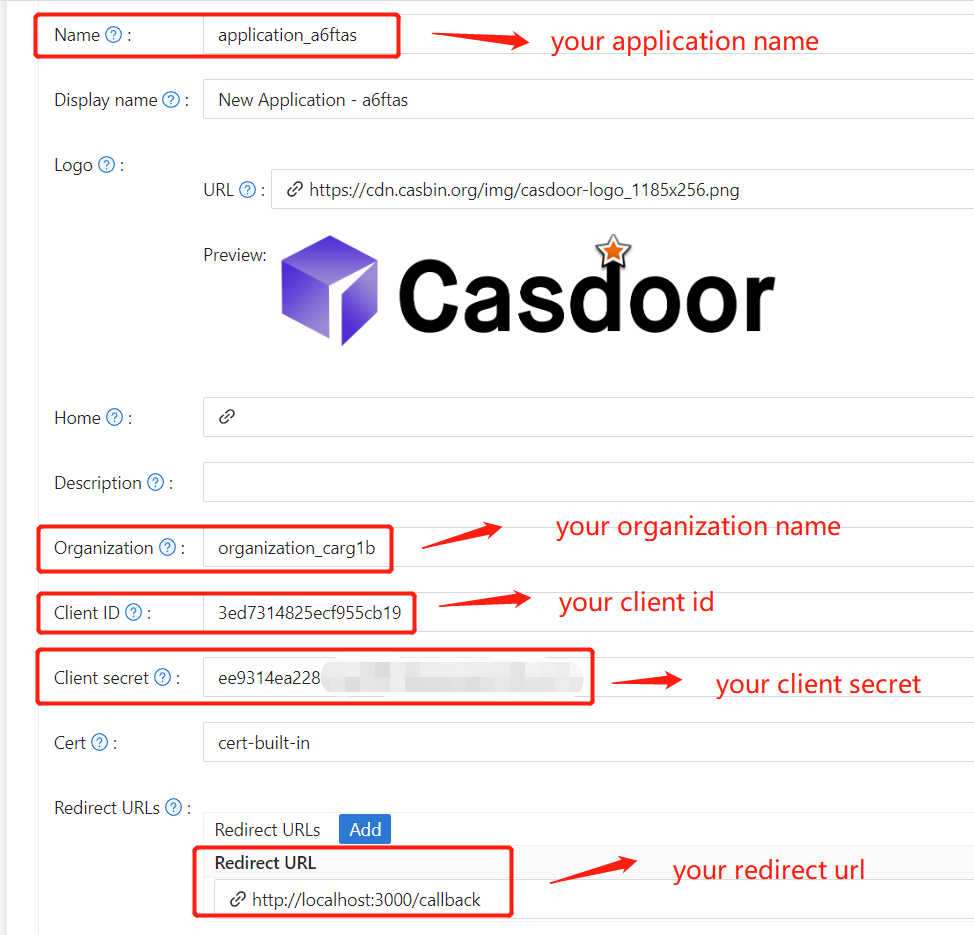
- Create or edit a Casdoor application and add your redirect URL (see next section for how to get it).
- 証明書編集ページで
Certificateを取得します。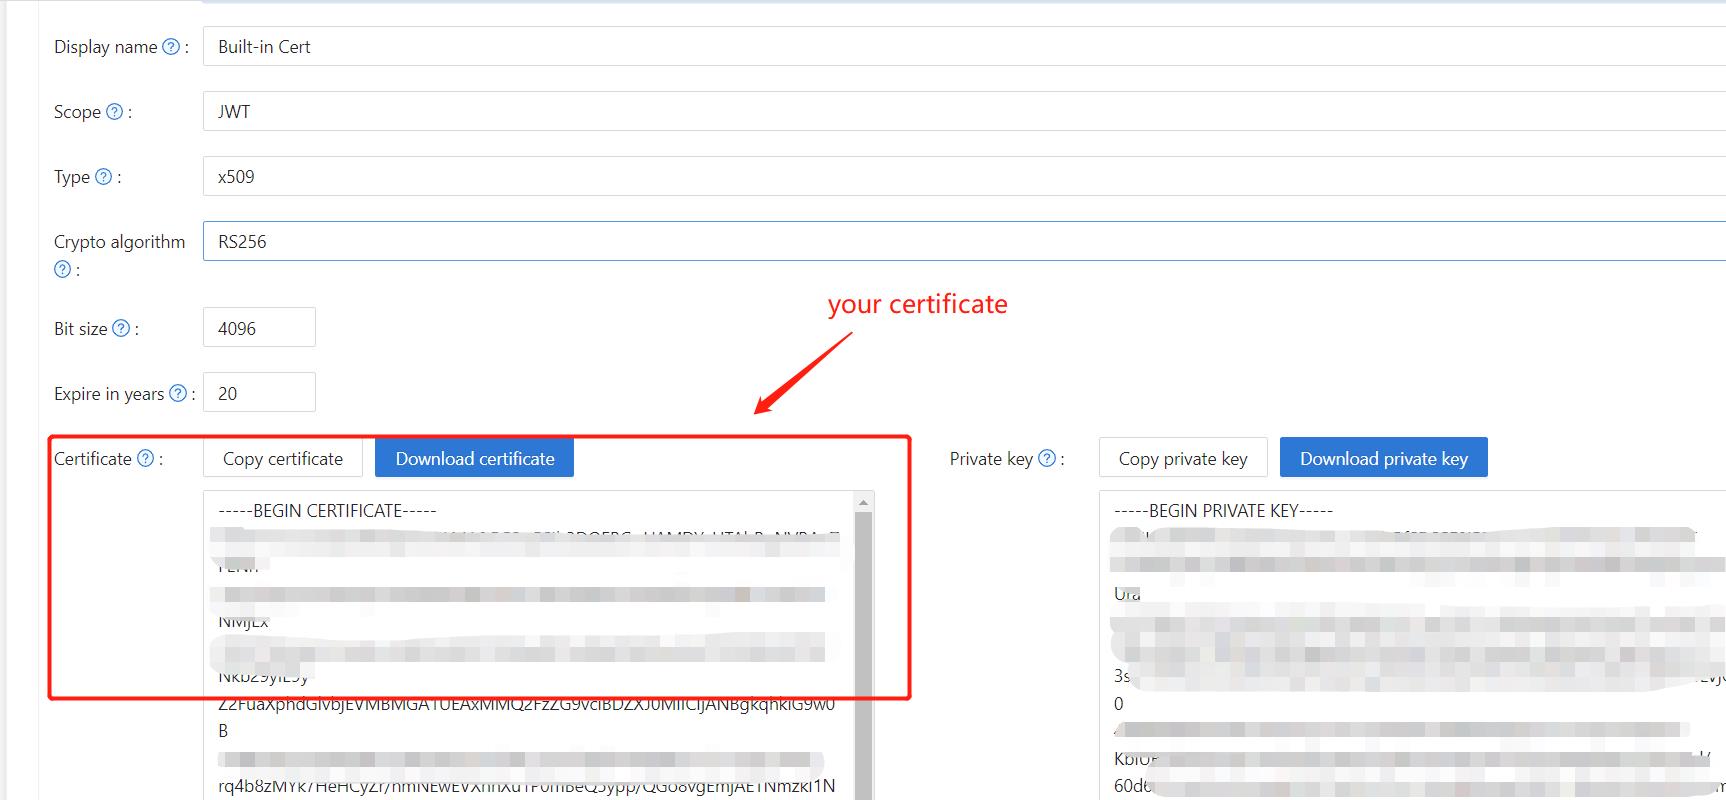
- 必要に応じてプロバイダーその他の設定を追加します。
Note Application Name, Organization Name, Redirect URL, Client ID, Client Secret, and Certificate from the application page for the next step.
ステップ3: Spring Securityを設定する
Customize the Spring Security filter to process tokens:
Replace the placeholders with your own Casdoor instance (Client ID, Client secret, etc.).
server:
  port: 8080
casdoor:
  endpoint: http://CASDOOR_HOSTNAME:8000
  client-id: <Client ID>
  client-secret: <Client Secret>
  certificate: <Certificate>
  organization-name: <Organization Name>
  application-name: <Application Name>
  redirect-url: http://FRONTEND_HOSTNAME/callback
Default <FRONTEND_HOSTNAME> is localhost:3000; redirect URL is http://localhost:3000/callback. Add this redirect URL in the Casdoor application.
ステップ4: フロントエンドを設定する
Install casdoor-js-sdk and configure it as follows:
-
casdoor-js-sdkをインストールします。npm i casdoor-js-sdk
# or
yarn add casdoor-js-sdk -
SDKを設定します。import Sdk from "casdoor-js-sdk";
// Serverurl is the URL where spring security is deployed
export const ServerUrl = "http://BACKEND_HOSTNAME:8080";
const sdkConfig = {
serverUrl: "http://CASDOOR_HOSTNAME:8000",
clientId: "<your client id>",
appName: "<your application name>",
organizationName: "<your organization name>",
redirectPath: "/callback",
};
export const CasdoorSDK = new Sdk(sdkConfig);
ステップ5: デモをセットアップする
-
Spring Bootアプリケーションを作成します。
-
JWTを処理するためのいくつかの設定を追加します。
@EnableWebSecurity
public class SecurityConfig {

    private final JwtTokenFilter jwtTokenFilter;

    public SecurityConfig(JwtTokenFilter jwtTokenFilter) {
        this.jwtTokenFilter = jwtTokenFilter;
    }

    @Bean
    public SecurityFilterChain securityFilterChain(HttpSecurity http) throws Exception {
        // enable CORS and disable CSRF
        http = http.cors(corsConfig -> corsConfig
                .configurationSource(configurationSource())
        ).csrf().disable();

        // set session management to stateless
        http = http
                .sessionManagement()
                .sessionCreationPolicy(SessionCreationPolicy.STATELESS)
                .and();

        // set permissions on endpoints
        http.authorizeHttpRequests(authorize -> authorize
                .mvcMatchers("/api/redirect-url", "/api/signin").permitAll()
                .mvcMatchers("/api/**").authenticated()
        );

        // set unauthorized requests exception handler
        http = http
                .exceptionHandling()
                .authenticationEntryPoint(
                        (request, response, ex) -> ResponseUtils.fail(response, "unauthorized")
                )
                .and();

        // add JWT token filter
        http.addFilterBefore(
                jwtTokenFilter,
                UsernamePasswordAuthenticationFilter.class
        );
        return http.build();
    }

    // ...


} -
トークン検証が必要なリクエストをインターセプトするシンプルなJWTフィルターを定義します。
@Component
public class JwtTokenFilter extends OncePerRequestFilter {

    private final CasdoorAuthService casdoorAuthService;

    public JwtTokenFilter(CasdoorAuthService casdoorAuthService) {
        this.casdoorAuthService = casdoorAuthService;
    }

    @Override
    protected void doFilterInternal(HttpServletRequest request,
                                    HttpServletResponse response,
                                    FilterChain chain)
            throws ServletException, IOException {
        // get authorization header and validate
        final String header = request.getHeader(HttpHeaders.AUTHORIZATION);
        if (!StringUtils.hasText(header) || !header.startsWith("Bearer ")) {
            chain.doFilter(request, response);
            return;
        }

        // get jwt token and validate
        final String token = header.split(" ")[1].trim();

        // get user identity and set it on the spring security context
        UserDetails userDetails = null;
        try {
            CasdoorUser casdoorUser = casdoorAuthService.parseJwtToken(token);
            userDetails = new CustomUserDetails(casdoorUser);
        } catch (CasdoorAuthException exception) {
            logger.error("casdoor auth exception", exception);
            chain.doFilter(request, response);
            return;
        }

        UsernamePasswordAuthenticationToken authentication = new UsernamePasswordAuthenticationToken(
                userDetails,
                null,
                AuthorityUtils.createAuthorityList("ROLE_casdoor")
        );

        authentication.setDetails(
                new WebAuthenticationDetailsSource().buildDetails(request)
        );

        SecurityContextHolder.getContext().setAuthentication(authentication);
        chain.doFilter(request, response);
    }

}
認証が必要なインターフェースにユーザーがアクセスすると、
JwtTokenFilterはリクエストヘッダーAuthorizationからトークンを取得し、それを検証します。 -
Casdoorにログインするユーザーを処理する
Controllerを定義します。 ユーザーがCasdoorにログインすると、サーバーにリダイレクトされ、codeとstateを持ってきます。 サーバーは、これら2つのパラメータを使用してCasdoorからユーザーの身元を確認し、tokenを取得する必要があります。@RestController
public class UserController {
private static final Logger logger = LoggerFactory.getLogger(UserController.class);
private final CasdoorAuthService casdoorAuthService;
// ...
@PostMapping("/api/signin")
public Result signin(@RequestParam("code") String code, @RequestParam("state") String state) {
try {
String token = casdoorAuthService.getOAuthToken(code, state);
return Result.success(token);
} catch (CasdoorAuthException exception) {
logger.error("casdoor auth exception", exception);
return Result.failure(exception.getMessage());
}
}
// ...
}
ステップ6: デモを試す
Open the frontend in a browser. When not logged in, a login button is shown; clicking it redirects to the Casdoor login page.
ルートページにアクセスすると、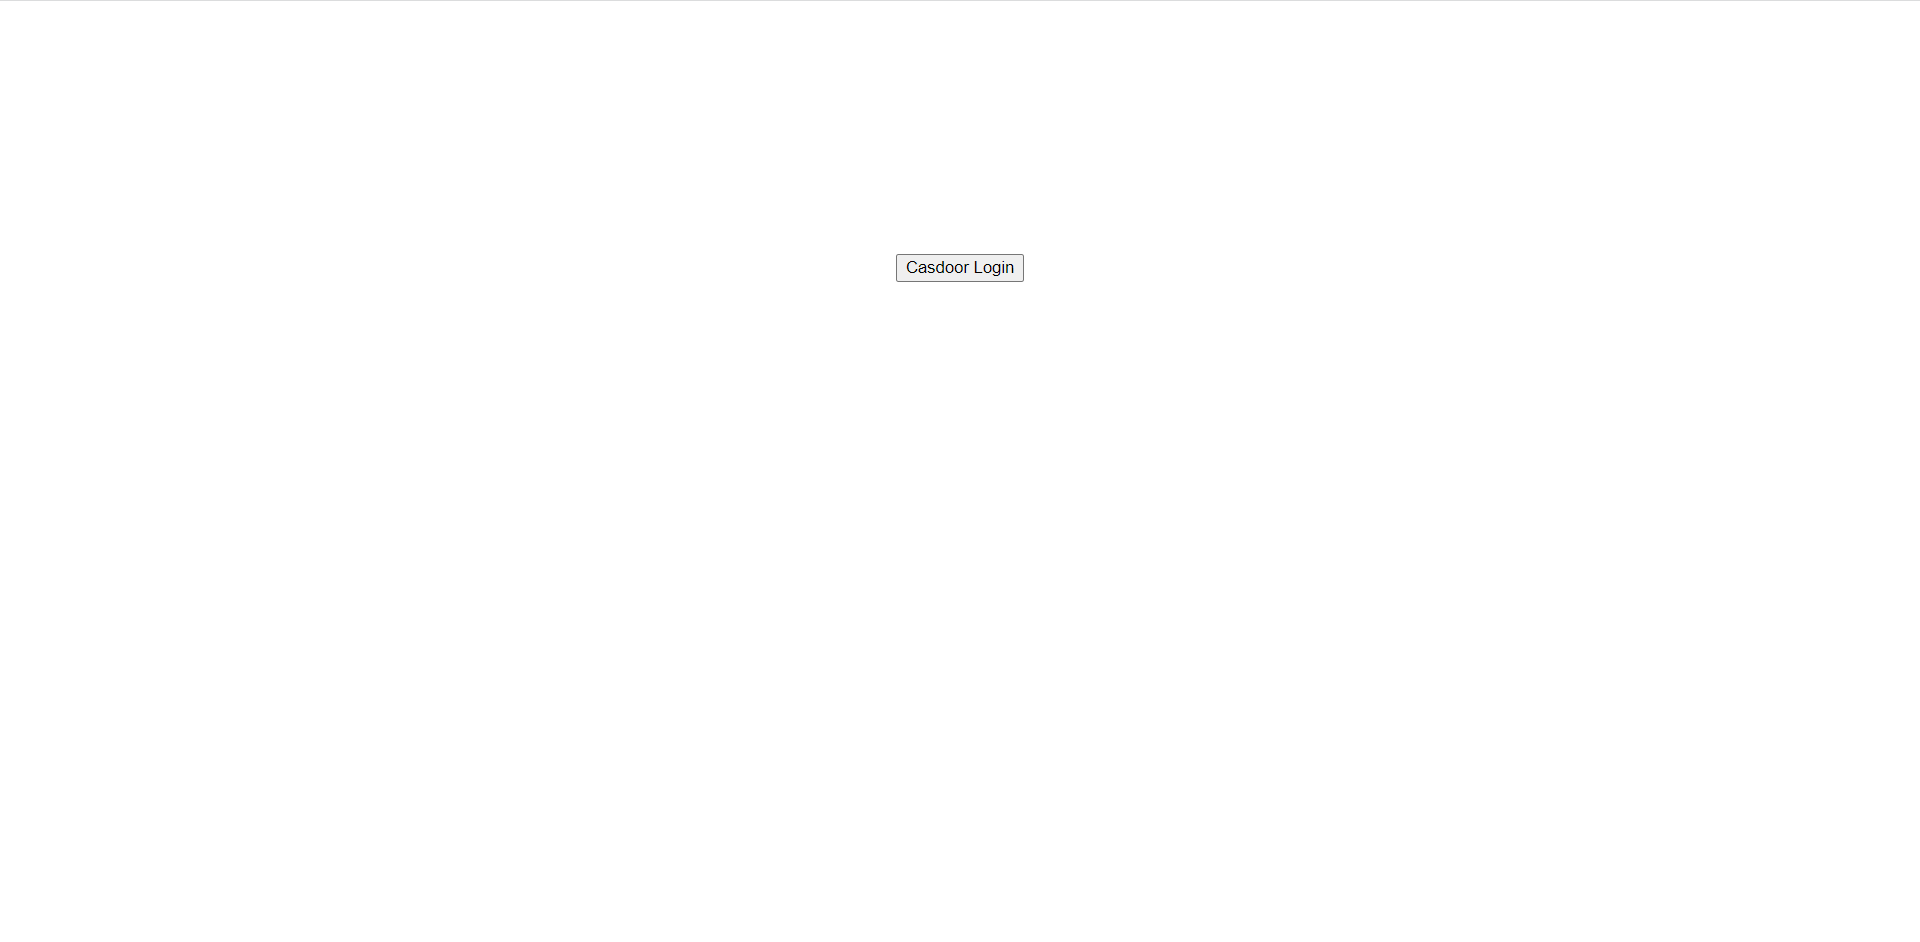
Casdoor Loginボタンをクリックすると、ページはCasdoorのログインページにリダイレクトされます。 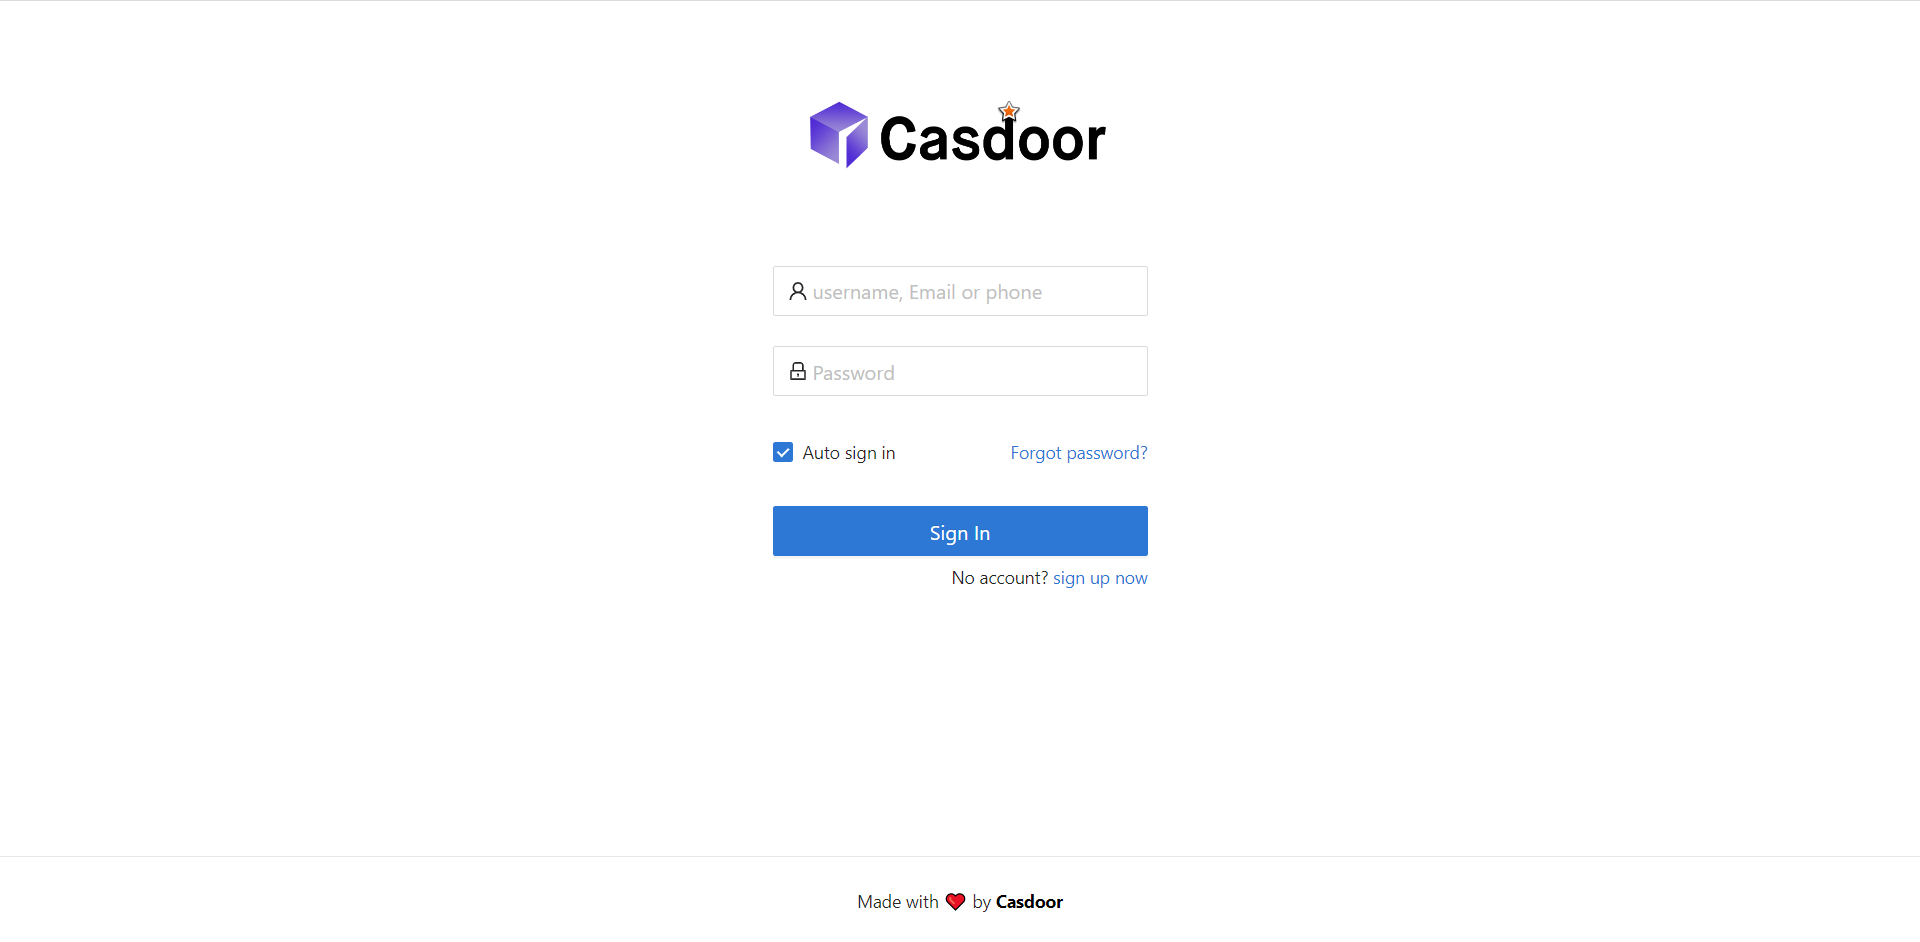
After login, the app redirects to /. 