Apache DolphinScheduler
CasdoorはApache DolphinSchedulerでサポートされているログイン方法の一つです。
ステップ1: Casdoorのデプロイ
Deploy Casdoor. See Server installation. Ensure the server is running (e.g. http://localhost:8000) and you can open the login page (e.g. http://localhost:7001) and sign in with admin / 123.
ステップ2: Casdoorアプリケーションの設定
- 新しいCasdoorアプリケーションを作成するか、既存のものを使用します。
- Add your redirect URL (see the next section for how to obtain it).
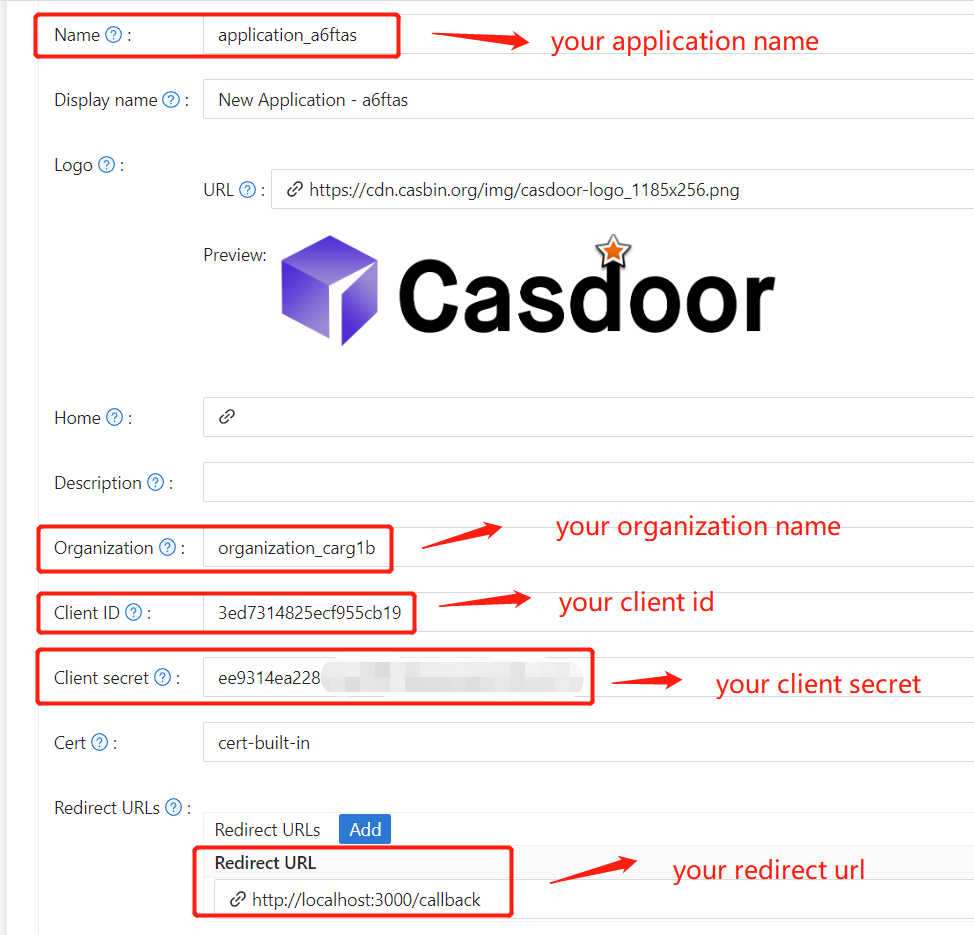
- 希望するプロバイダーを追加し、他の必要な設定を入力します。
Note Client ID and Client secret from the application page for the next step.
お気に入りのブラウザを開いてhttp://CASDOOR_HOSTNAME/.well-known/openid-configurationにアクセスし、CasdoorのOIDC設定を表示します。
ステップ3: DolphinSchedulerの設定
dolphinscheduler-api/src/main/resources/application.yaml
security:
  authentication:
    # Authentication types (supported types: PASSWORD, LDAP, CASDOOR_SSO)
    type: CASDOOR_SSO
casdoor:
  # The URL of your Casdoor server
  endpoint:
  client-id:
  client-secret:
  # Use `|-` for multi-line certificate
  certificate:
  # The organization name you added in Casdoor
  organization-name:
  # The application name you added in Casdoor
  application-name:
  # The DolphinScheduler login URL
  redirect-url: http://localhost:5173/login
これで、DolphinSchedulerは自動的にCasdoorにリダイレクトして認証を行います。