Apache DolphinScheduler
Casdoor is one of the supported login methods for Apache DolphinScheduler.
Step 1: Deploy Casdoor
Firstly, Casdoor should be deployed. You can refer to the Casdoor official documentation for Server Installation.
After a successful deployment, please ensure that:
- The Casdoor server is running successfully at http://localhost:8000.
- Open your favorite browser and visit http://localhost:7001. You will see the login page of Casdoor.
- Test the login functionality by inputting "admin" and "123".
Once the deployment is completed, you can quickly implement a Casdoor-based login page in your own app by following the steps below.
Step 2: Configure Casdoor Application
- Create a new Casdoor application or use an existing one.
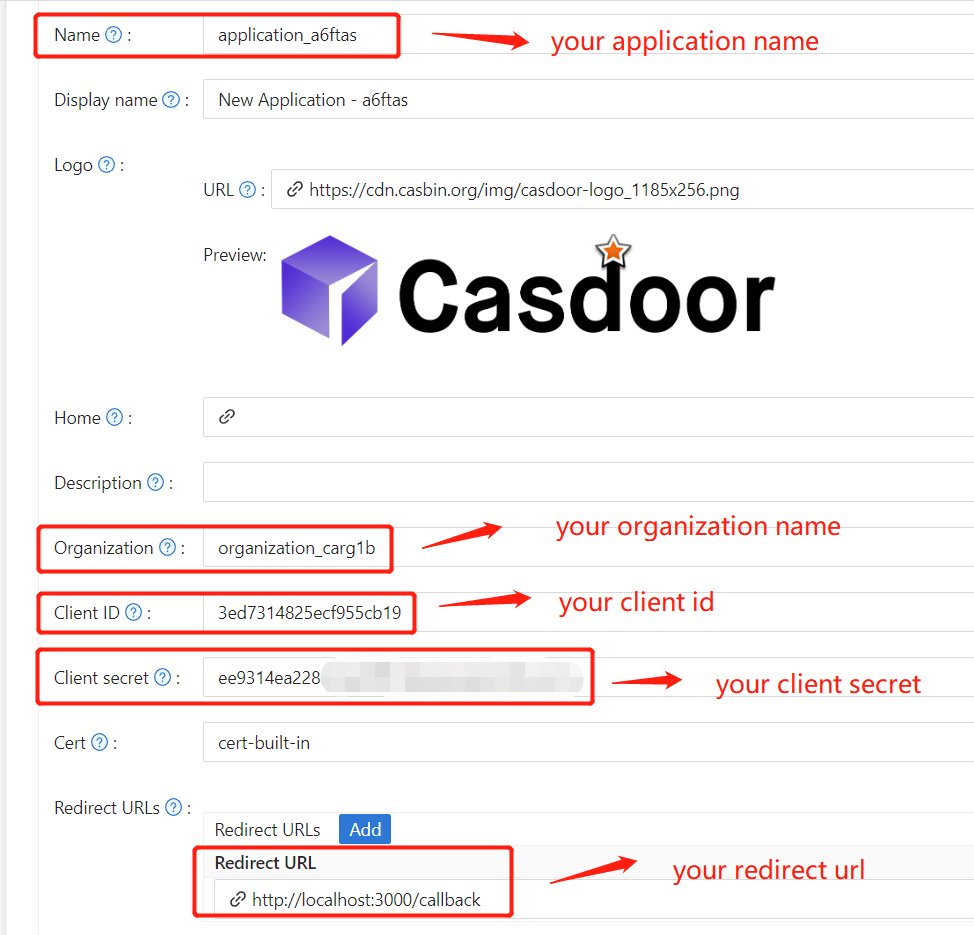
- Add your redirect URL (You can find more details about how to obtain the redirect URL in the next section).

- Add the desired provider and fill in other necessary settings.
On the application settings page, you will find two important values: Client ID and Client secret, as shown in the picture above. We will use these values in the next step.
Open your favorite browser and visit http://CASDOOR_HOSTNAME/.well-known/openid-configuration to view the OIDC configuration of Casdoor.
Step 3: Configure DolphinScheduler
dolphinscheduler-api/src/main/resources/application.yaml
security:
  authentication:
    # Authentication types (supported types: PASSWORD, LDAP, CASDOOR_SSO)
    type: CASDOOR_SSO
casdoor:
  # The URL of your Casdoor server
  endpoint:
  client-id:
  client-secret:
  # The certificate may be multi-line; you can use `|-` for ease
  certificate:
  # The organization name you added in Casdoor
  organization-name:
  # The application name you added in Casdoor
  application-name:
  # The DolphinScheduler login URL
  redirect-url: http://localhost:5173/login
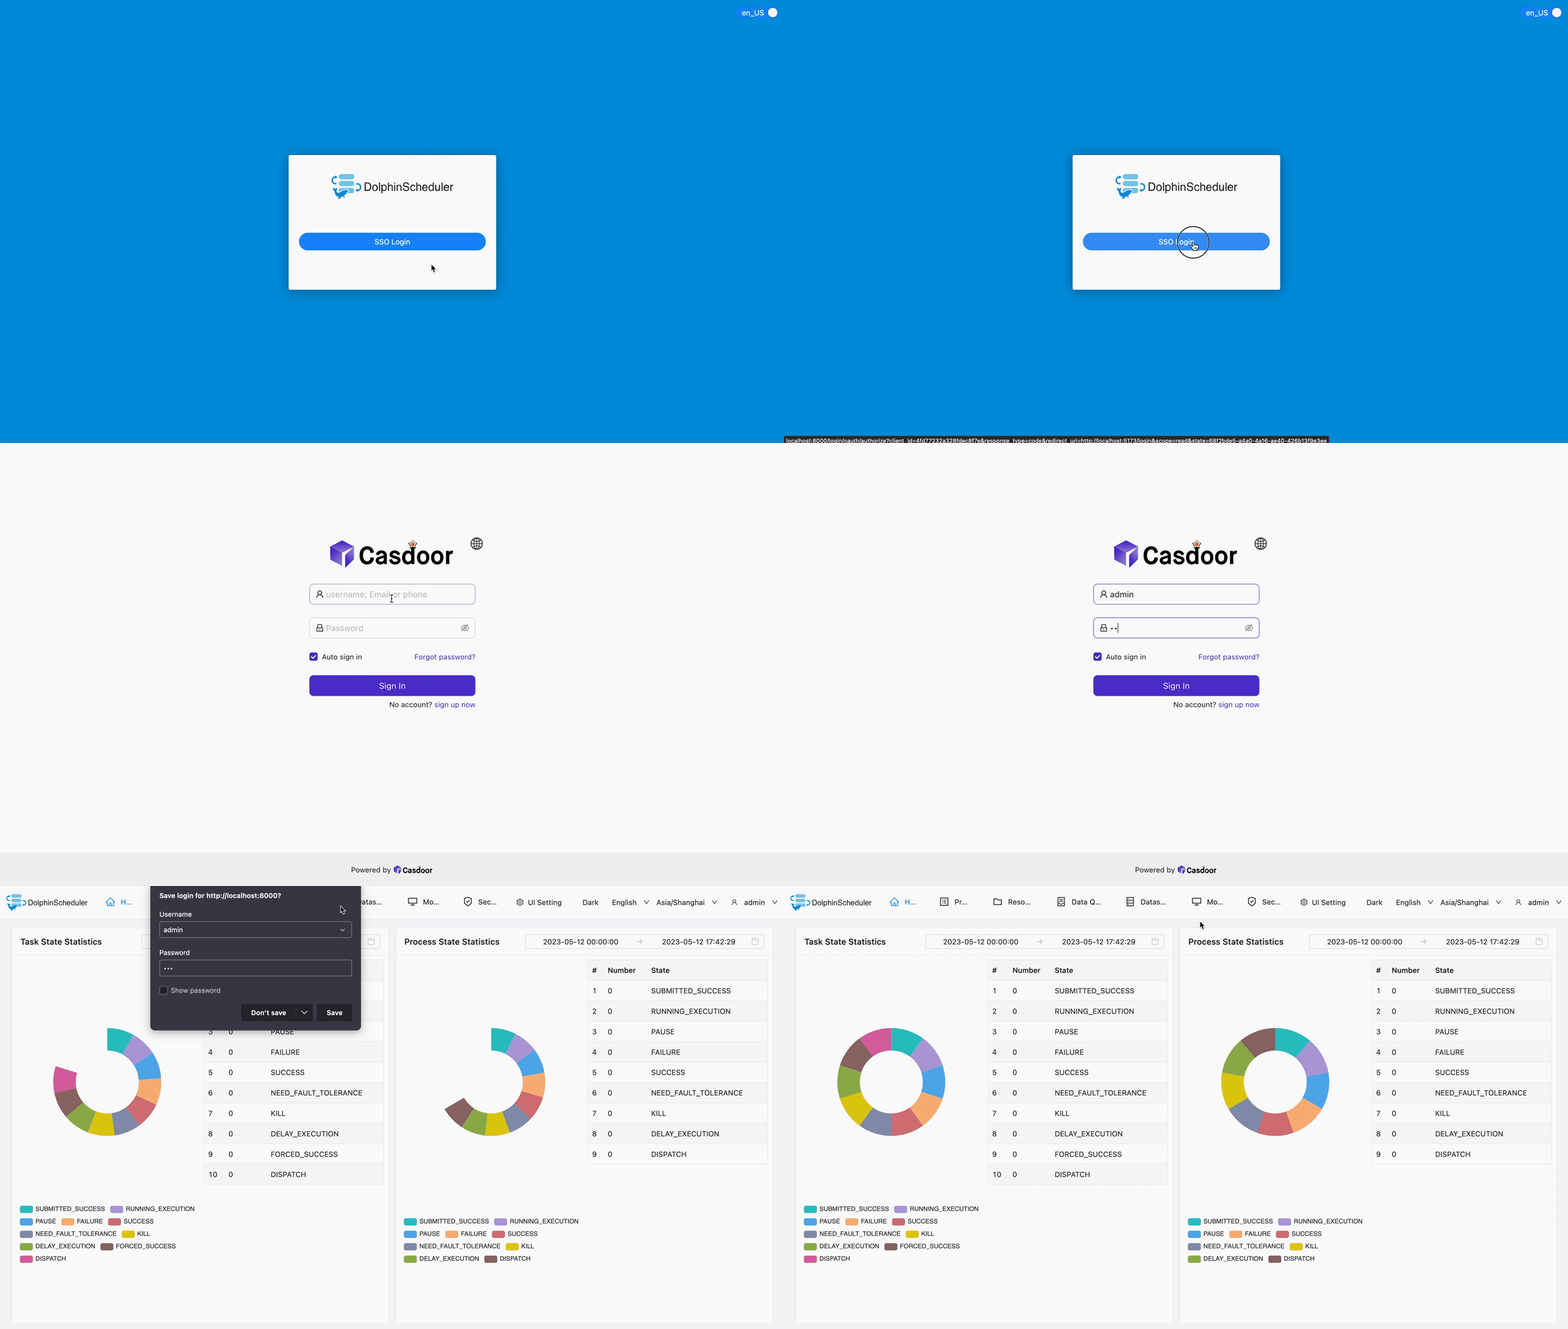
Now, DolphinScheduler will automatically redirect you to Casdoor for authentication.
