Connecting Applications with OIDC Protocol - Confluence
Casdoor can use OIDC protocol as an IDP to connect various applications. In this guide, we will use Confluence as an example to demonstrate how to use OIDC to connect your applications.
To start, make sure you have deployed Casdoor and Confluence successfully. Here are a few configuration names you need to remember:
CASDOOR_HOSTNAME: Domain name or IP where Casdoor server is deployed.Confluence_HOSTNAME: Domain name or IP where Confluence is deployed.
Step 1: Deploy Casdoor and Confluence
First, deploy Casdoor and Confluence.
After successful deployment, ensure the following:
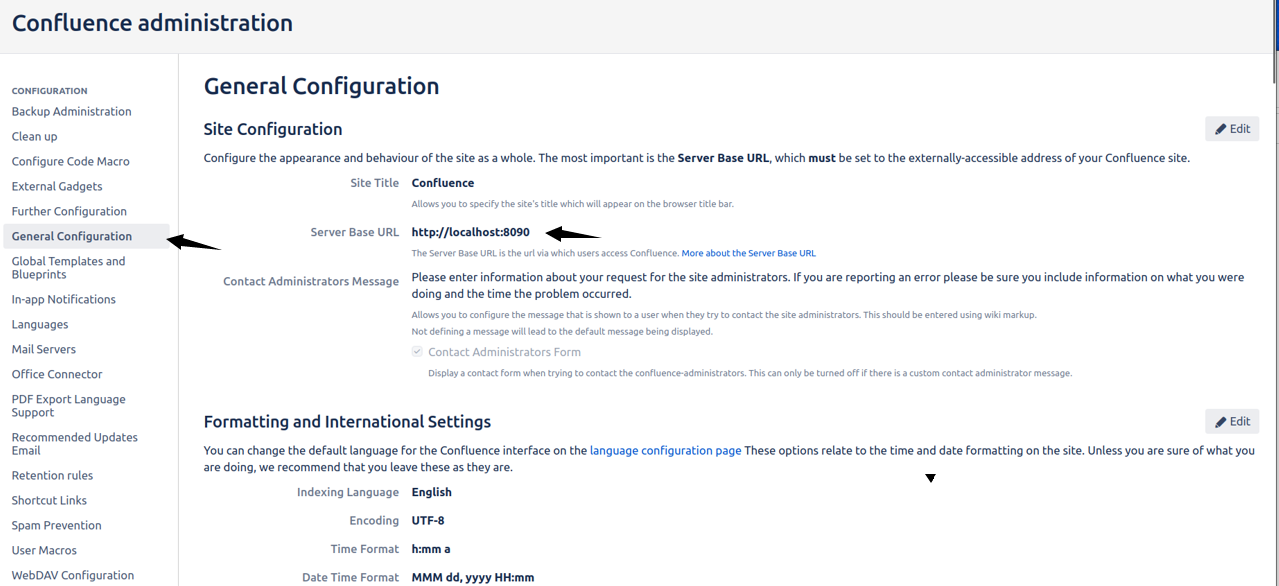
- Set Confluence URL to
Confluence_HOSTNAME.
- Casdoor can be logged in and used normally.
- You can set
CASDOOR_HOSTNAMEtohttp://localhost:8000if you deploy Casdoor inprodmode. Refer to the production mode for more details.
Step 2: Configure Casdoor application
- Create a new Casdoor application or use an existing one.
- Find a redirect URL:

- Add the redirect URL to the application:

- Add the desired provider and configure other settings accordingly.
On the application settings page, you will find two values: Client ID and Client Secret. We will need these in the next step.
Open your favorite browser and visit: http://CASDOOR_HOSTNAME/.well-known/openid-configuration to see the OIDC configuration of Casdoor.
Step 3: Configure Confluence
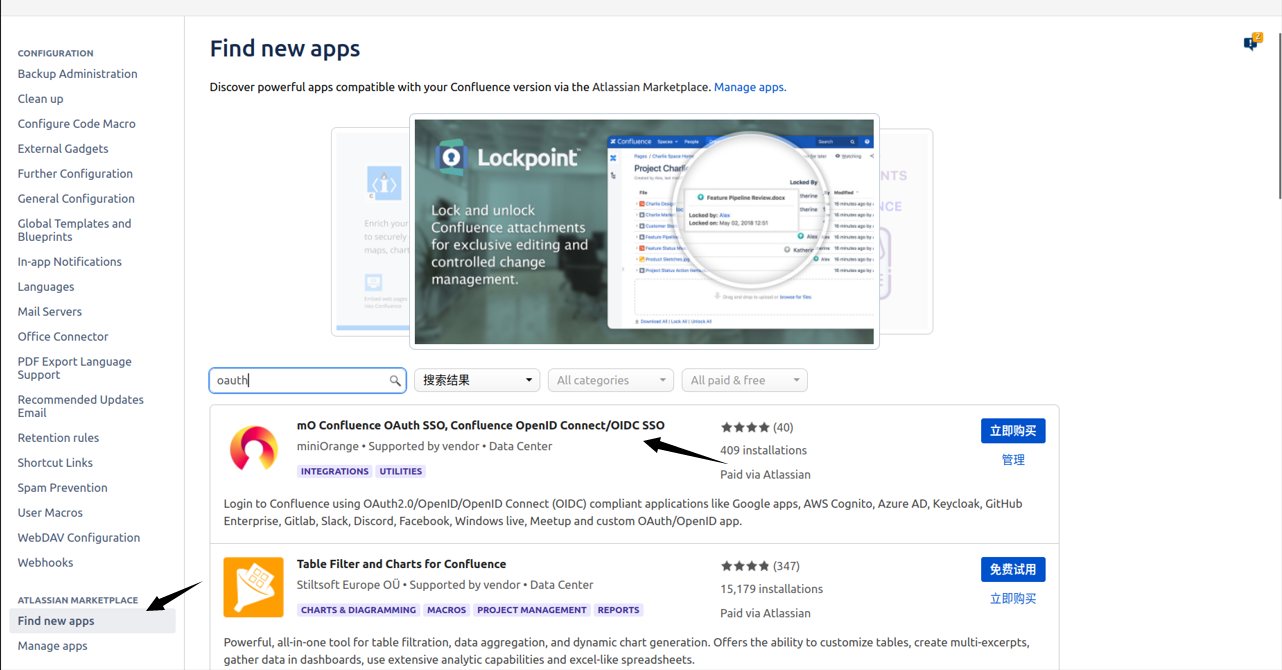
- Install the miniOrange app to support OAuth. You can find this app in:

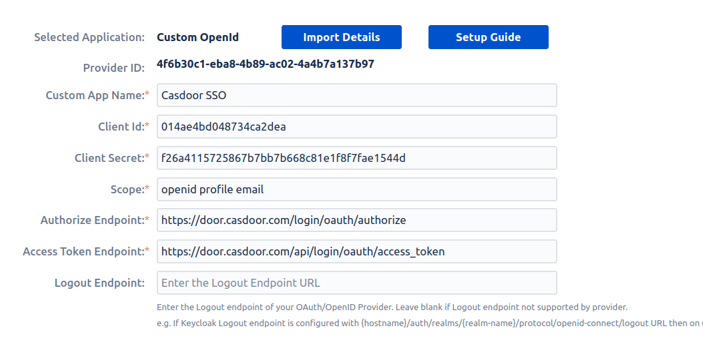
- Configure the app:

- Set
Selected Applicationto Custom OpenID. - Retrieve the Client ID and Client Secret from the Casdoor application page.
Configure the following settings for Confluence:
Token server URL: http://CASDOOR_HOSTNAME/api/login/oauth/access_tokenAuthorization server URL: http://CASDOOR_HOSTNAME/login/oauth/authorizeUserInfo server URL: http://CASDOOR_HOSTNAME/api/get-accountScopes:address phone openid profile offline_access email
You can configure more advanced authorization settings later. For now, check if OpenID actually works.
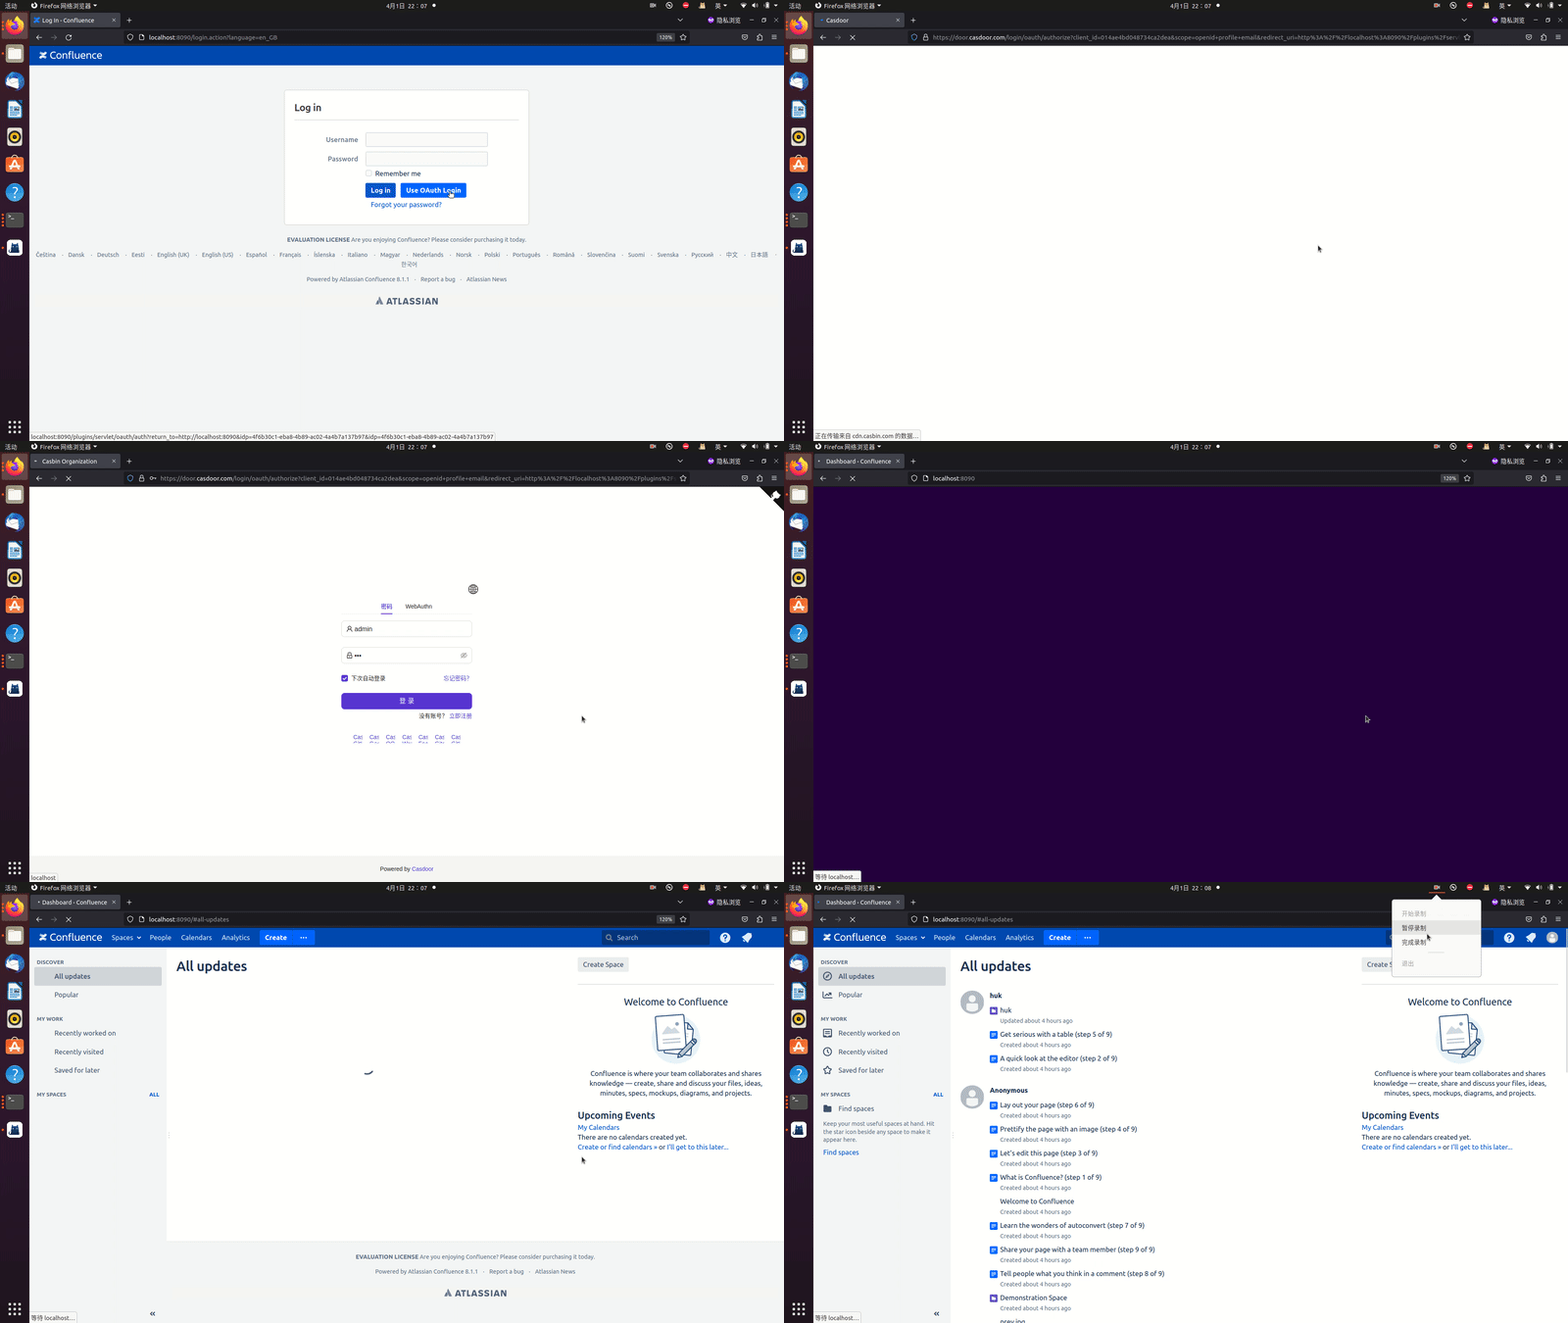
Log out of Confluence and test SSO:
