Using the miniOrange plugin
This tutorial explains how to use miniOrange to connect casdoor and Jira.
This guide connects Jira to Casdoor via OIDC using the miniOrange plugin.
The following are some important names in the configuration:
CASDOOR_HOSTNAME: The domain name or IP where the Casdoor server is deployed.
Jira_HOSTNAME: The domain name or IP where Jira is deployed.
Step 1: Deploy Casdoor and Jira
After successful deployment, make sure:
- Set Jira URL (Plans -> Administration -> System -> General Configuration) to
Jira_HOSTNAME.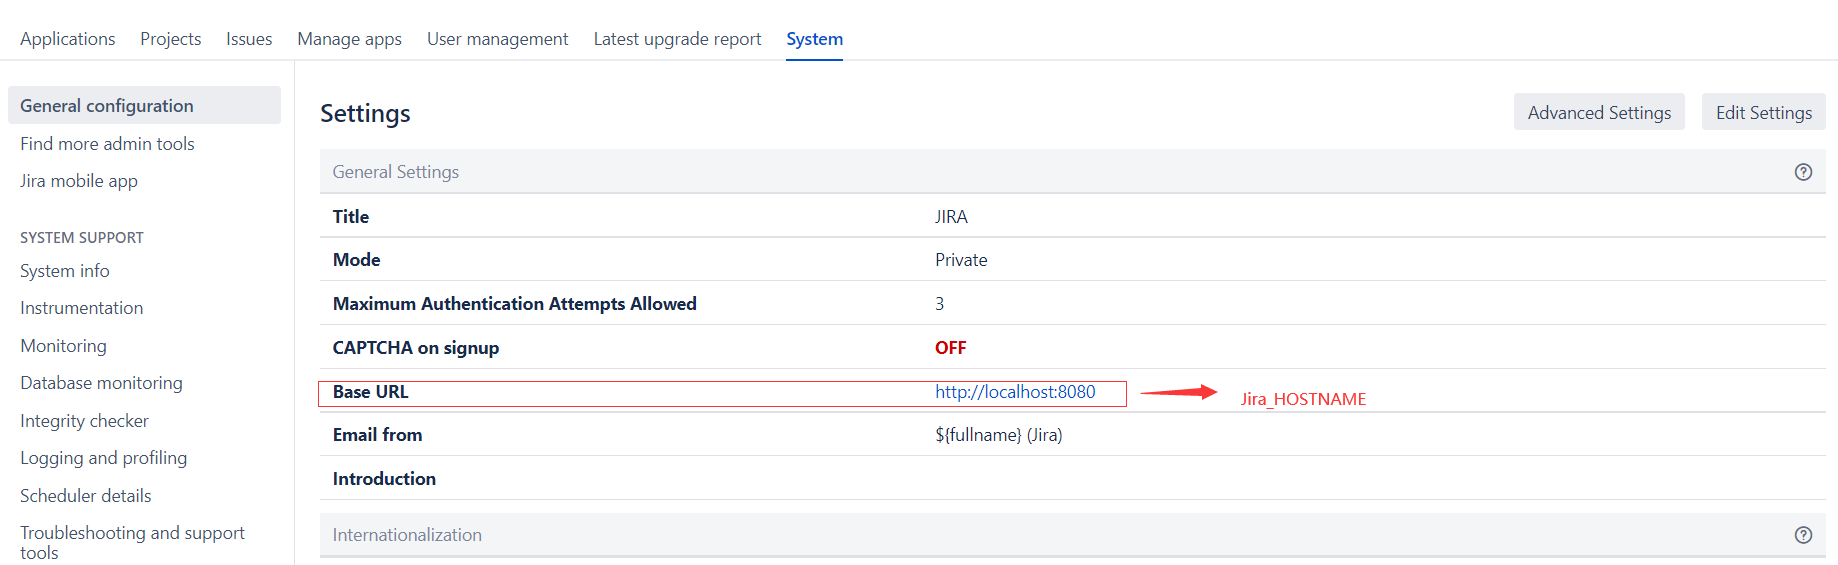
- Casdoor can be logged in and used normally.
- For local
prodmode, setCASDOOR_HOSTNAMEtohttp://localhost:8000. See production mode.
Step 2: Configure Casdoor Application and Jira
- Create a new Casdoor application or use an existing one.
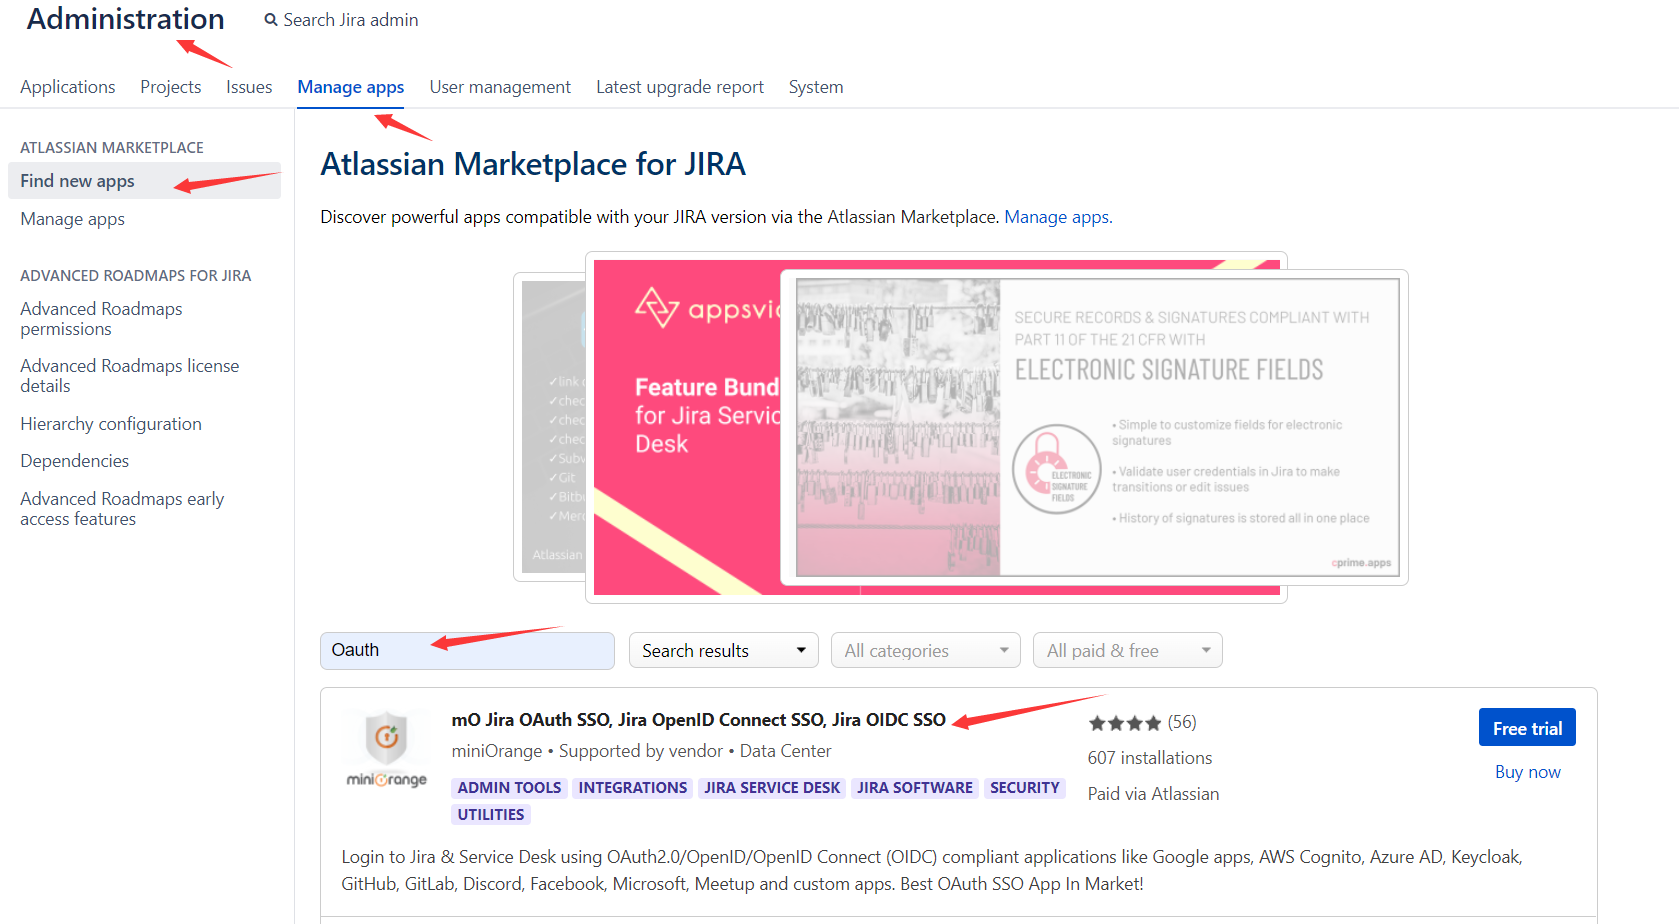
- Install the miniOrange OIDC app (Plans → Administration → Find new apps → search).
- Set
Selected Applicationto Custom OpenId. - Find the redirect URL:
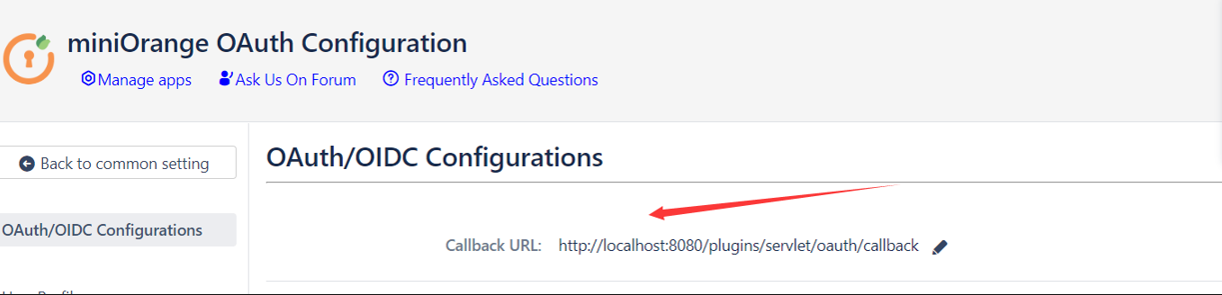
- Add the redirect URL:

- Configure the app as follows:
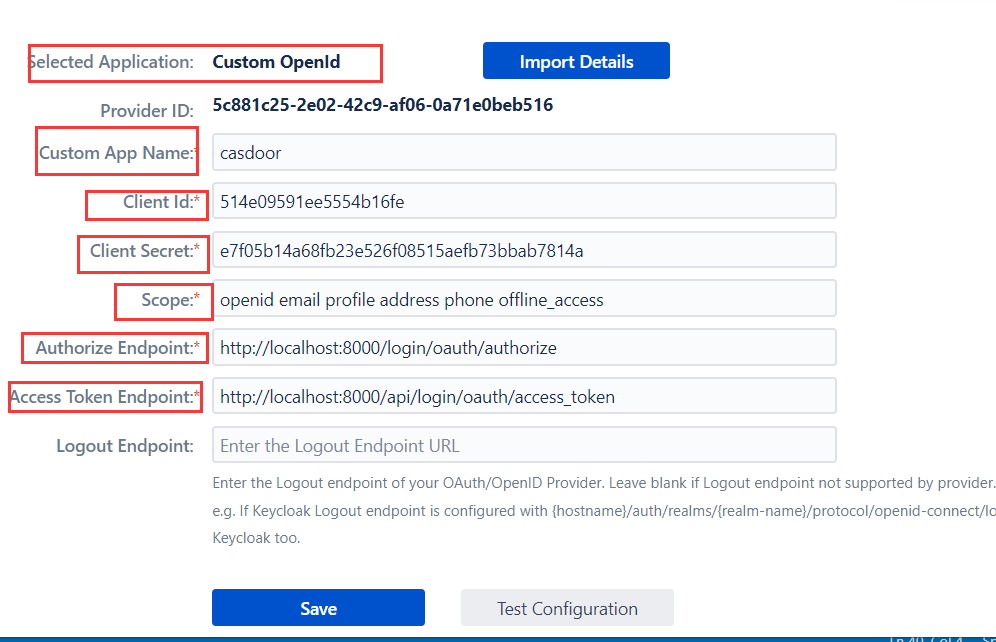
Token server URL: http://CASDOOR_HOSTNAME/api/login/oauth/access_tokenAuthorization server URL: http://CASDOOR_HOSTNAME/login/oauth/authorizeUserInfo server URL: http://CASDOOR_HOSTNAME/api/get-accountScopes:address phone openid profile offline_access email
OIDC discovery: http://<CASDOOR_HOSTNAME>/.well-known/openid-configuration.
Log out of Jira and test SSO.