Via built-in SSO
This is a free method to connect Casdoor, but your website must use HTTPS.
Casdoor can use the OIDC protocol as an IDP to connect various applications. Here is a Jira tutorial.
The following are some of the names in the configuration:
CASDOOR_HOSTNAME: Domain name or IP where the Casdoor server is deployed.Jira_HOSTNAME: Domain name or IP where Jira is deployed.
Step 1: Deploy Casdoor and Jira
After a successful deployment, ensure the following:
- Casdoor can be logged in and used normally.
- For local
prodmode, setCASDOOR_HOSTNAMEtohttp://localhost:8000. See production mode.
Step 2: Configure Casdoor application
- Create or use an existing Casdoor application.
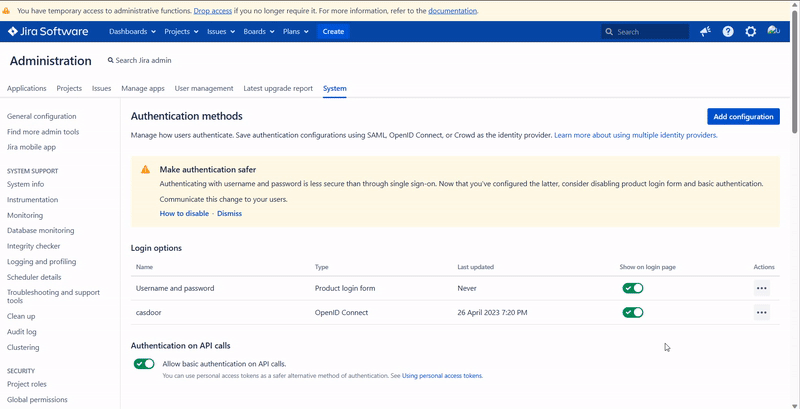
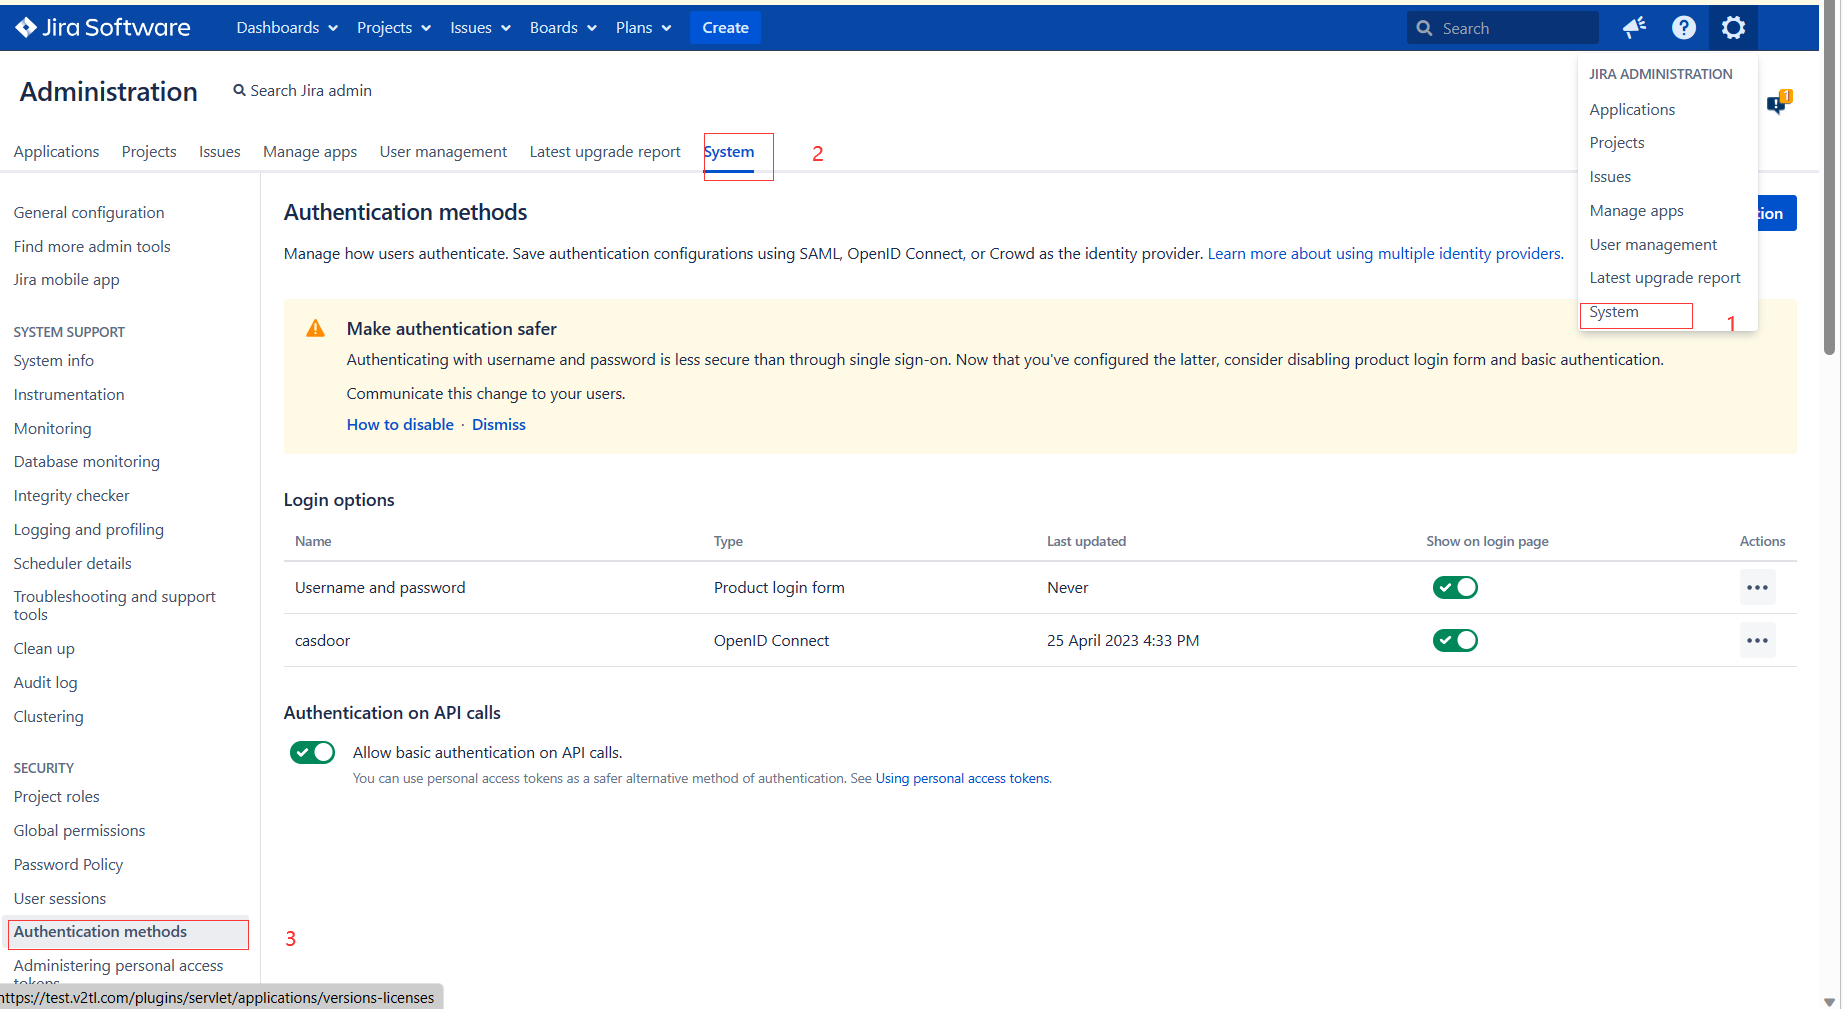
- Find Authentication methods:
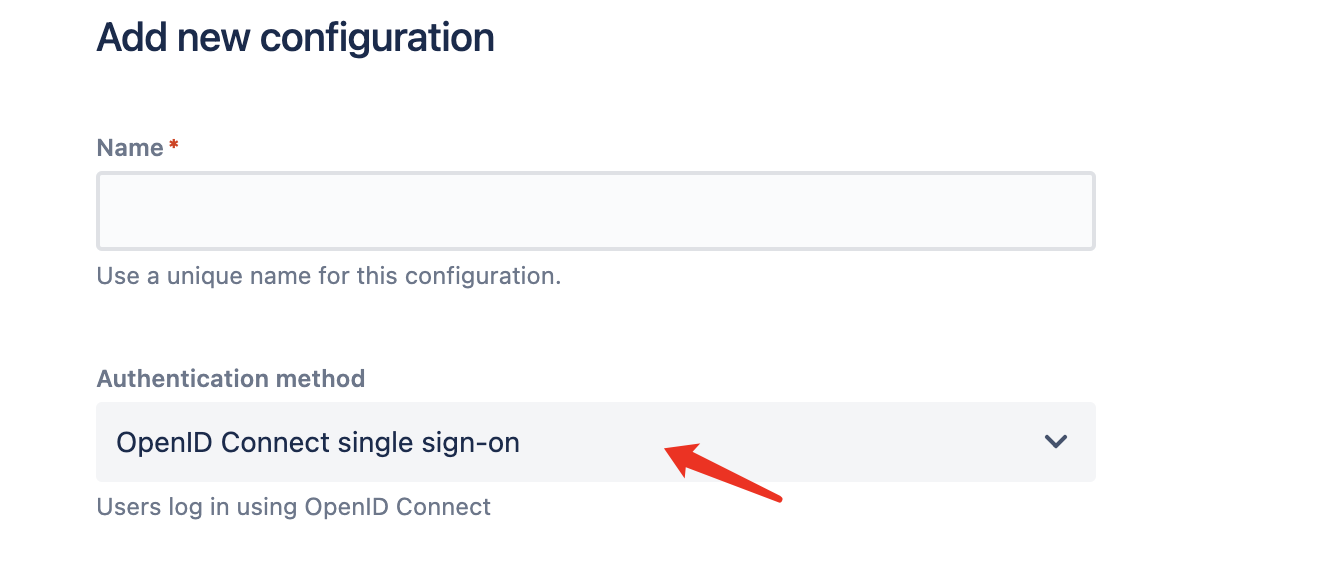
- Add a Configuration and choose OpenID Connection single sign-on in the Authentication method
- Find the redirect URL:
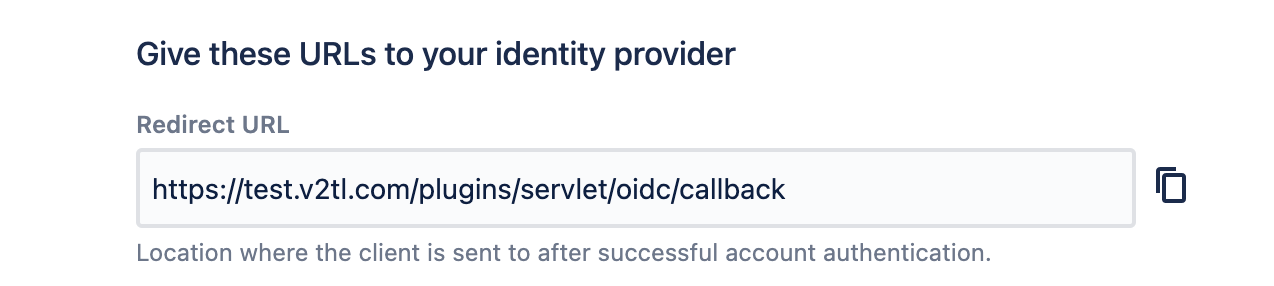
- Add a redirect URL:
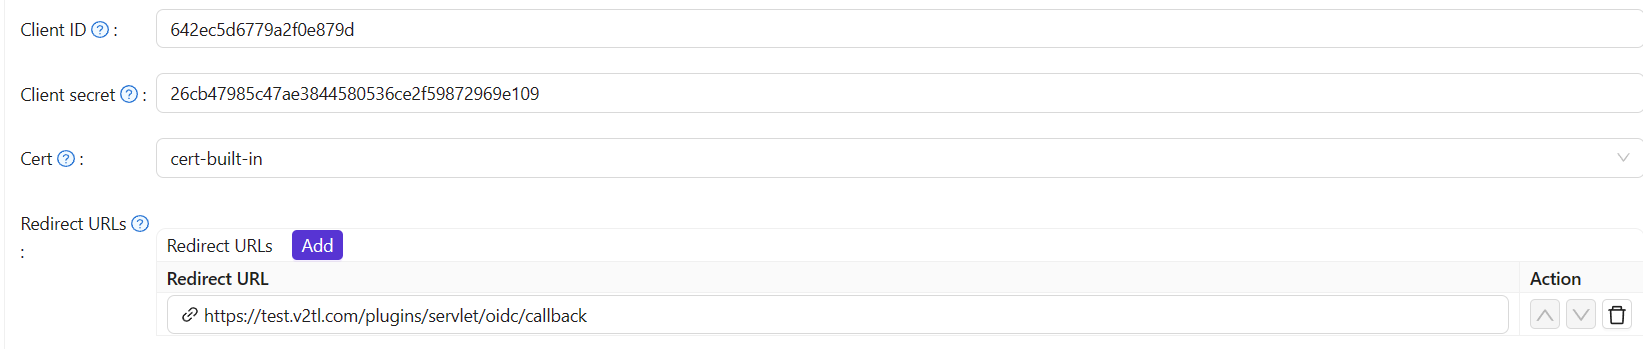
Note Client ID and Client secret from the application page for the next step.
Open http://CASDOOR_HOSTNAME/.well-known/openid-configuration in a browser to view Casdoor's OIDC configuration.
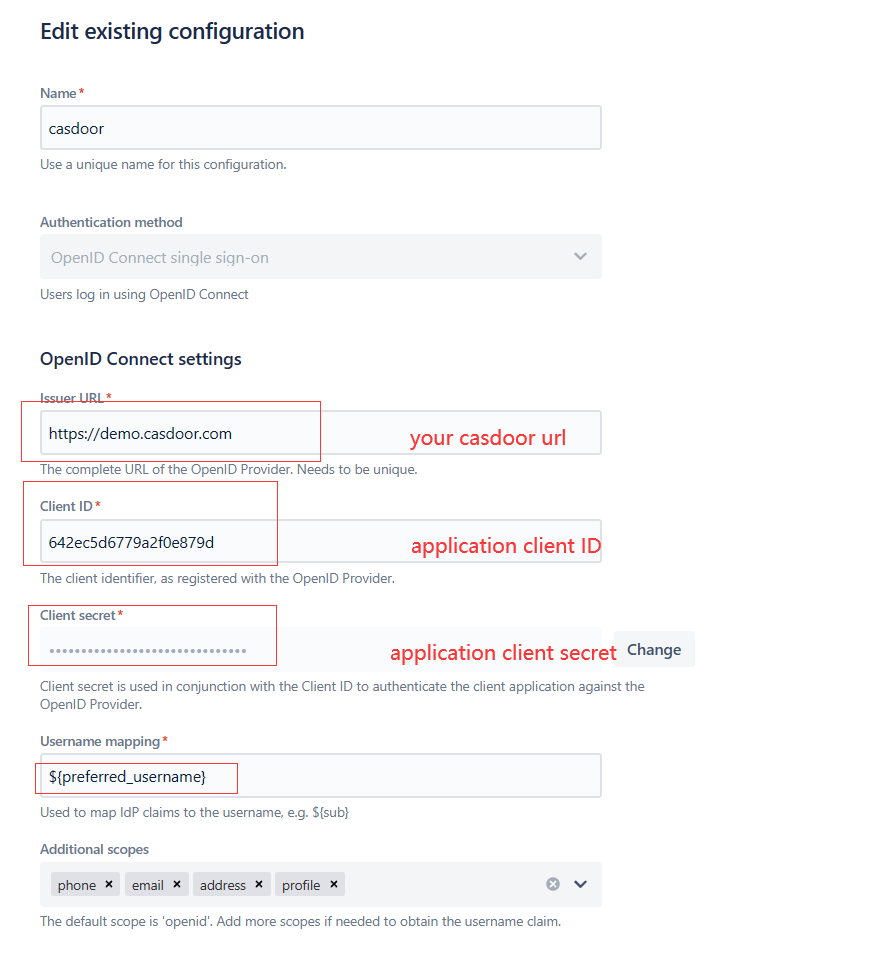
Step 3: Configure Jira
-
We need to continue configuring our Configuration in Jira

-
Configure more complex authorization later; first verify that OpenID sign-in works.