Using Casdoor in ShenYu
ShenYu has a Casdoor plugin to enable the use of Casdoor.
Step 1: Deploy Casdoor
Deploy Casdoor first. See Server installation.
After deployment, ensure:
- The Casdoor server is running on
http://localhost:8000. - Open your preferred browser and visit
http://localhost:7001to see the Casdoor login page. - Login functionality is working fine by inputting
adminand123.
After the above setup, add a Casdoor-based login page with the following steps.
Step 2: Configure the Casdoor application
- Create a new Casdoor application or use an existing one
- Add your redirect URL
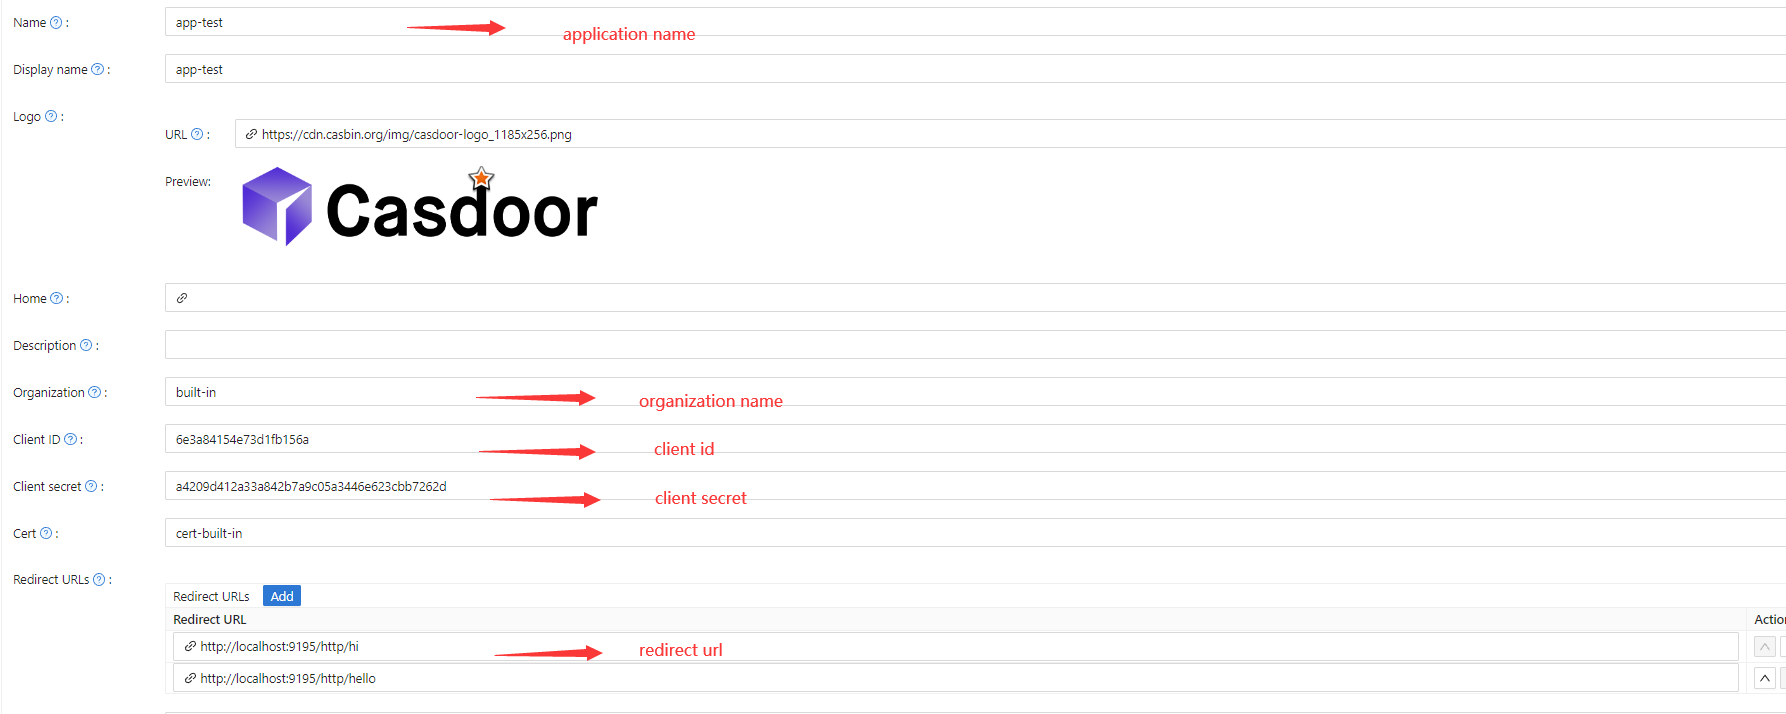
- On the certificate editing page, copy your
Certificate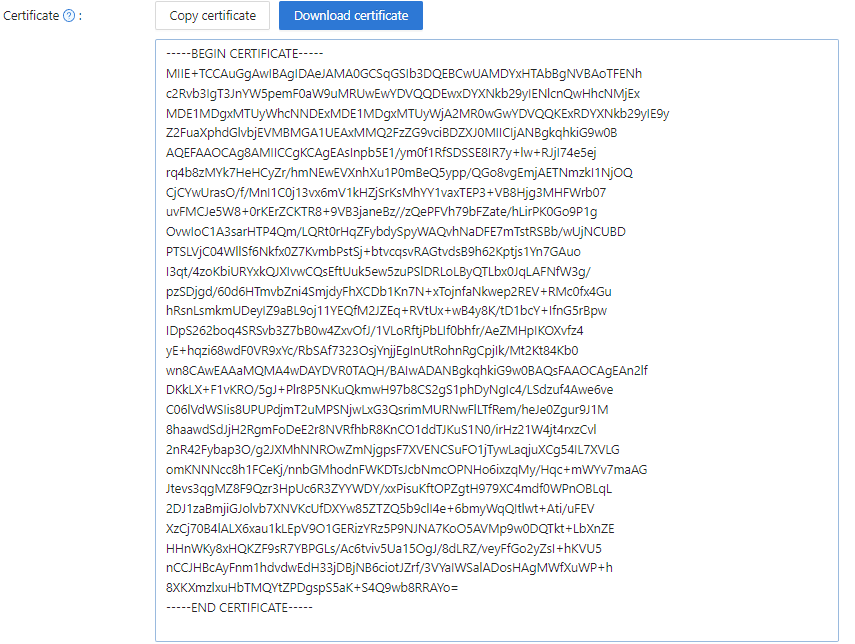
Step 3: Use the Casdoor plugin in ShenYu
1. Configure the Casdoor plugin in ShenYu
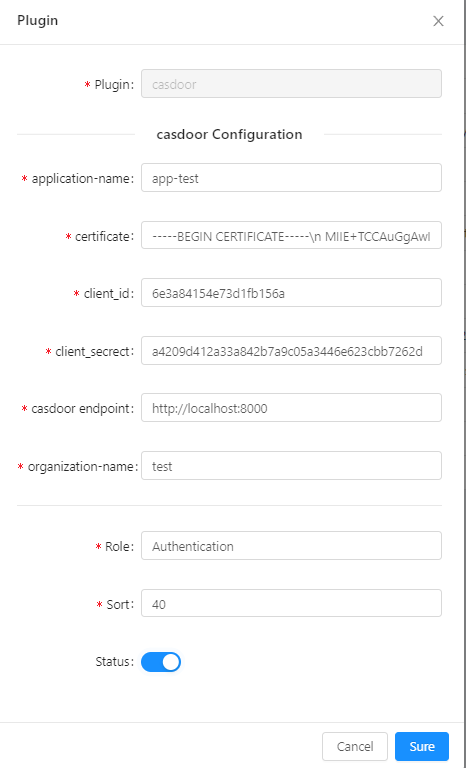
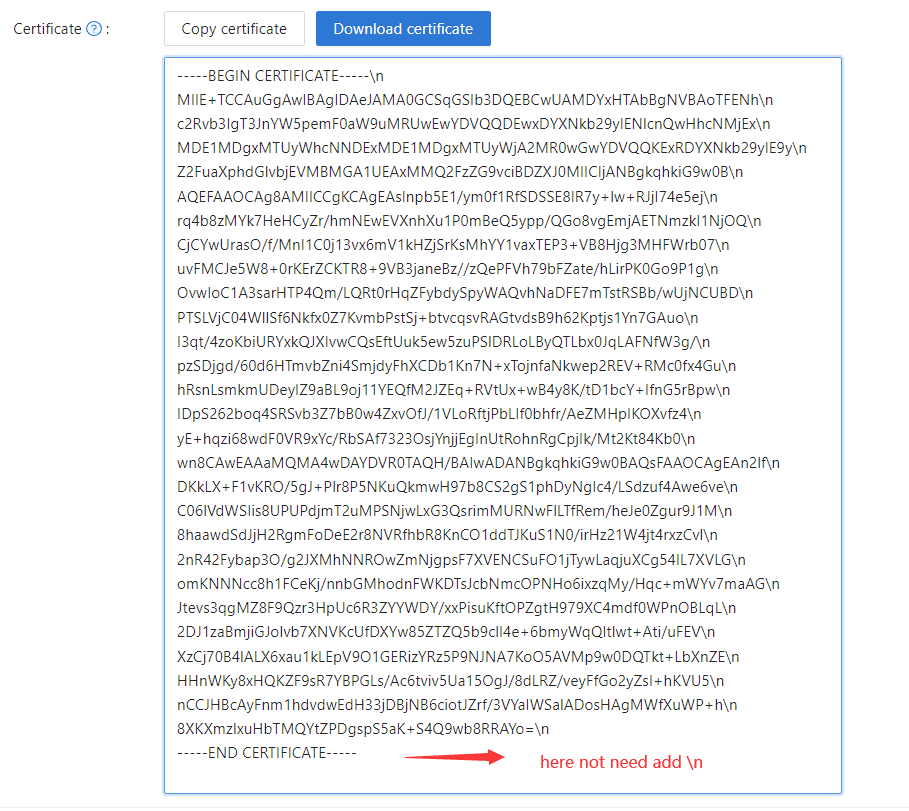
Note: As ShenYu only has a single line input box, \n must be added in every line of certificate.
Paste it into the certificate field of the ShenYu Casdoor config.
You don't need to save it in the Casdoor certificate editing page, as it is only for copying.
2. Configure the ShenYu Casdoor plugin
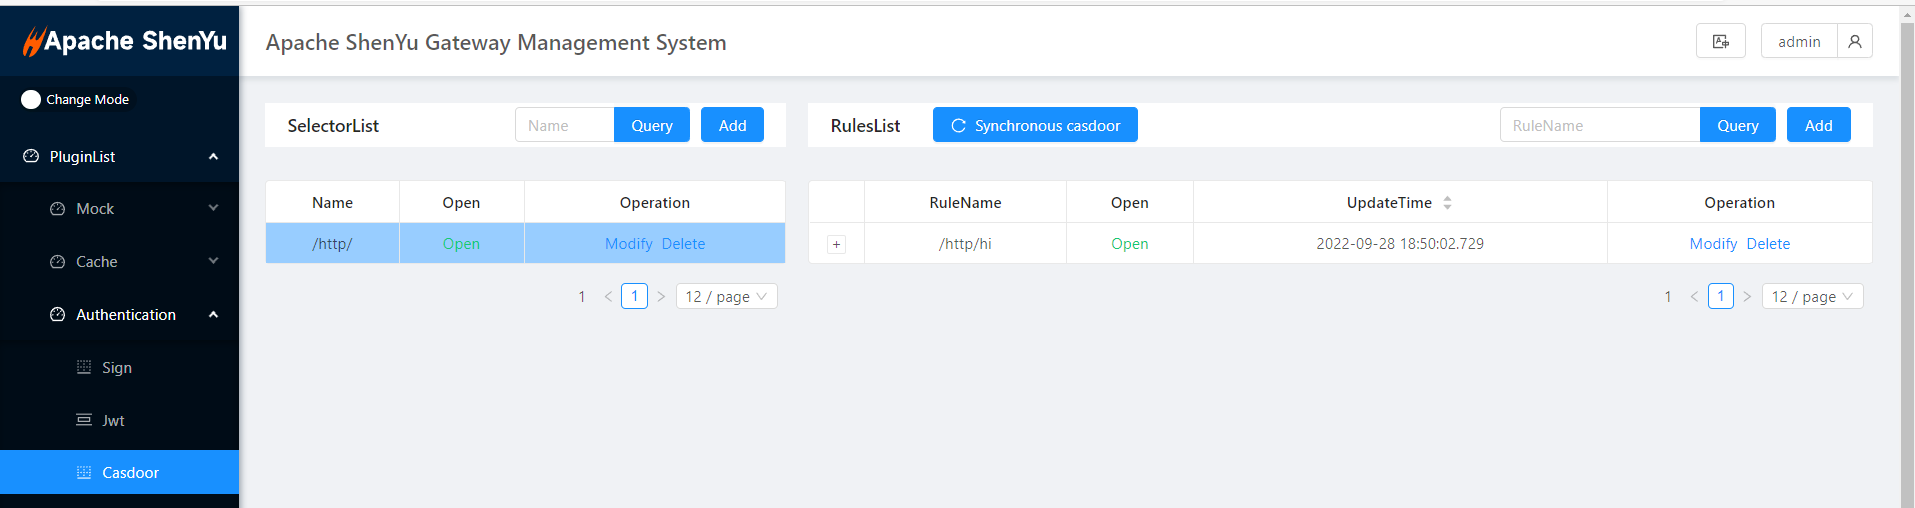 Configure the Casdoor settings as needed.
3. Getting the service and using it
3.1 Directly visit the Web

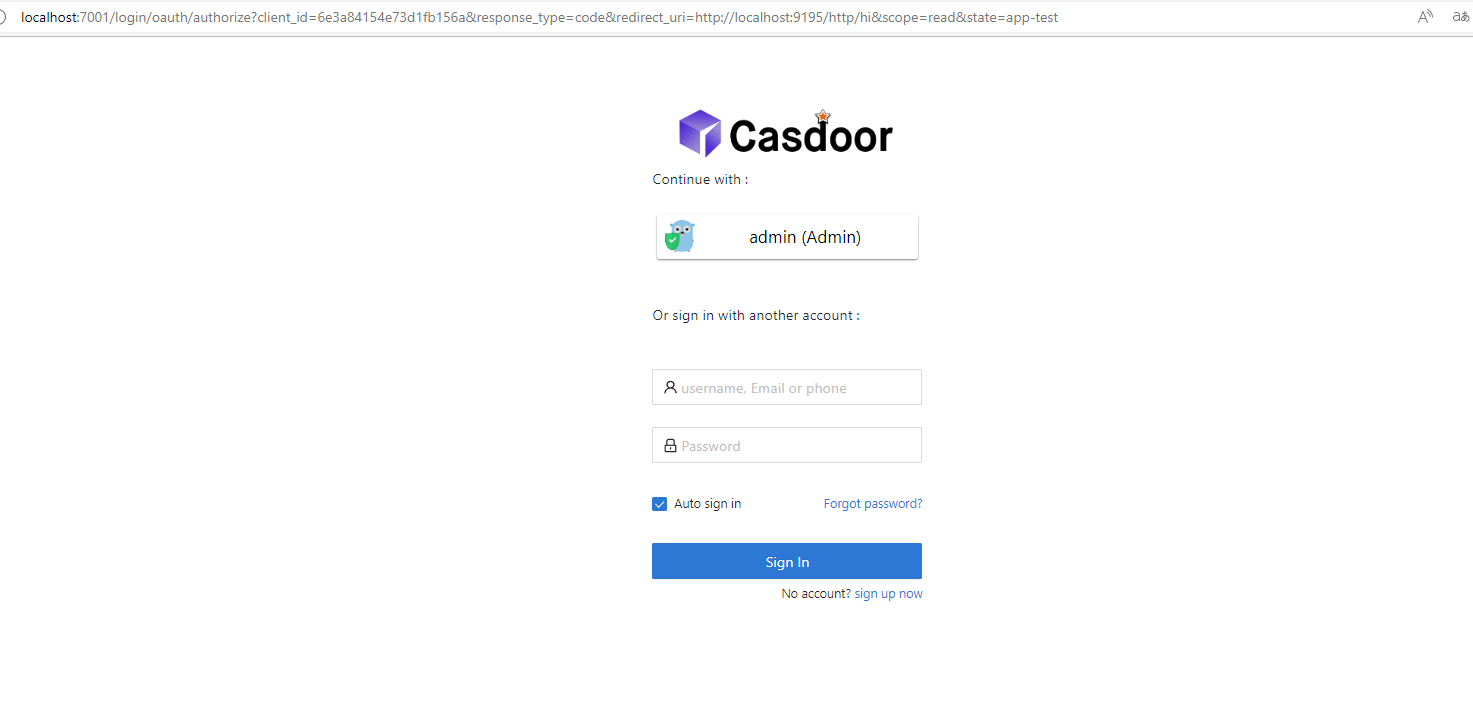
3.2 Use Casdoor Login

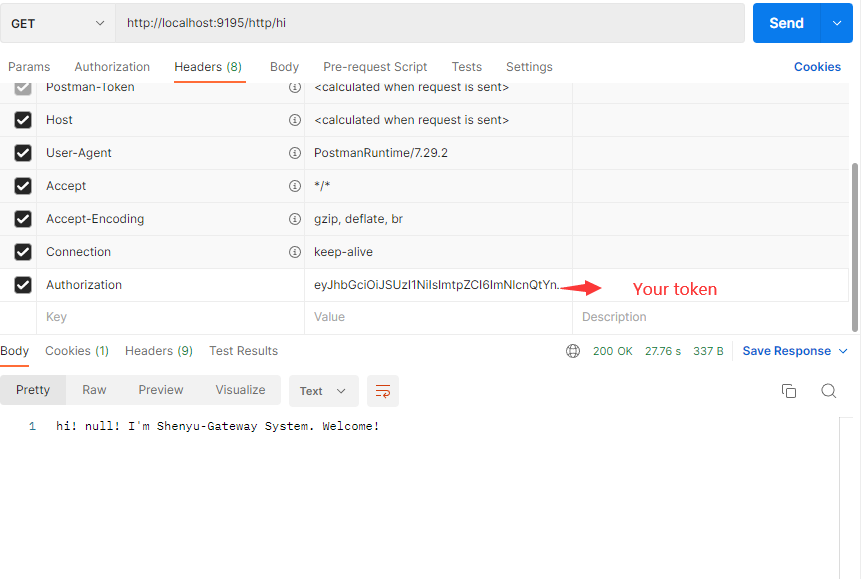
3.3 Carry the token in Headers
3.4 Save name, ID and organization in Headers
This makes it easier to use them in the future.