Pulsar manager
CasdoorはPulsar Managerに簡単に接続できます。
Casdoorを接続するコードは既にPulsar Managerに追加されているので、バックエンドのapplication.ymlファイルを設定し、フロントエンドのスイッチを有効にするだけです。
ステップ1: Casdoorのデプロイ
Deploy Casdoor. See Server installation. Ensure the server is running and you can sign in at the Casdoor login page (e.g. admin / 123).
ステップ2: Casdoorの設定
Configure an organization and an application in Casdoor (see Application and Organization).
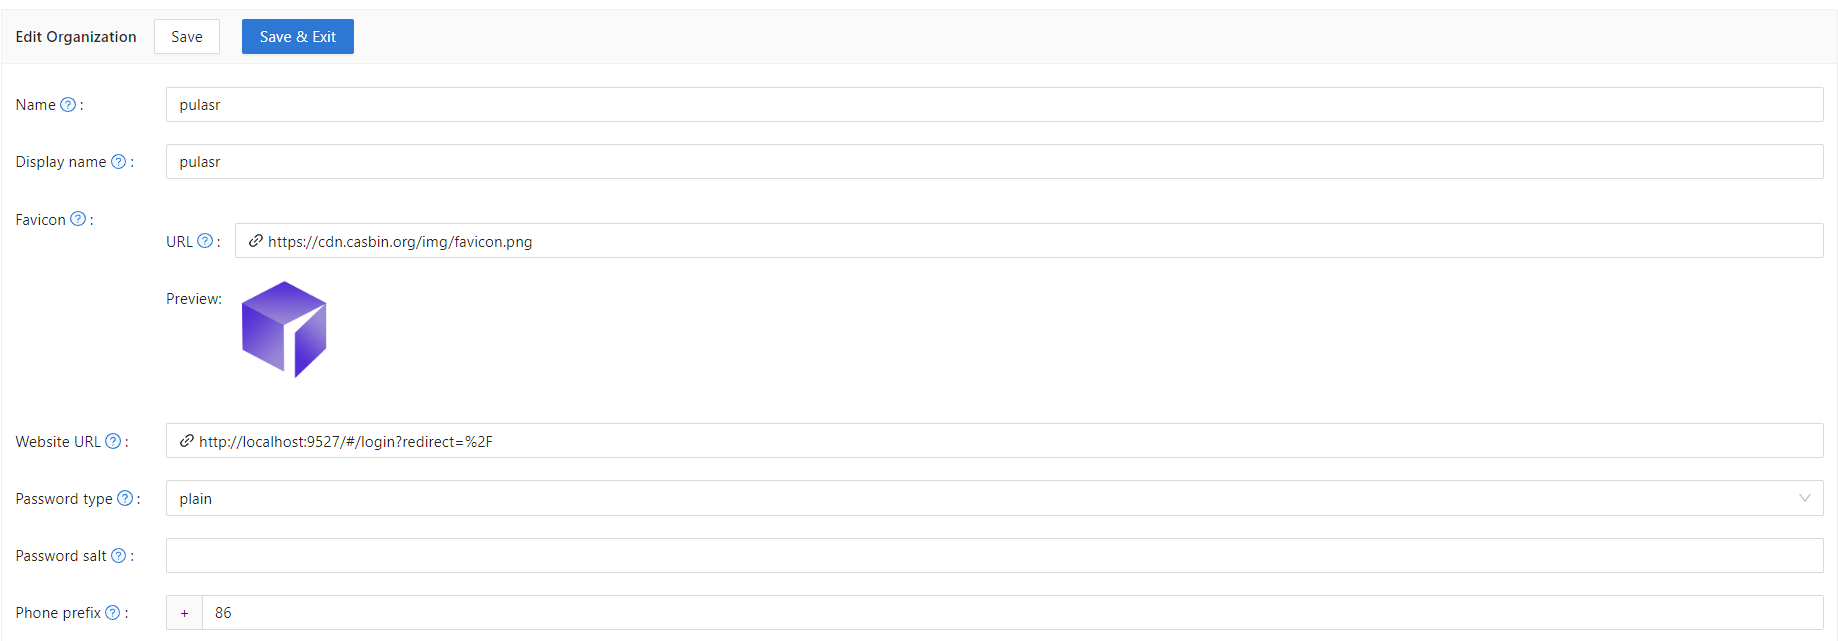
ステップ2.1: 組織の作成
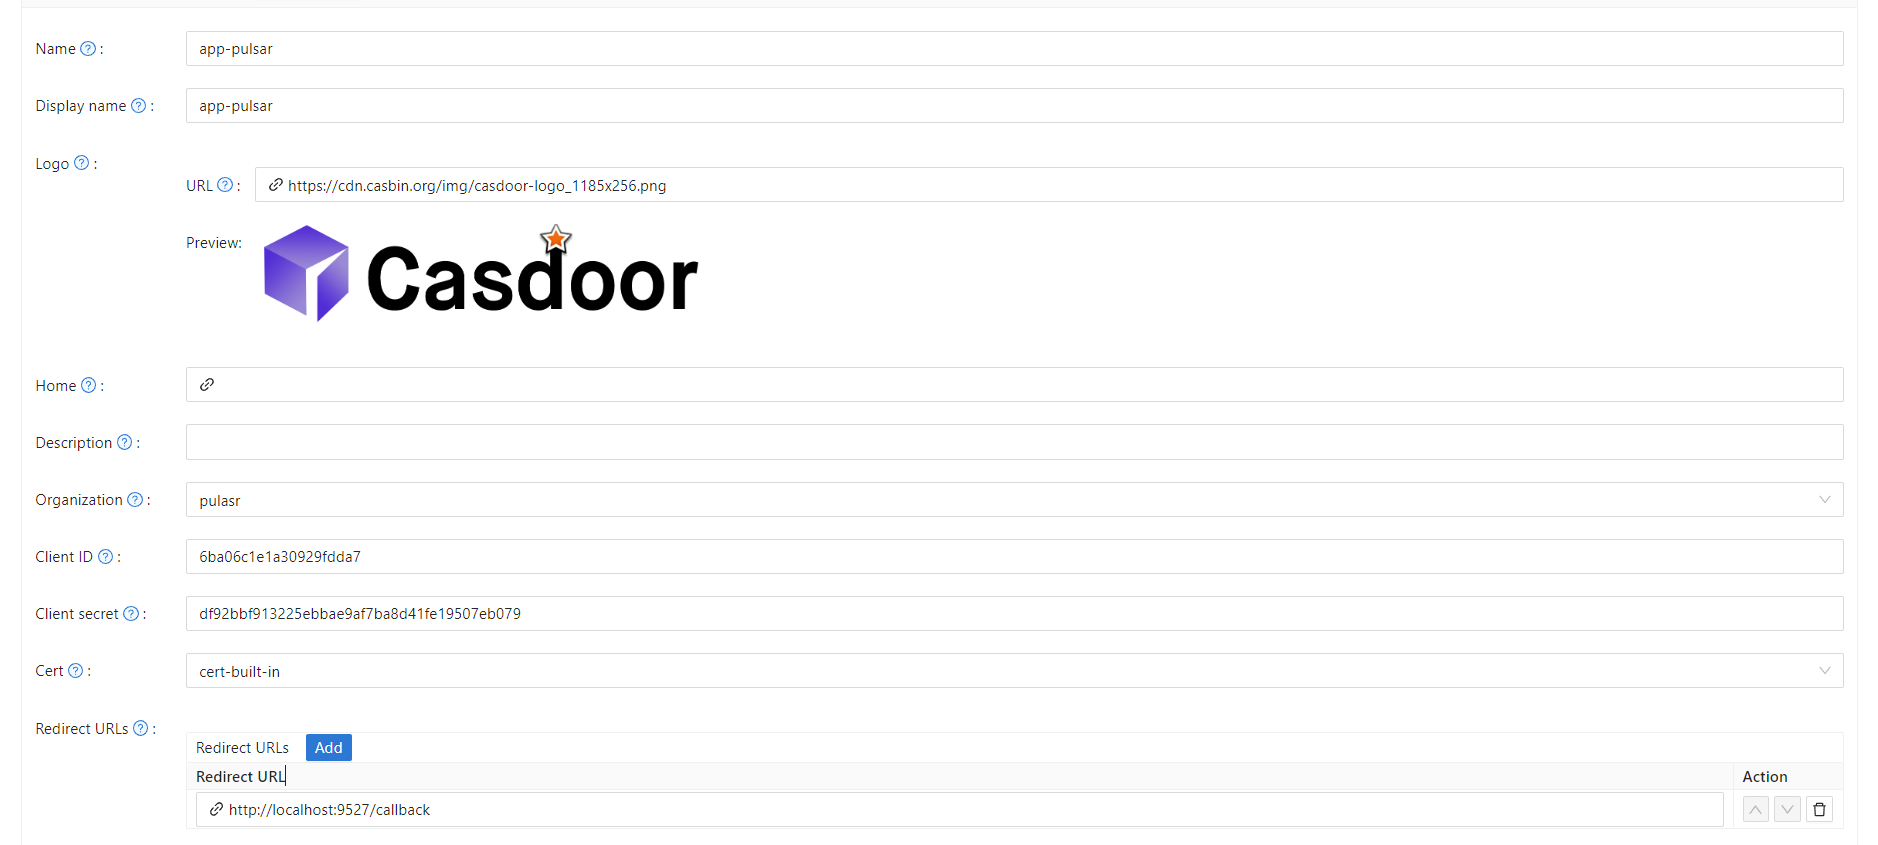
ステップ2.2: アプリケーションの作成
ステップ3: Pulsar Managerフロントエンドのスイッチを有効にする
このスイッチを有効にすると、コードと状態がバックエンドに送信されます。
The switch is on line 80 of pulsar-manager/front-end/src/router/index.js.

ステップ4: バックエンドコードの設定
application.propertiesファイルでCasdoorの設定を構成します。このファイルはpulsar-manager/src/main/resources/application.propertiesの154行目にあります。
casdoor.endpoint = http://localhost:8000
casdoor.clientId = <client id from previous step>
casdoor.clientSecret = <client secret from previous step>
casdoor.certificate = <client certificate from previous step>
casdoor.organizationName = pulsar
casdoor.applicationName = app-pulsar