Login UI customization
This guide walks through customizing your application’s sign-in page: background image, login panel style, position, and optional side panel.
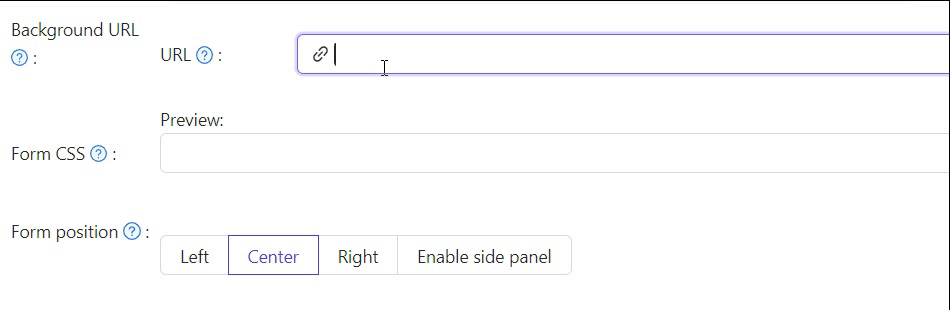
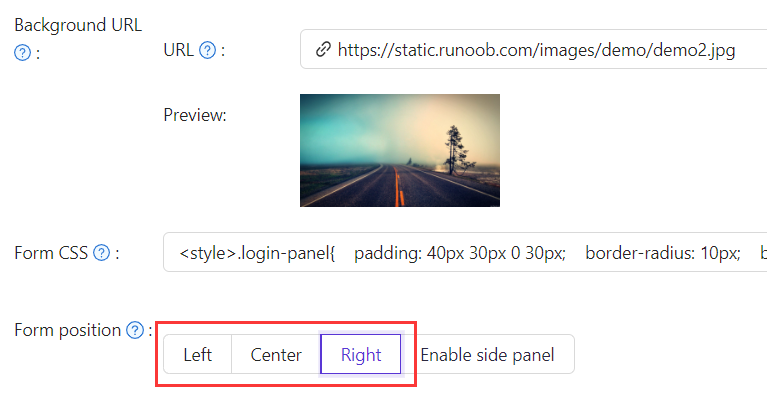
1. Background image
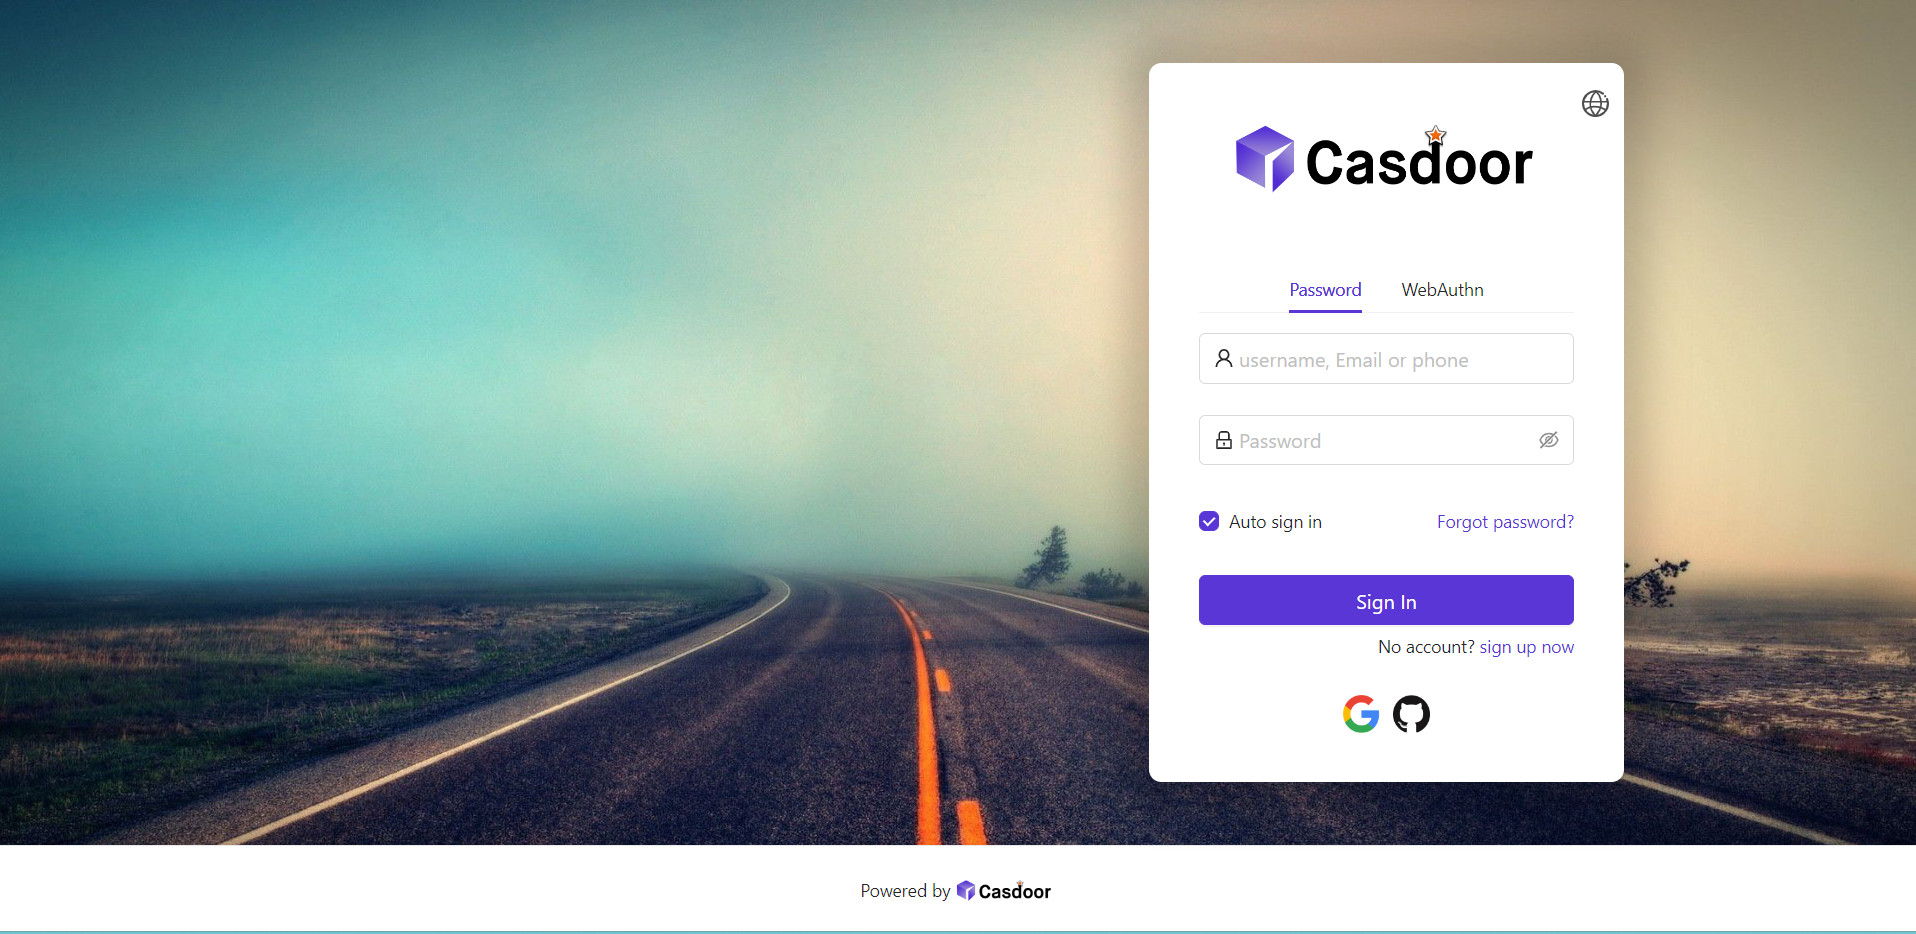
The default background is white. Set Background URL to an image URL; the preview updates when the URL is valid.
2. Login panel style
Use Form CSS to style the login panel. Example:
<style>
.login-panel{
    padding: 40px 30px 0 30px;
    border-radius: 10px;
    background-color: #ffffff;
    box-shadow: 0 0 30px 20px rgba(0, 0, 0, 0.20);
}
</style>

If Form CSS is empty, the editor may show a default; copy the content and paste it into the field, then save.
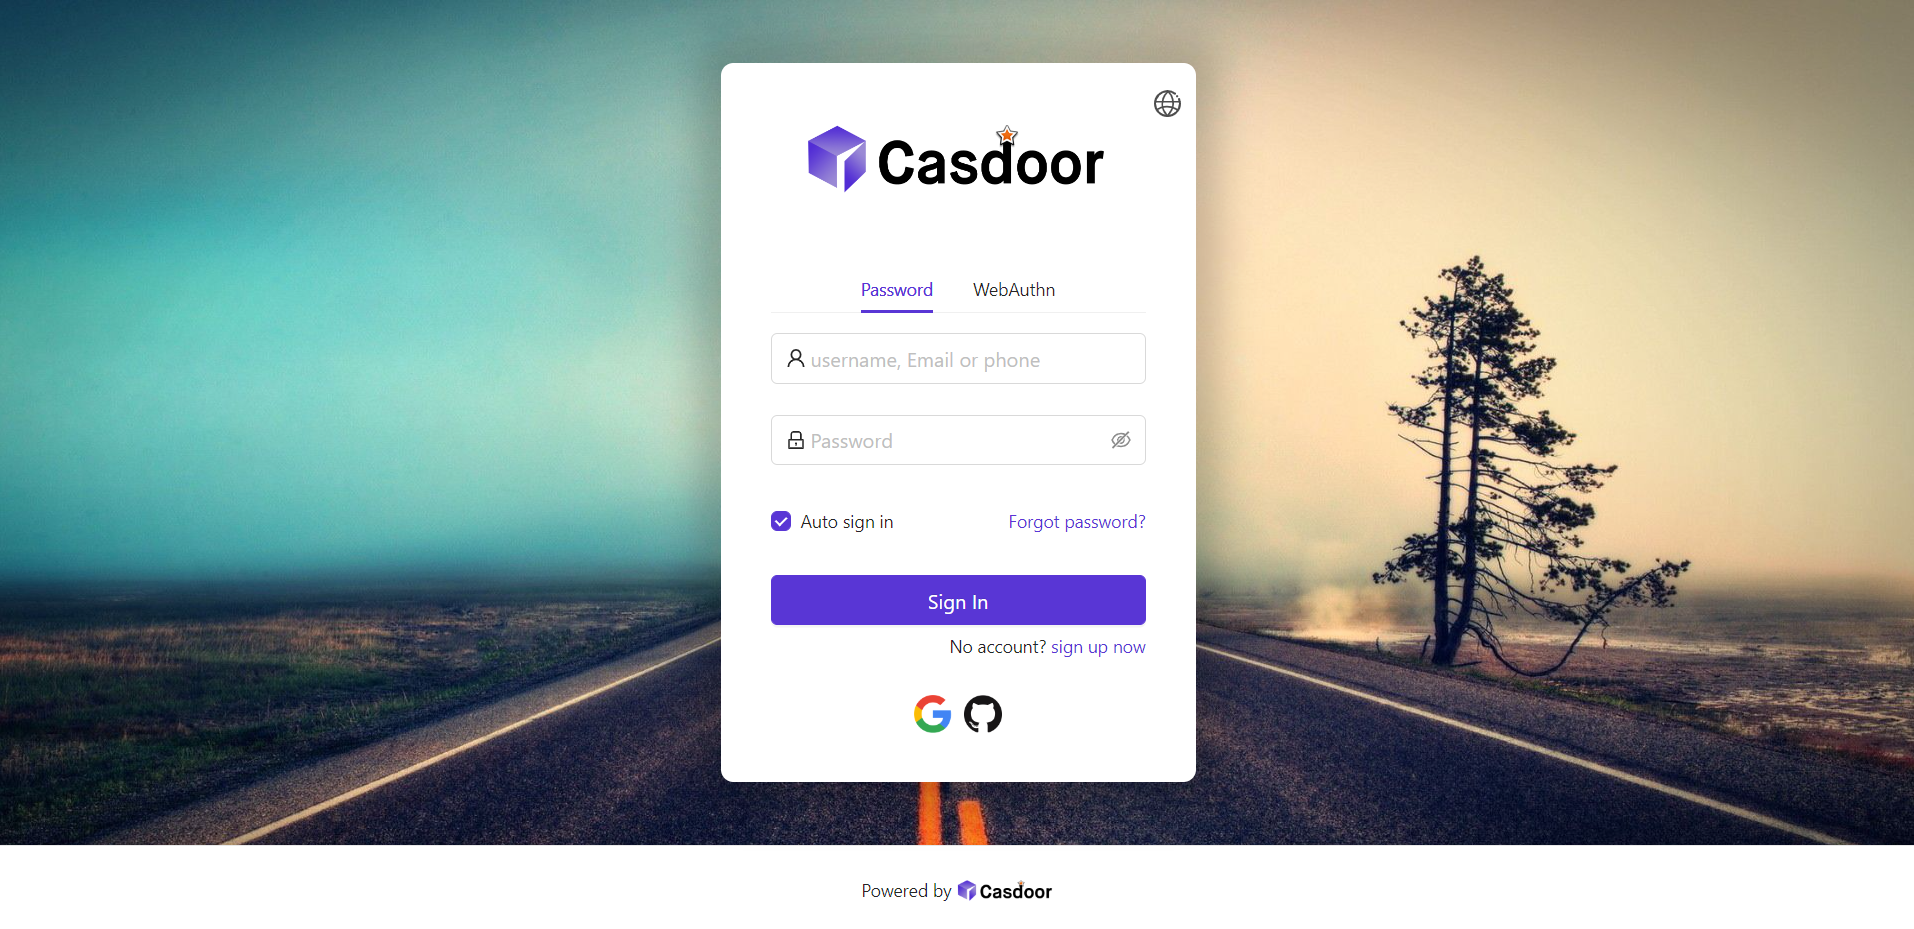
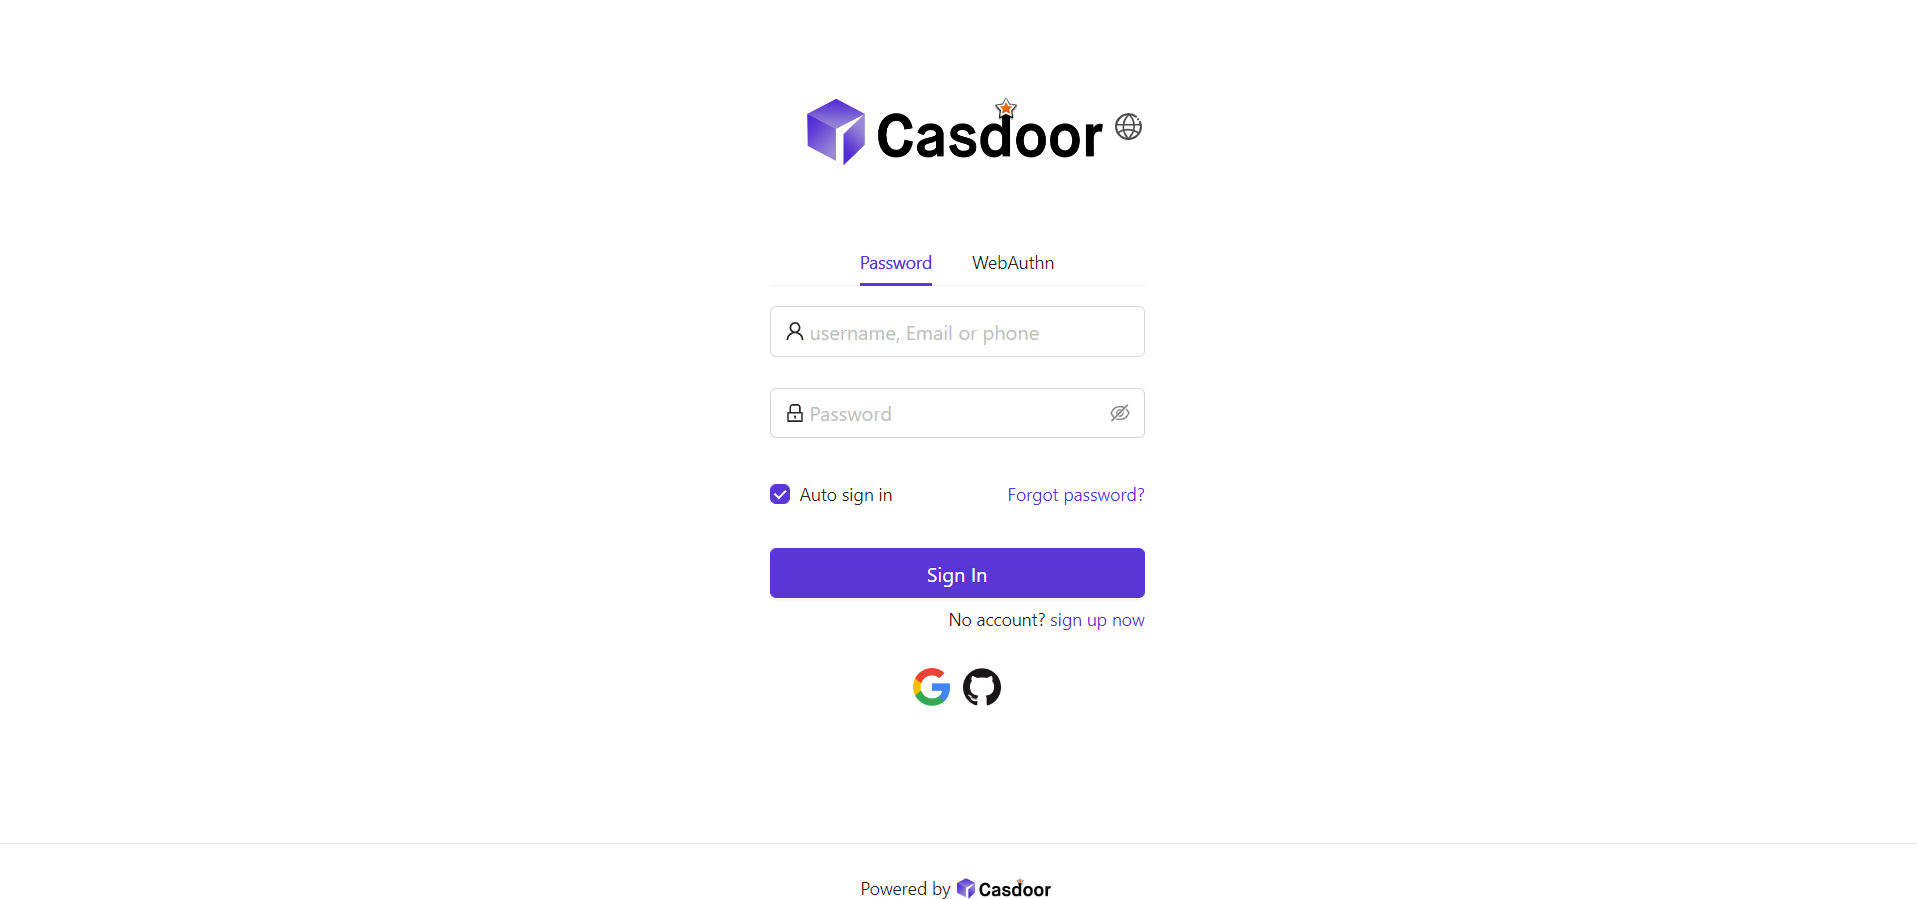
3. Panel position
Use the position buttons to place the panel on the Left, Center, or Right.
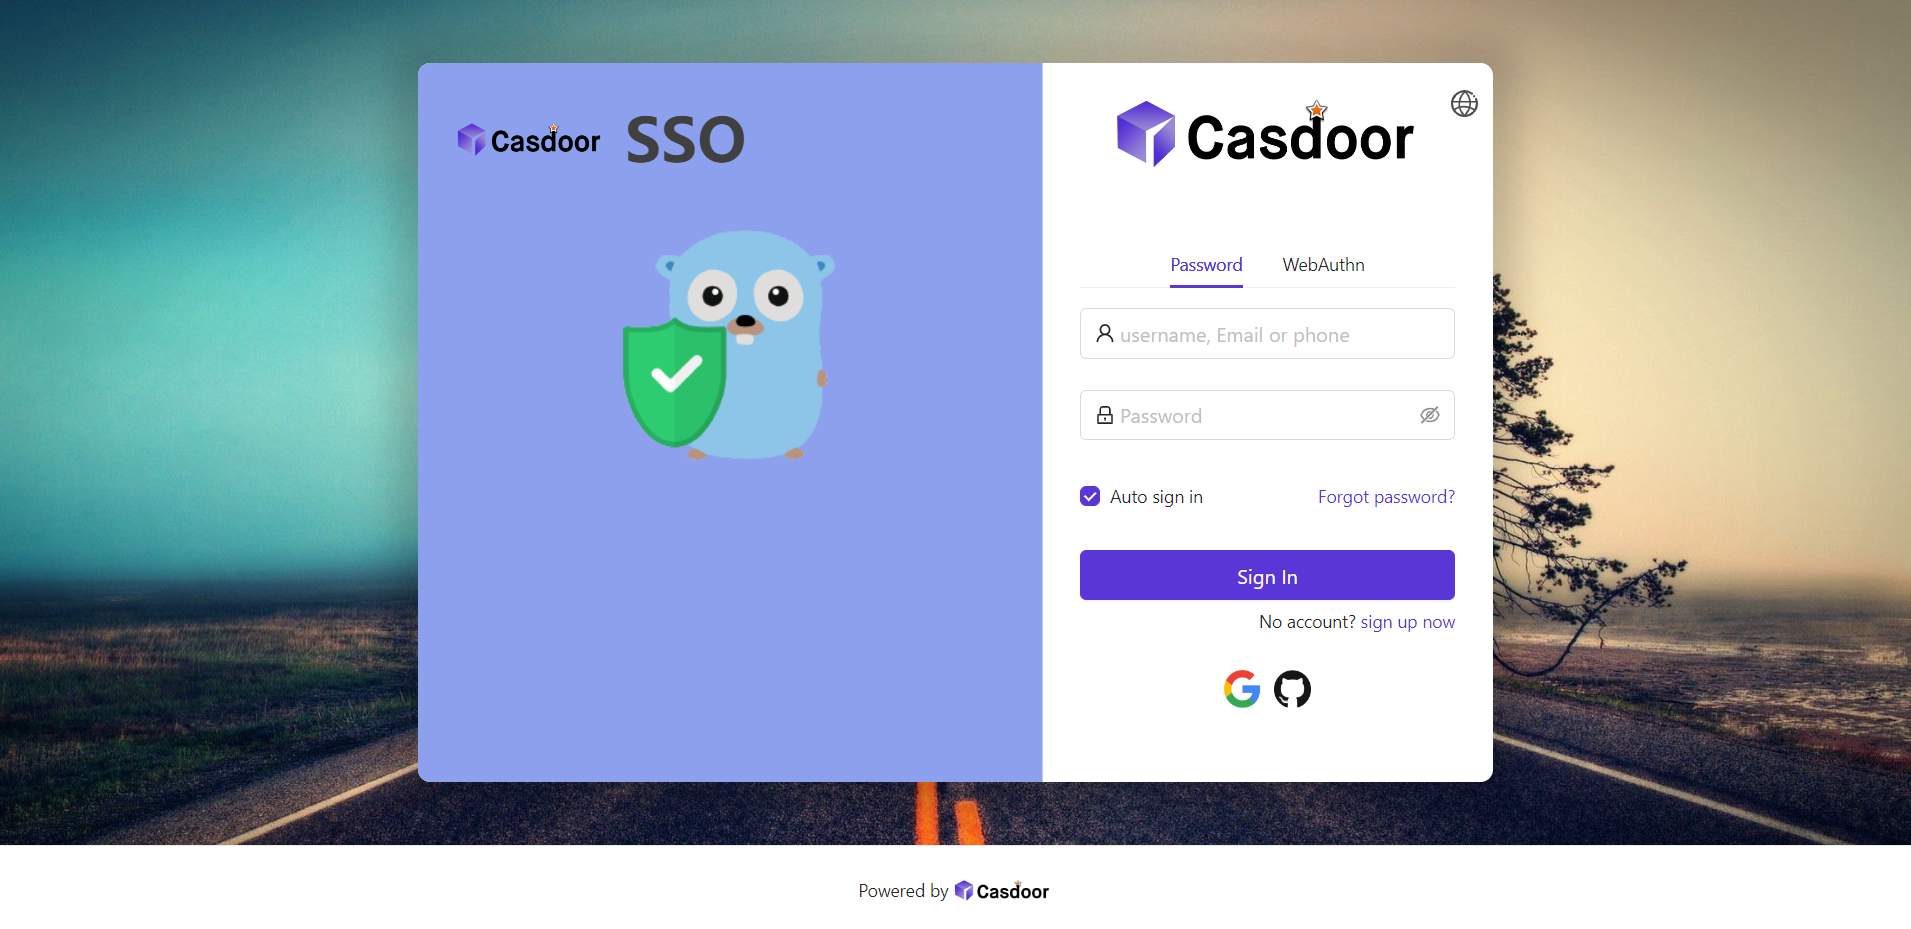
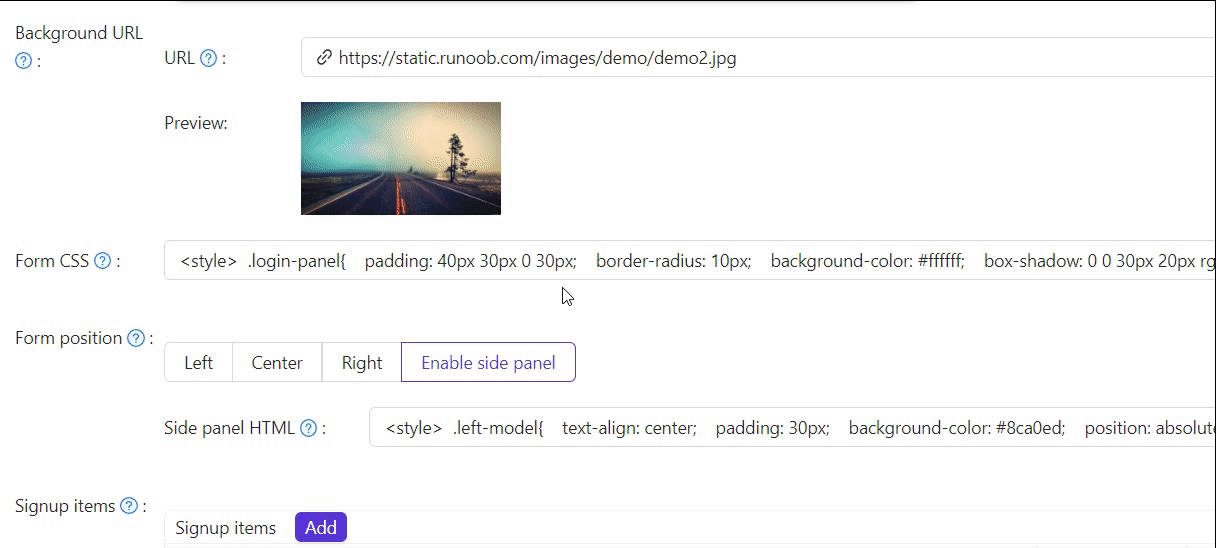
4. Side panel
Enable Enable Side Panel so the form is centered with a side area. Edit Side panel HTML for the side content; start from the default template or customize it.

Example Side panel HTML:
<style>
  .left-model{
    text-align: center;
    padding: 30px;
    background-color: #8ca0ed;
    position: absolute;
    transform: none;
    width: 100%;
    height: 100%;
  }
  .side-logo{
    display: flex;
    align-items: center;
  }
  .side-logo span {
    font-family: Montserrat, sans-serif;
    font-weight: 900;
    font-size: 2.4rem;
    line-height: 1.3;
    margin-left: 16px;
    color: #404040;
  }
  .img{
    max-width: none;
    margin: 41px 0 13px;
  }
</style>
<div class="left-model">
  <span class="side-logo"> <img src="https://cdn.casbin.org/img/casdoor-logo_1185x256.png" alt="Casdoor" style="width: 120px">
    <span>SSO</span>
  </span>
  <div class="img">
    <img src="https://cdn.casbin.org/img/casbin.svg" alt="Casdoor"/>
  </div>
</div>
Refine the layout with Form CSS (e.g. .login-panel, .login-form):
<style>
  .login-panel{
    border-radius: 10px;
    background-color: #ffffff;
    box-shadow: 0 0 30px 20px rgba(0, 0, 0, 0.20);
  }
  .login-form {
    padding: 30px;
  }
</style>
.login-panel and .login-form are the main container classes; target them in Form CSS for further customization.
Summary
Set Background URL, style Form CSS, choose panel position, and optionally enable and style Side panel HTML. See also:
- Customize theme — primary color and border radius
- Sign-up items table
- Application config