Keycloak SAML
Keycloak is an open-source IdP that supports SAML and OpenID Connect and can broker LDAP or other SAML IdPs. This guide configures a Keycloak SAML client and Casdoor so Keycloak users can sign in to Casdoor.
Keycloakの設定
Example assumptions:
- Casdoor: UI at
http://localhost:7001, API athttp://localhost:8000. Adjust for your deployment. - Keycloak: UI at
http://localhost:8080/auth. - SP ACS URL and Entity ID:
http://localhost:8000/api/acs.
The /api/acs endpoint only accepts POST requests. Ensure Keycloak is configured to use HTTP POST binding for SAML responses.
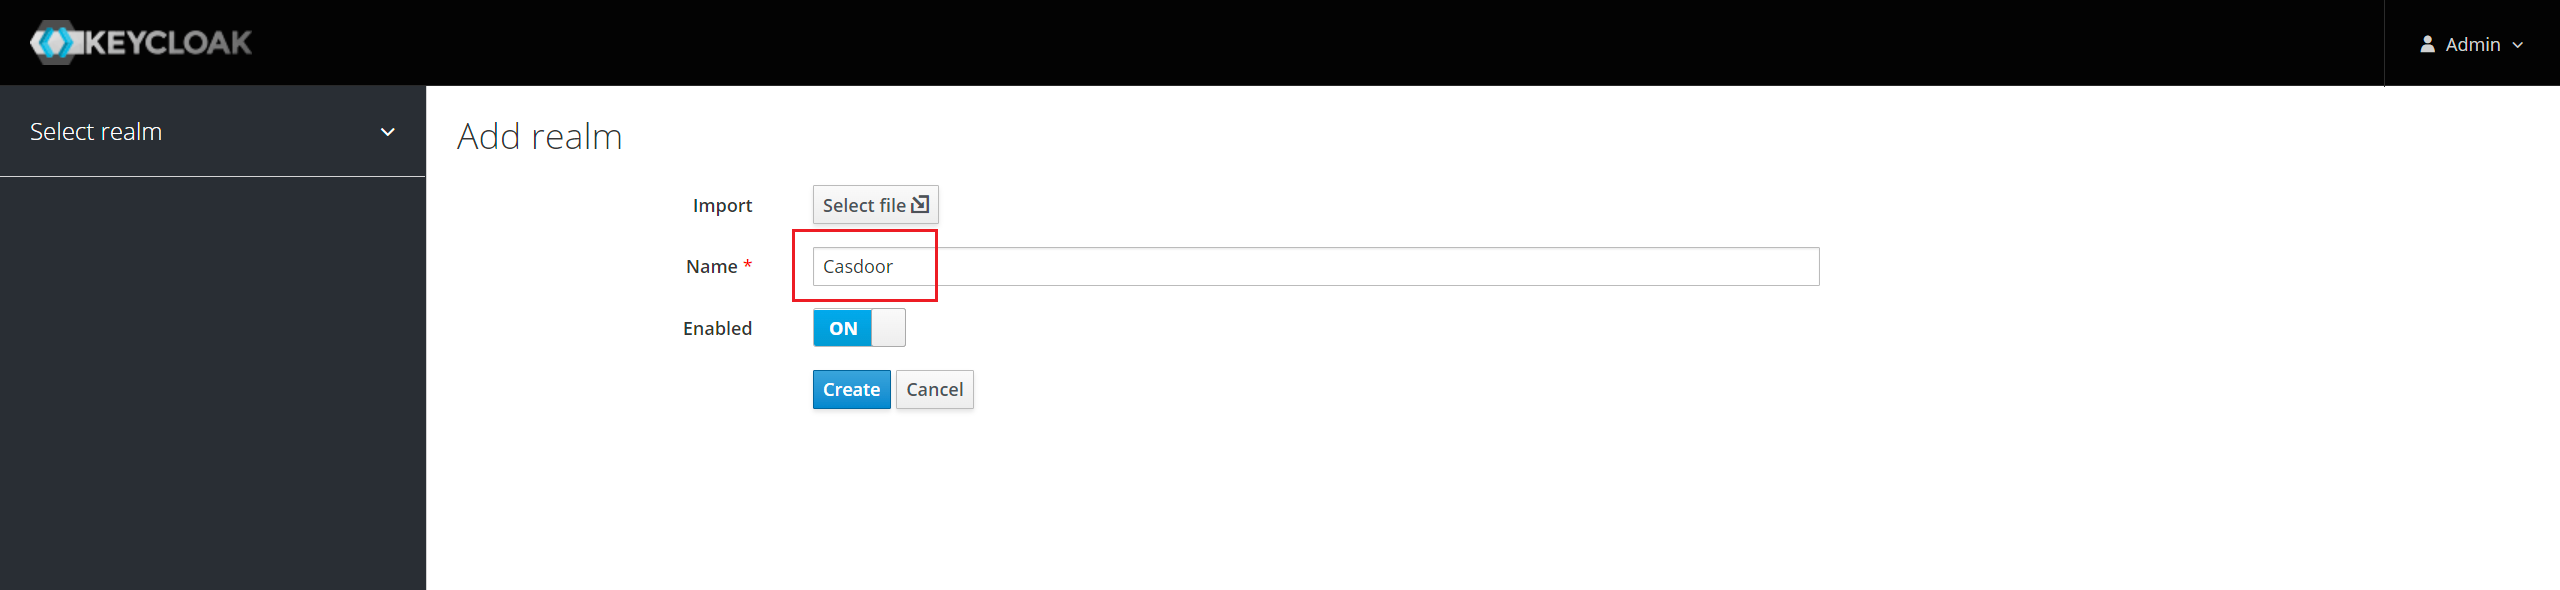
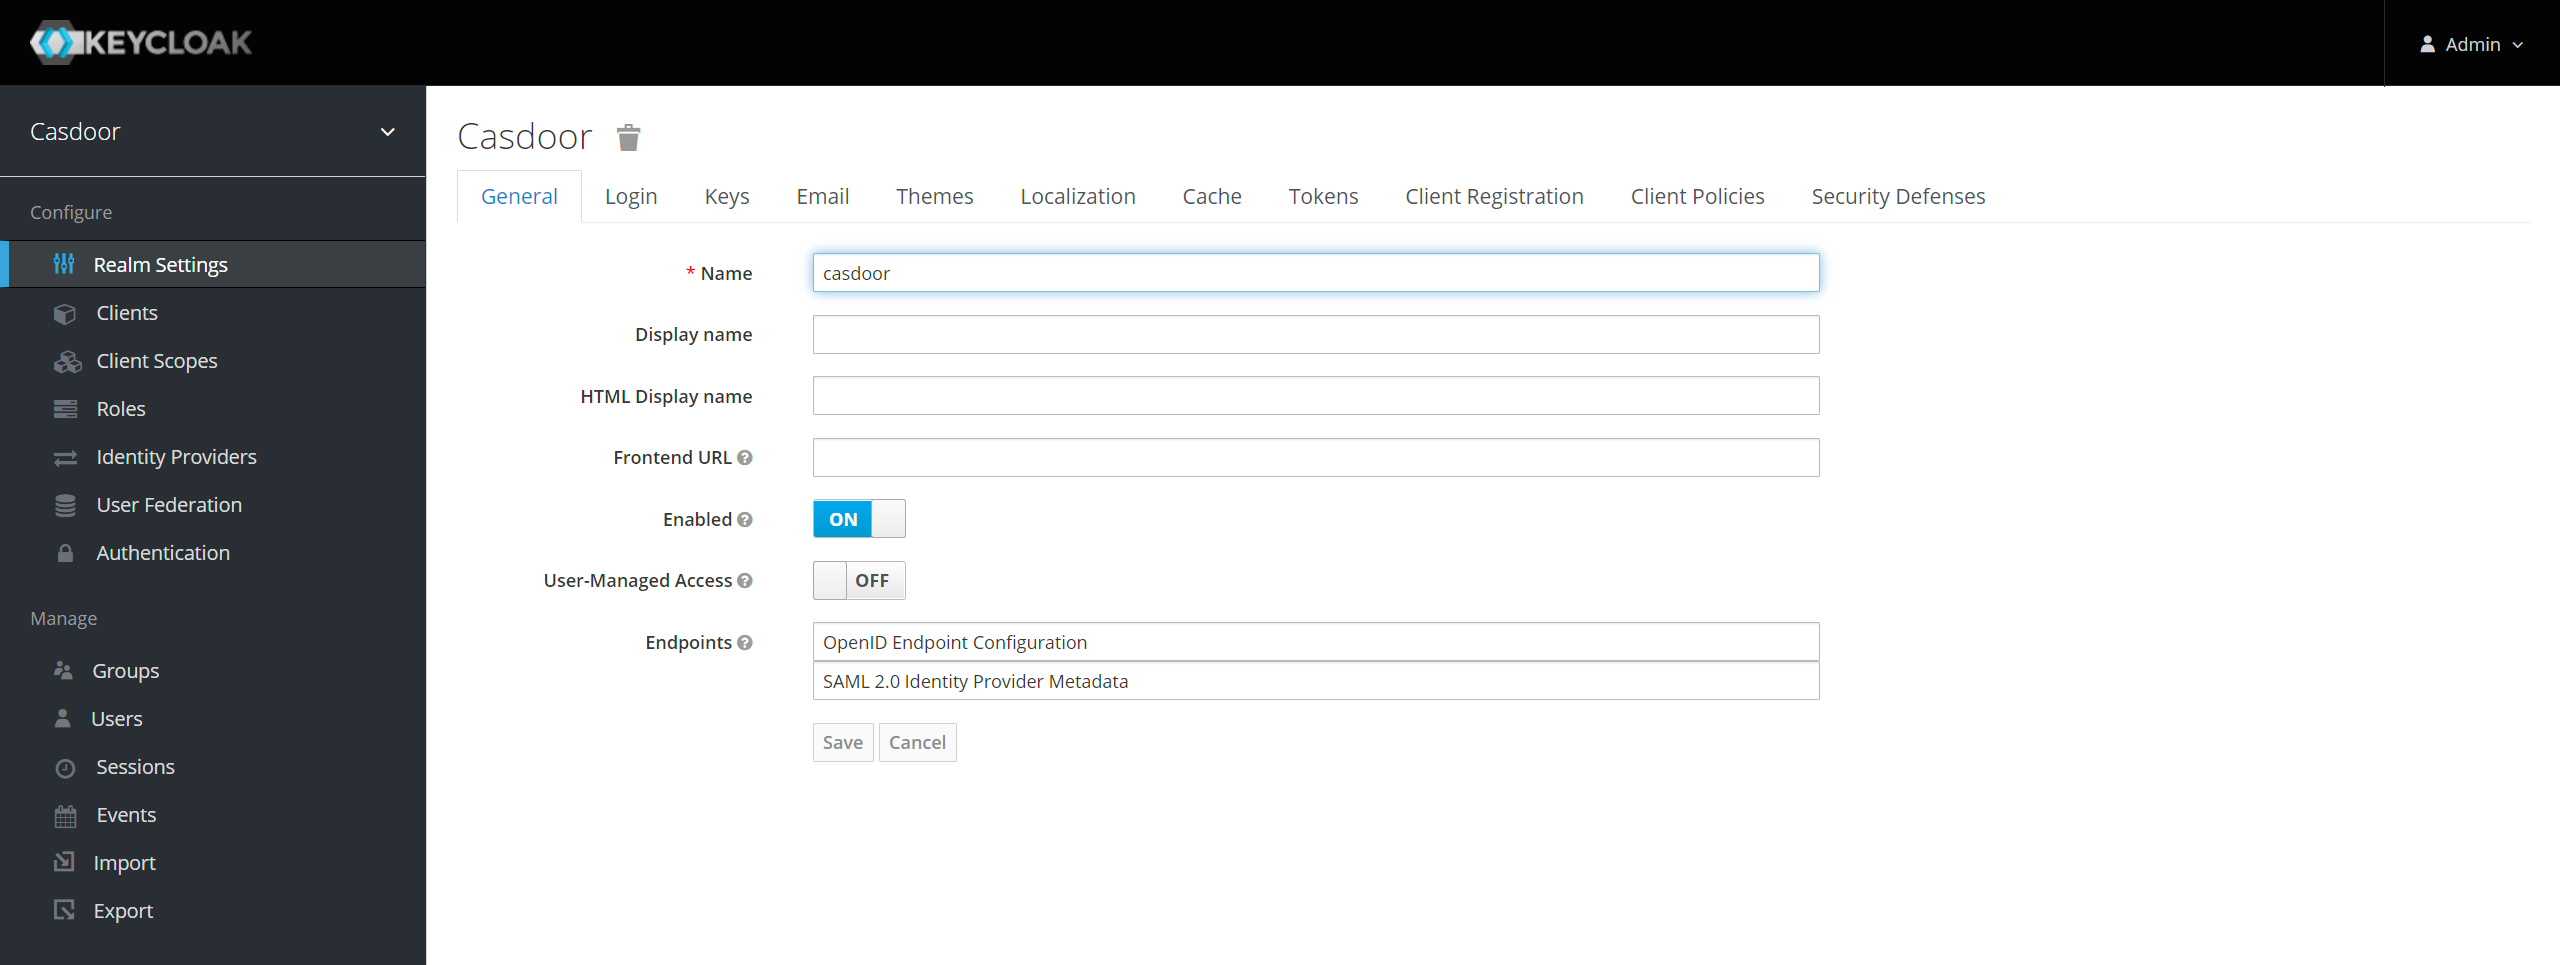
Use the default realm or create a new one.
Keycloakにクライアントエントリを追加
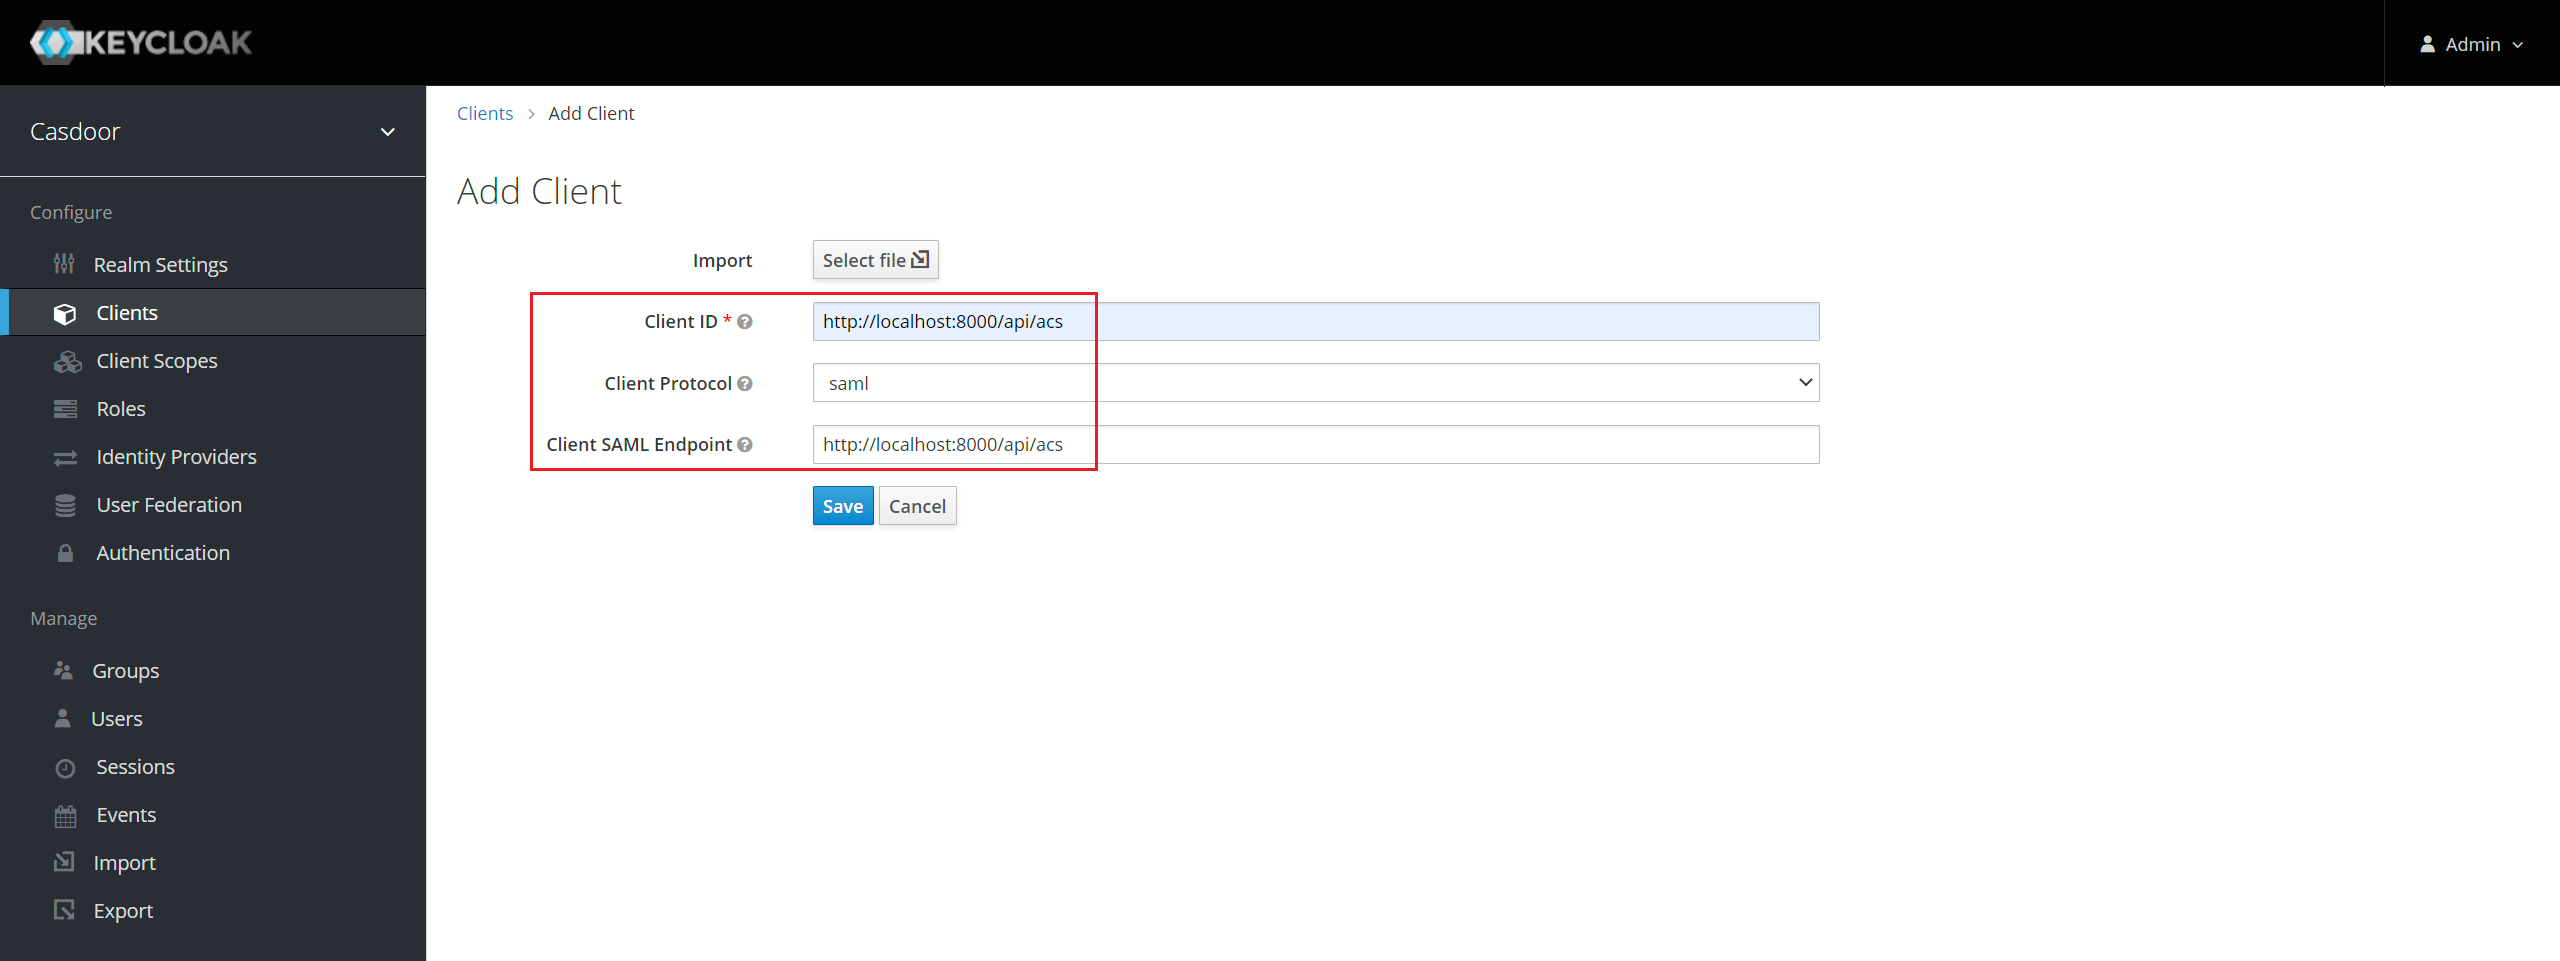
メニューのクライアントをクリックし、次に作成をクリックしてクライアント追加ページに進みます。 以下のようにフィールドを入力します:
- クライアントID:
http://localhost:8000/api/acs- これは後でCasdoor設定で使用されるSPエンティティIDになります。 - クライアントプロトコル:
saml。 - クライアントSAMLエンドポイント:
http://localhost:8000/api/acs- このURLは、KeycloakサーバーがSAMLリクエストとレスポンスを送信する場所です。 一般的に、アプリケーションはSAMLリクエストを処理するための1つのURLを持っています。 複数のURLはクライアントの設定タブで設定できます。
保存をクリック。 このアクションはクライアントを作成し、設定タブに移動します。
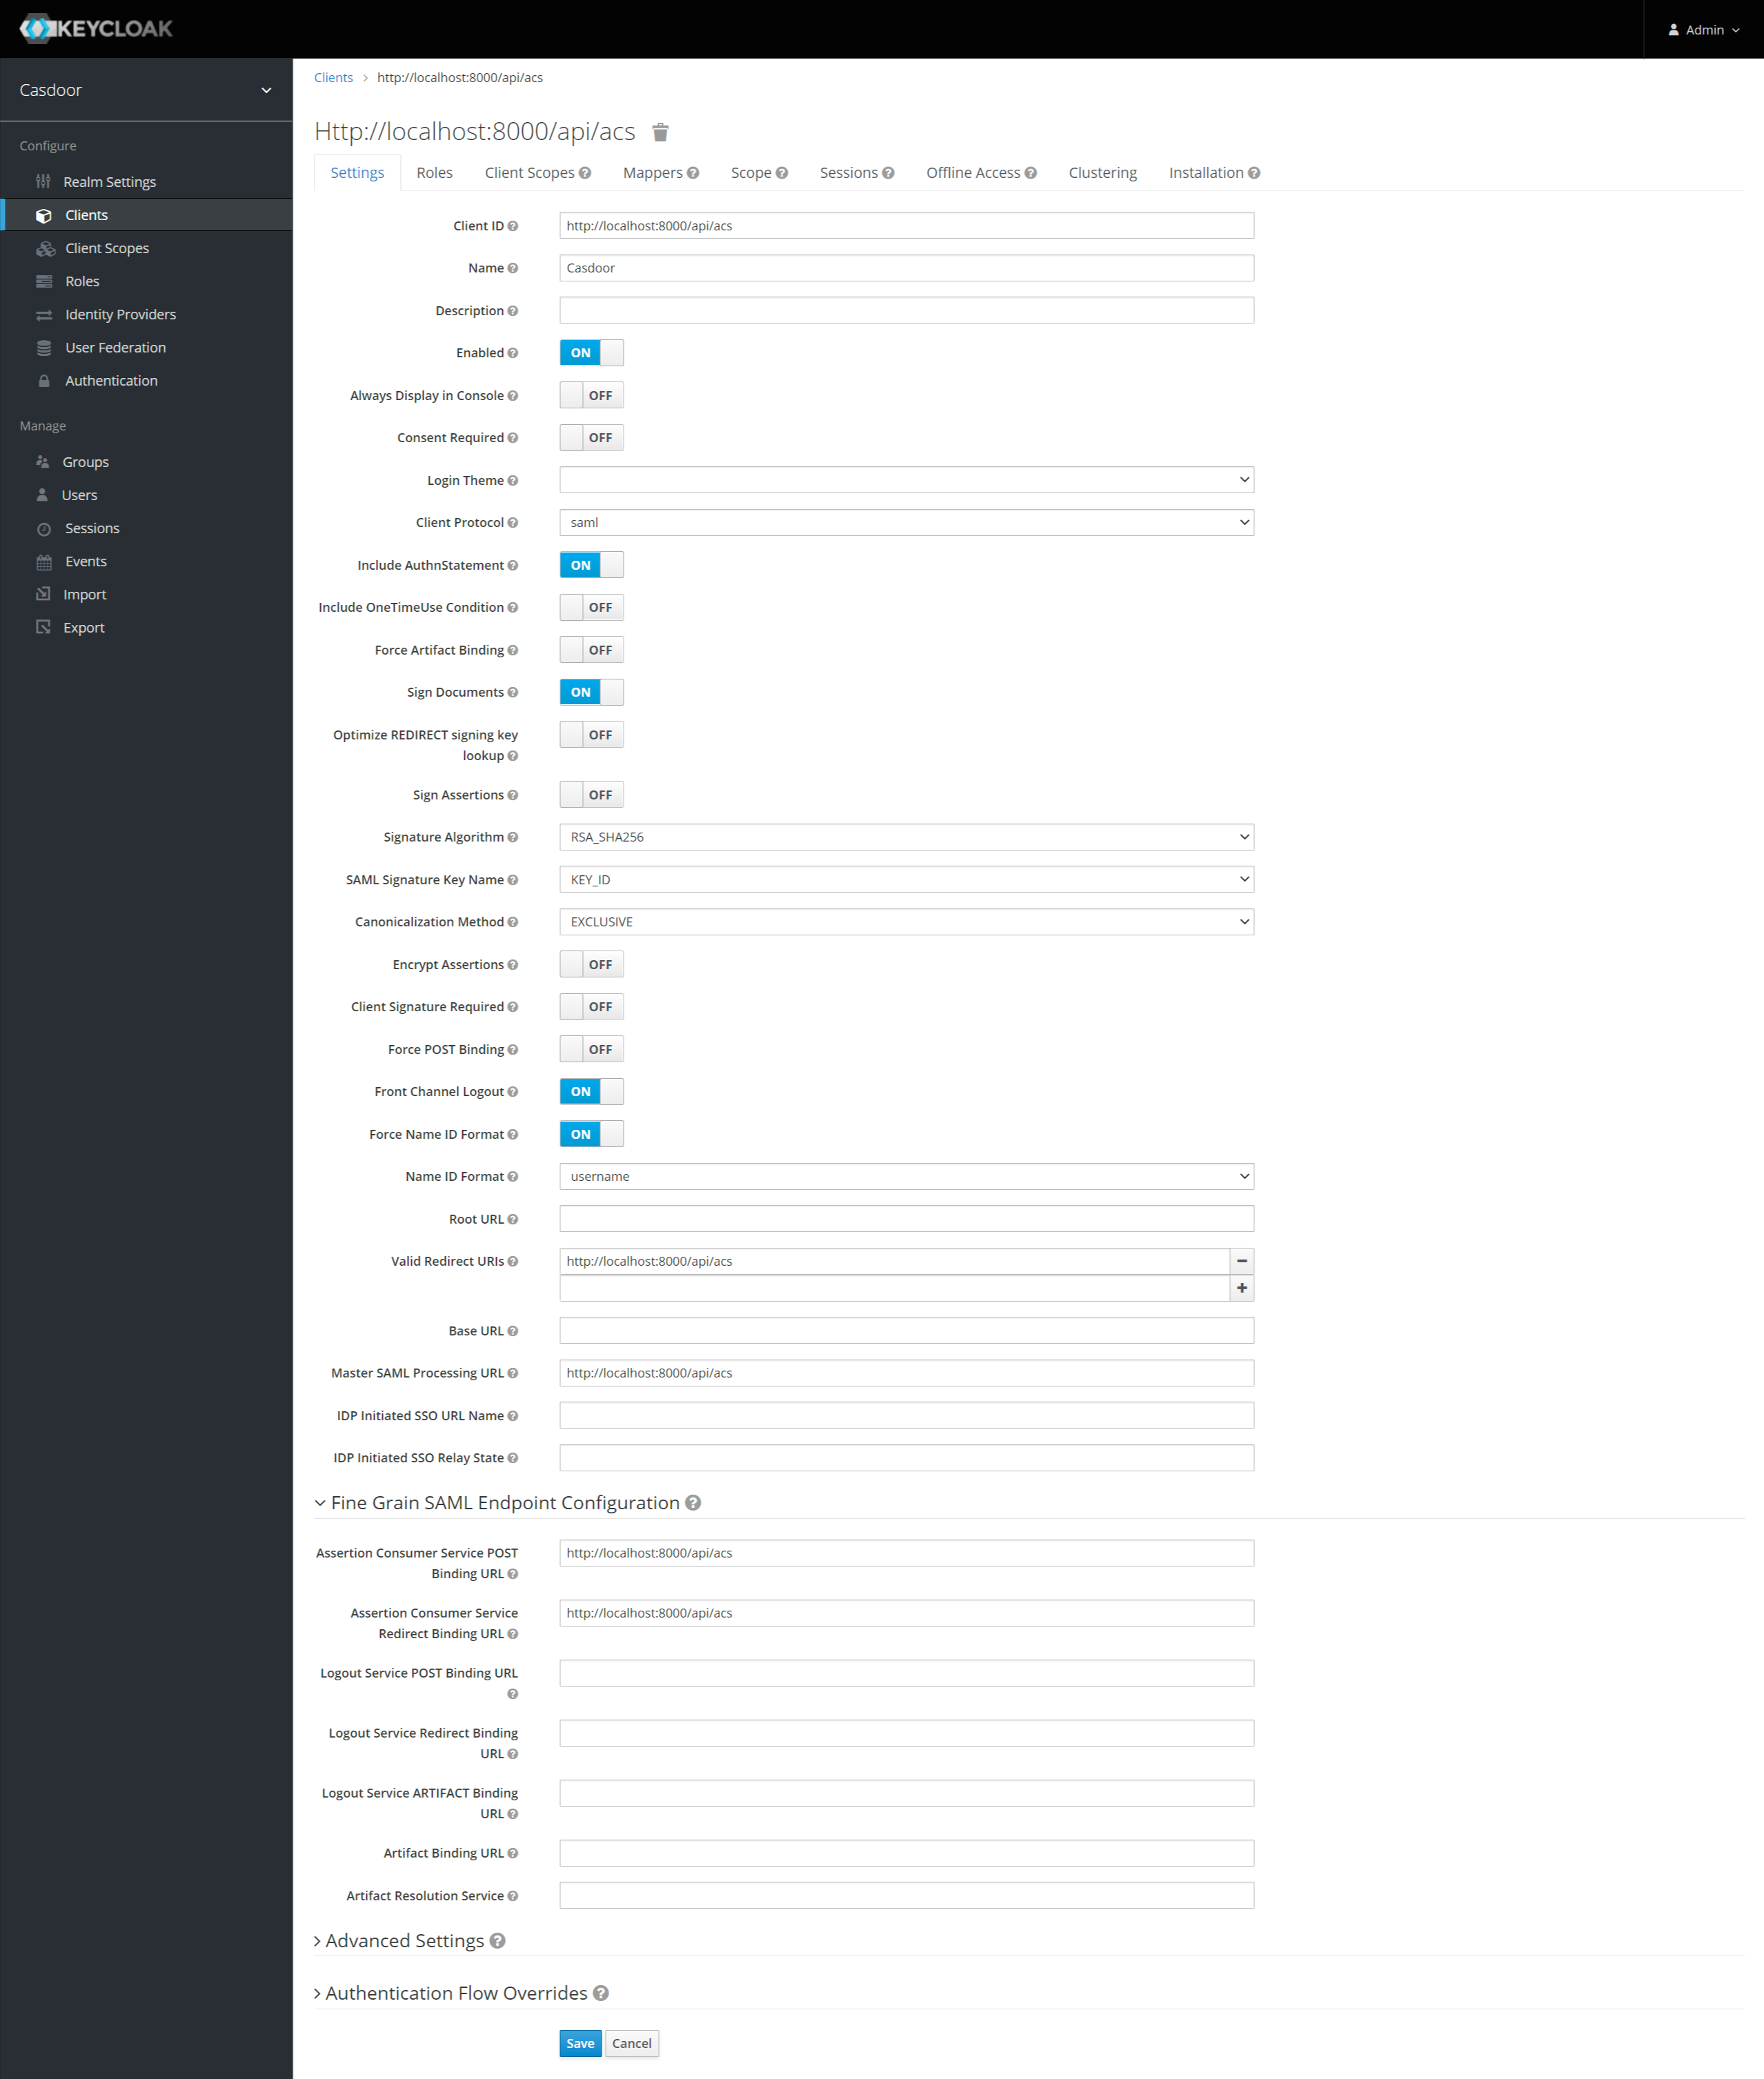
設定の一部は以下の通りです:
- Name — e.g.
Casdoor; any friendly name for the Keycloak UI. - 有効 -
onを選択。 - Authnステートメントを含む -
onを選択。 - ドキュメントに署名 -
onを選択。 - アサーションに署名 -
offを選択。 - アサーションを暗号化 -
offを選択。 - クライアント署名必須 -
offを選択。 - Name IDフォーマットを強制 -
onを選択。 - Name IDフォーマット -
usernameを選択。 - 有効なリダイレクトURI -
http://localhost:8000/api/acsを追加。 - マスターSAML処理URL -
http://localhost:8000/api/acs。 - 細かいSAMLエンドポイント設定
- アサーションコンシューマーサービスPOSTバインディングURL -
http://localhost:8000/api/acs。 - アサーションコンシューマーサービスリダイレクトバインディングURL -
http://localhost:8000/api/acs。
- アサーションコンシューマーサービスPOSTバインディングURL -
設定を保存する。
To sign the authn request: enable Client Signature Required and upload your certificate. Casdoor’s private key and certificate (token_jwt_key.key, token_jwt_key.pem) are in the object directory. In Keycloak open Keys → Import → Archive Format → Certificate PEM and upload the certificate.
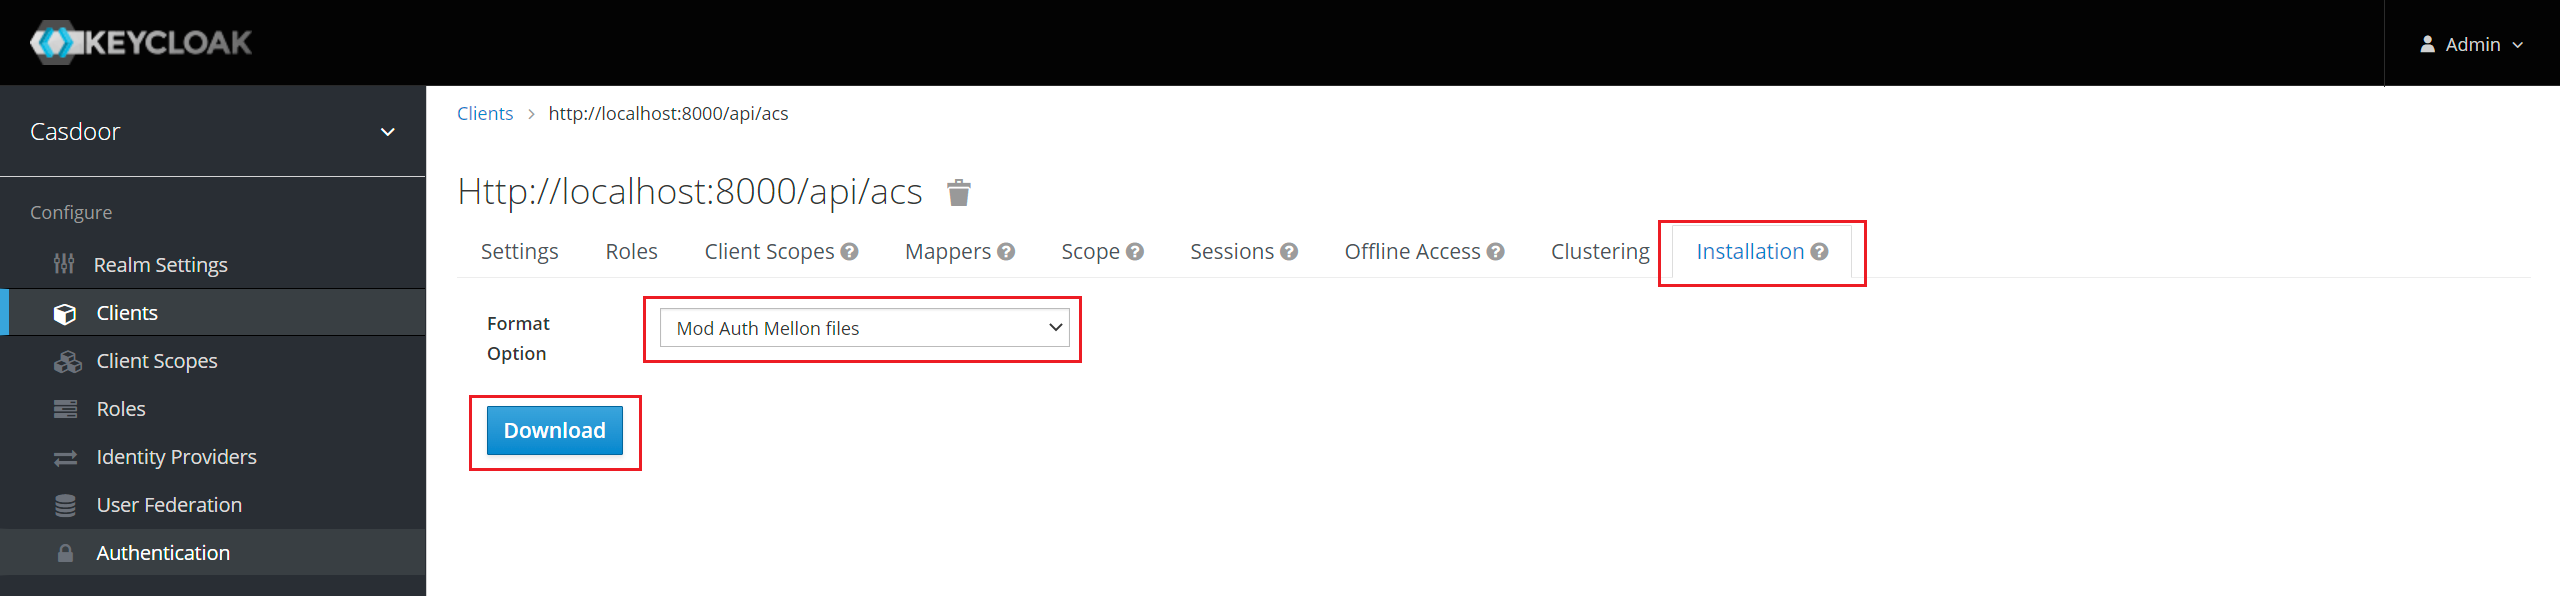
インストールタブをクリック。
For Keycloak <= 5.0.0, select Format Option - SAML Metadata IDPSSODescriptor and copy the metadata.
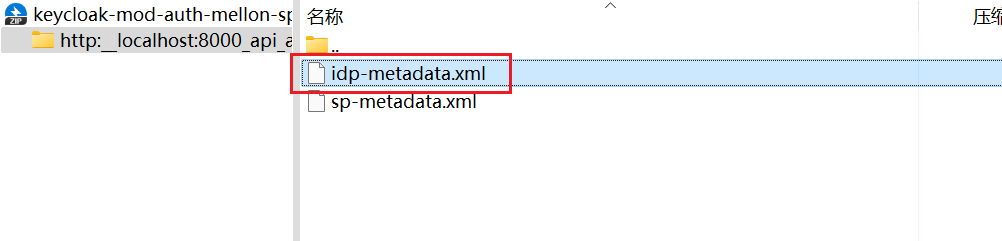
Keycloak 6.0.0+の場合、フォーマットオプション - Mod Auth Mellon filesを選択し、ダウンロードをクリック。 ダウンロードした.zipを解凍し、idp-metadata.xmlを探してメタデータをコピーします。
Casdoorでの設定
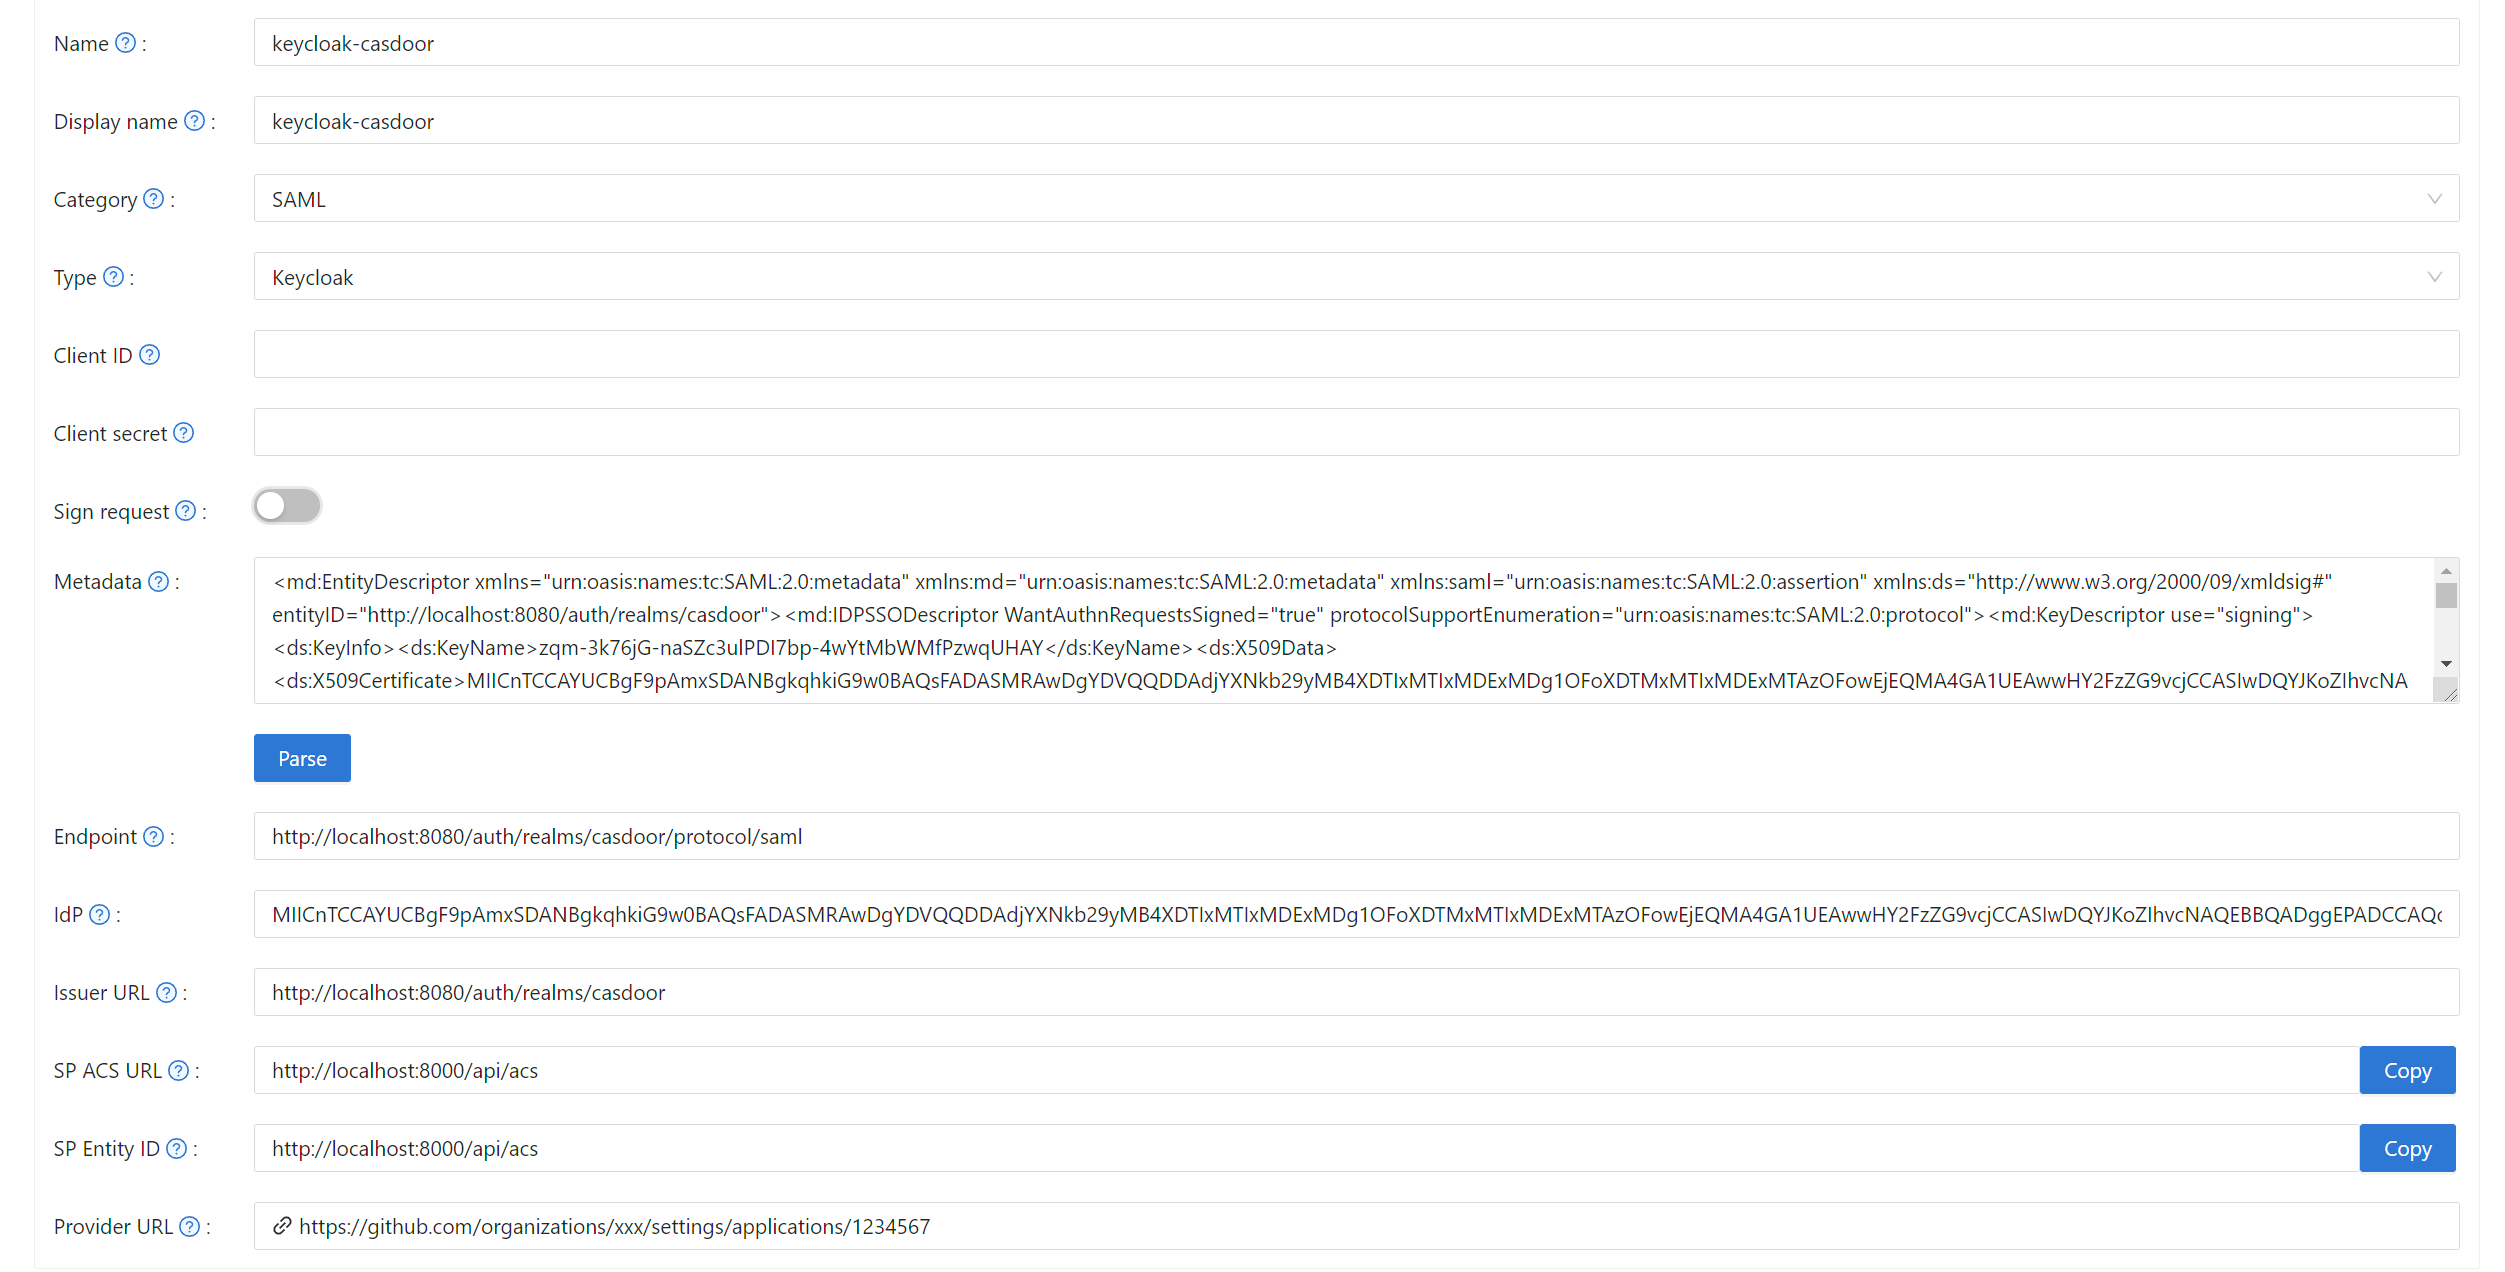
Casdoorに新しいプロバイダーを作成。
カテゴリをSAML、タイプをKeycloakとして選択。 メタデータの内容をコピーして、メタデータフィールドに貼り付けます。 エンドポイント、IdP、発行者URLの値は、解析ボタンをクリックした後に自動的に生成されます。 最後に、保存ボタンをクリックします。
If Client Signature Required is enabled in Keycloak and you uploaded a certificate, enable Sign request in Casdoor.
Casdoorで設定したいアプリケーションを編集。 追加したばかりのプロバイダーを選択し、保存ボタンをクリックします。

Test
Open the application’s login page; a Keycloak option appears. Click it to sign in via Keycloak; after success you are logged into Casdoor.