SendGrid
In this guide, we will use SendGrid as an email provider.
Step 1: Create an API Key for Your SendGrid Account
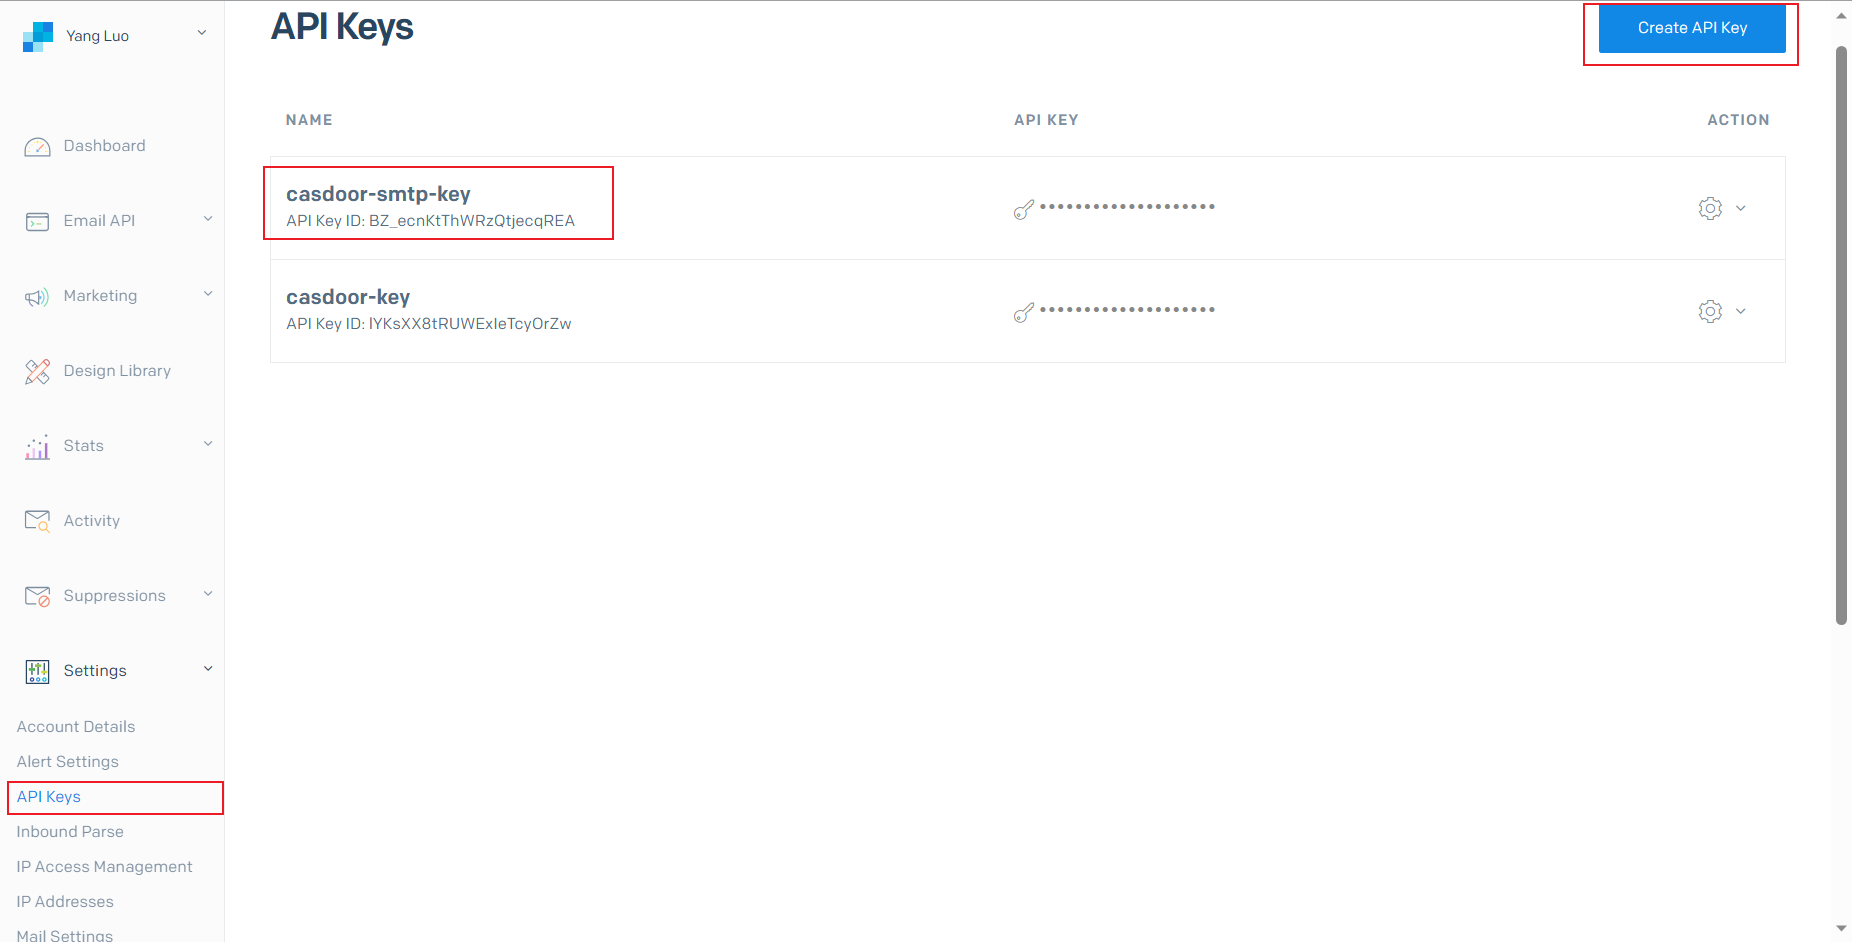
Expand Settings from the left navigation bar, then click on API Keys. Here, you will see all previously generated API keys. To create a new one, click on Create API Key and configure the necessary permissions.

Step 2: Sender Verification
To verify your email sender, choose between Single Sender Verification or Domain Authentication by referring to the official documentation:
Sender Identity
Step 3: Configure Casdoor as an Email Provider
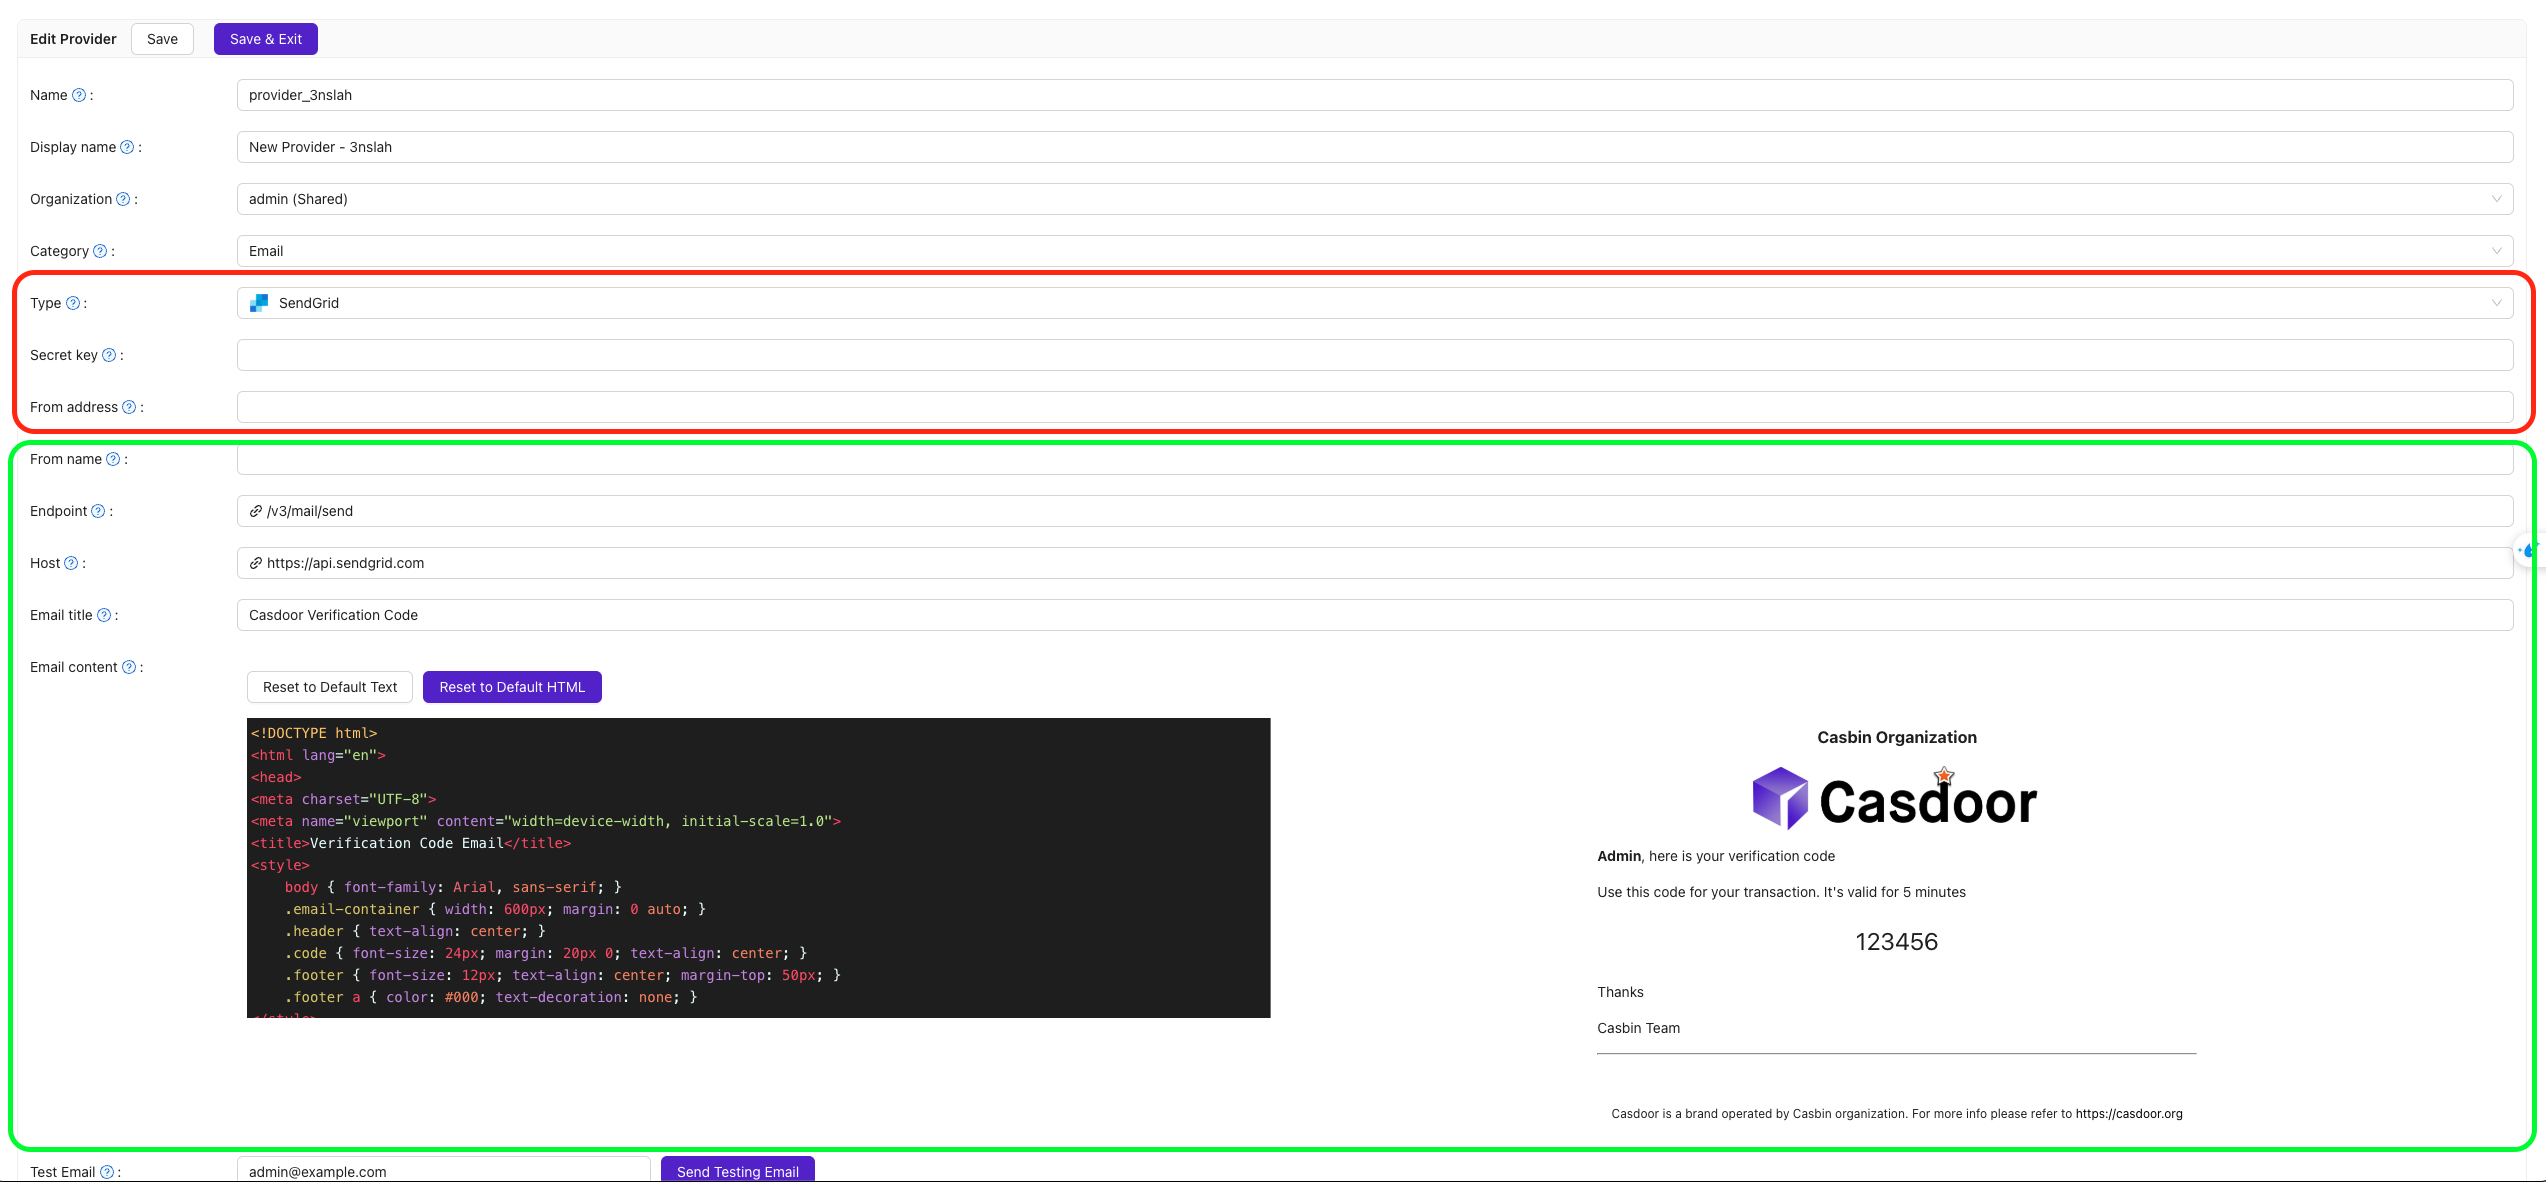
Create a SendGrid email provider in Casdoor and fill in the following fields:
Required Fields
| Field | Description |
|---|---|
| Secret Key | Your SendGrid API key |
| From Address | Your verified email address (or domain) |
Default Fields
| Field | Description |
|---|---|
| Endpoint | Default: /v3/mail/send |
| Host | Default: https://api.sendgrid.com |
Email Fields
| Field | Description |
|---|---|
| From Name | The display name of the email sender |
| Email Title | The subject of the email |
| Email Content | Supports HTML templates |
| Test Email | The recipient's email address for testing |

Finally, click on the Send Testing Email button and check your Test Email address for the test email.