Spring Security OAuth
Casdoor สามารถใช้โปรโตคอล OIDC เป็น IDP เพื่อเชื่อมต่อแอปพลิเคชันต่างๆ ในคู่มือนี้ เราจะใช้ Spring Security เป็นตัวอย่างเพื่อแสดงวิธีการใช้ OIDC เพื่อเชื่อมต่อกับแอปพลิเคชันของคุณ
ขั้นตอนที่ 1: ติดตั้ง Casdoor
ก่อนอื่น คุณต้องติดตั้ง Casdoor
คุณสามารถอ้างอิงไปยังเอกสารทางการของ Casdoor สำหรับ การติดตั้งเซิร์ฟเวอร์ ได้
หลังจากติดตั้ง Casdoor สำเร็จแล้ว ตรวจสอบให้แน่ใจว่า:
- เซิร์ฟเวอร์ Casdoor กำลังทำงานอยู่ที่ http://localhost:8000
- เปิดเบราว์เซอร์ที่คุณชอบและเยี่ยมชม http://localhost:7001 ที่นั่นคุณจะเห็นหน้าล็อกอินของ Casdoor
- ตรวจสอบให้แน่ใจว่าฟังก์ชันการล็อกอินทำงานได้ดีโดยการป้อน
adminและ123
ตอนนี้ คุณสามารถรวดเร็วในการใช้งานหน้าล็อกอินที่ใช้ Casdoor ในแอปของคุณเองโดยการทำตามขั้นตอนด้านล่าง
ขั้นตอนที่ 2 กำหนดค่าแอปพลิเคชัน Casdoor
- สร้างแอปพลิเคชัน Casdoor ใหม่หรือใช้แอปพลิเคชันที่มีอยู่
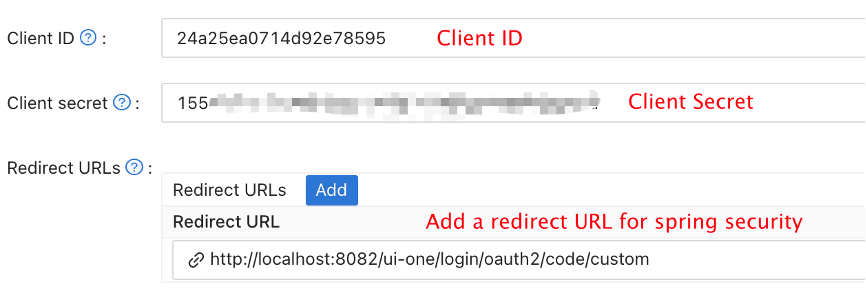
- เพิ่ม URL ที่เปลี่ยนทางของคุณ (คุณสามารถหาข้อมูลเพิ่มเติมเกี่ยวกับวิธีการได้รับ URL ที่เปลี่ยนทางในส่วนถัดไป)

- เพิ่มผู้ให้บริการที่ต้องการและกรอกการตั้งค่าเพิ่มเติม
ในหน้าการตั้งค่าแอปพลิเคชัน คุณจะพบค่าสองค่า: Client ID และ Client secret ตามที่แสดงในภาพด้านบน เราจะใช้ค่าเหล่านี้ในขั้นตอนถัดไป
เปิดเบราว์เซอร์ที่คุณชอบและเยี่ยมชม: http://CASDOOR_HOSTNAME/.well-known/openid-configuration ที่นี่ คุณจะพบการกำหนดค่า OIDC ของ Casdoor
ขั้นตอนที่ 3 กำหนดค่า Spring Security
Spring Security รองรับ OIDC โดยธรรมชาติ
คุณสามารถปรับแต่งการตั้งค่าของ Spring Security OAuth2 Client ได้:
คุณควรจะแทนที่การตั้งค่าด้วยข้อมูลของ Casdoor ของคุณเอง โดยเฉพาะ <Client ID> และอื่นๆ
- application.yml
- application.properties
spring:
  security:
    oauth2:
      client:
        registration:
          casdoor:
            client-id: <Client ID>
            client-secret: <Client Secret>
            scope: <Scope>
            authorization-grant-type: authorization_code
            redirect-uri: <Redirect URL>
        provider:
          casdoor:
            authorization-uri: http://CASDOOR_HOSTNAME:7001/login/oauth/authorize
            token-uri: http://CASDOOR_HOSTNAME:8000/api/login/oauth/access_token
            user-info-uri: http://CASDOOR_HOSTNAME:8000/api/get-account
            user-name-attribute: name
spring.security.oauth2.client.registration.casdoor.client-id=<Client ID>
spring.security.oauth2.client.registration.casdoor.client-secret=<Client Secret>
spring.security.oauth2.client.registration.casdoor.scope=<Scope>
spring.security.oauth2.client.registration.casdoor.authorization-grant-type=authorization_code
spring.security.oauth2.client.registration.casdoor.redirect-uri=<Redirect URL>

spring.security.oauth2.client.provider.casdoor.authorization-uri=http://CASDOOR_HOSTNAME:7001/login/oauth/authorize
spring.security.oauth2.client.provider.casdoor.token-uri=http://CASDOOR_HOSTNAME:8000/api/login/oauth/access_token
spring.security.oauth2.client.provider.casdoor.user-info-uri=http://CASDOOR_HOSTNAME:8000/api/get-account
spring.security.oauth2.client.provider.casdoor.user-name-attribute=name
สำหรับสถานการณ์เริ่มต้นของ Spring Security <Redirect URL> ควรเป็นแบบ http://<Your Spring Boot Application Endpoint>/<Servlet Prefix if it is configured>/login/oauth2/code/custom ตัวอย่างเช่น ในการสาธิตต่อไปนี้ URL ที่เปลี่ยนทางควรเป็น http://localhost:8080/login/oauth2/code/custom
คุณควรจะกำหนดค่านี้ในแอปพลิเคชัน casdoor ด้วย
คุณยังสามารถปรับแต่งการตั้งค่าโดยใช้ ClientRegistration ในโค้ดของคุณ คุณสามารถหาการแมปปิ้ง ที่นี่
ขั้นตอนที่ 4: เริ่มต้นกับการสาธิต
เราสามารถสร้างแอปพลิเคชัน Spring Boot
เราสามารถเพิ่มการกำหนดค่าที่ป้องกันทุกเอนด์พอยต์ยกเว้น
/และ/login**เพื่อให้ผู้ใช้สามารถล็อกอินได้@EnableWebSecurity
public class UiSecurityConfig extends WebSecurityConfigurerAdapter {
@Override
protected void configure(HttpSecurity http) throws Exception {
http.authorizeRequests()
.antMatchers("/", "/login**")
.permitAll()
.anyRequest()
.authenticated()
.and()
.oauth2Login();
}
}เราสามารถเพิ่มหน้าง่ายๆ สำหรับผู้ใช้เพื่อล็อกอิน
<!DOCTYPE html>
<html lang="en">
<head>
<meta http-equiv="Content-Type" content="text/html; charset=utf-8" />
<title>Spring OAuth Client Thymeleaf - 1</title>
<link rel="stylesheet"
    href="https://stackpath.bootstrapcdn.com/bootstrap/4.1.3/css/bootstrap.min.css" />
</head>
<body>
    <nav
        class="navbar navbar-expand-lg navbar-light bg-light shadow-sm p-3 mb-5">
        <a class="navbar-brand" th:href="@{/foos/}">Spring OAuth Client
            Thymeleaf - 1</a>
    </nav>
    <div class="container">
        <label>Welcome!</label> <br /> <a th:href="@{/foos/}"
            class="btn btn-primary">Login</a>
    </div>
</body>
</html>
เมื่อผู้ใช้คลิกปุ่ม
loginพวกเขาจะถูกเปลี่ยนทางไปยังcasdoorต่อไป เราสามารถกำหนดทรัพยากรที่ได้รับการป้องกันของเรา เราสามารถเปิดเผยเอนด์พอยต์ที่เรียกว่า
/foosและหน้าเว็บสำหรับการแสดงโมเดลข้อมูล
public class FooModel {
    private Long id;
    private String name;

    public FooModel(Long id, String name) {
        super();
        this.id = id;
        this.name = name;
    }
    public Long getId() {
        return id;
    }
    public void setId(Long id) {
        this.id = id;
    }
    public String getName() {
        return name;
    }
    public void setName(String name) {
        this.name = name;
    }
}
คอนโทรลเลอร์
@Controller
public class FooClientController {
    @GetMapping("/foos")
    public String getFoos(Model model) {
        List<FooModel> foos = new ArrayList<>();
        foos.add(new FooModel(1L, "a"));
        foos.add(new FooModel(2L, "b"));
        foos.add(new FooModel(3L, "c"));
        model.addAttribute("foos", foos);
        return "foos";
    }
}
หน้าเว็บ
<!DOCTYPE html>
<html lang="en">
<head>
<meta http-equiv="Content-Type" content="text/html; charset=utf-8" />
<title>Spring OAuth Client Thymeleaf - 1</title>
<link rel="stylesheet"
href="https://stackpath.bootstrapcdn.com/bootstrap/4.1.3/css/bootstrap.min.css" />
</head>
<body>
<nav
class="navbar navbar-expand-lg navbar-light bg-light shadow-sm p-3 mb-5">
<a class="navbar-brand" th:href="@{/foos/}">Spring OAuth Client
Thymeleaf -1</a>
<ul class="navbar-nav ml-auto">
<li class="navbar-text">Hi, <span sec:authentication="name">preferred_username</span> </li>
</ul>
</nav>
<div class="container">
<h1>All Foos:</h1>
<table class="table table-bordered table-striped">
<thead>
<tr>
<td>ID</td>
<td>Name</td>
</tr>
</thead>
<tbody>
<tr th:if="${foos.empty}">
<td colspan="4">No foos</td>
</tr>
<tr th:each="foo : ${foos}">
<td>
<span th:text="${foo.id}">ID</span>
</td>
<td>
<span th:text="${foo.name}">Name</span>
</td>
</tr>
</tbody>
</table>
</div>
</body>
</html>
แม่แบบหน้าเว็บทั้งหมดควรถูกวางไว้ใต้ resources/templates
ขั้นตอนที่ 5: ลองใช้การสาธิต!
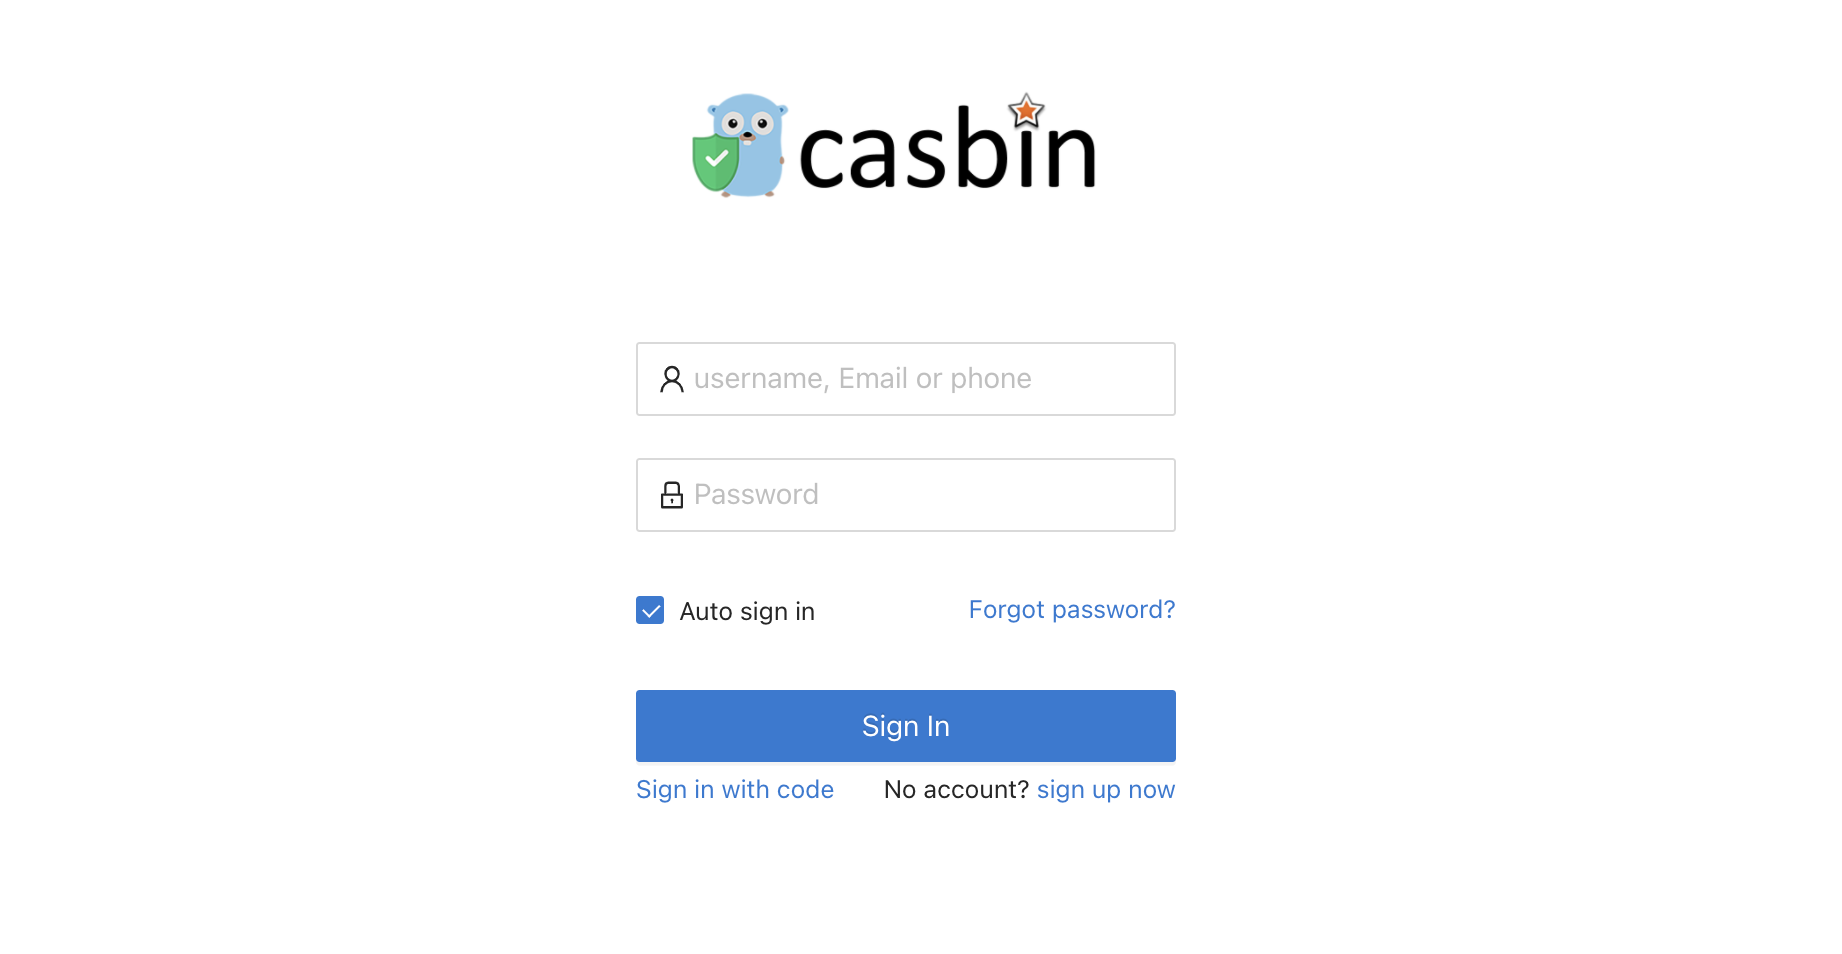
ก่อนอื่น คุณสามารถลองเปิดเบราว์เซอร์ที่คุณชอบและเยี่ยมชม /foos โดยตรง มันจะเปลี่ยนทางคุณไปยังหน้าล็อกอินของ Casdoor โดยอัตโนมัติ คุณสามารถล็อกอินที่นั่นหรือจากหน้าราก
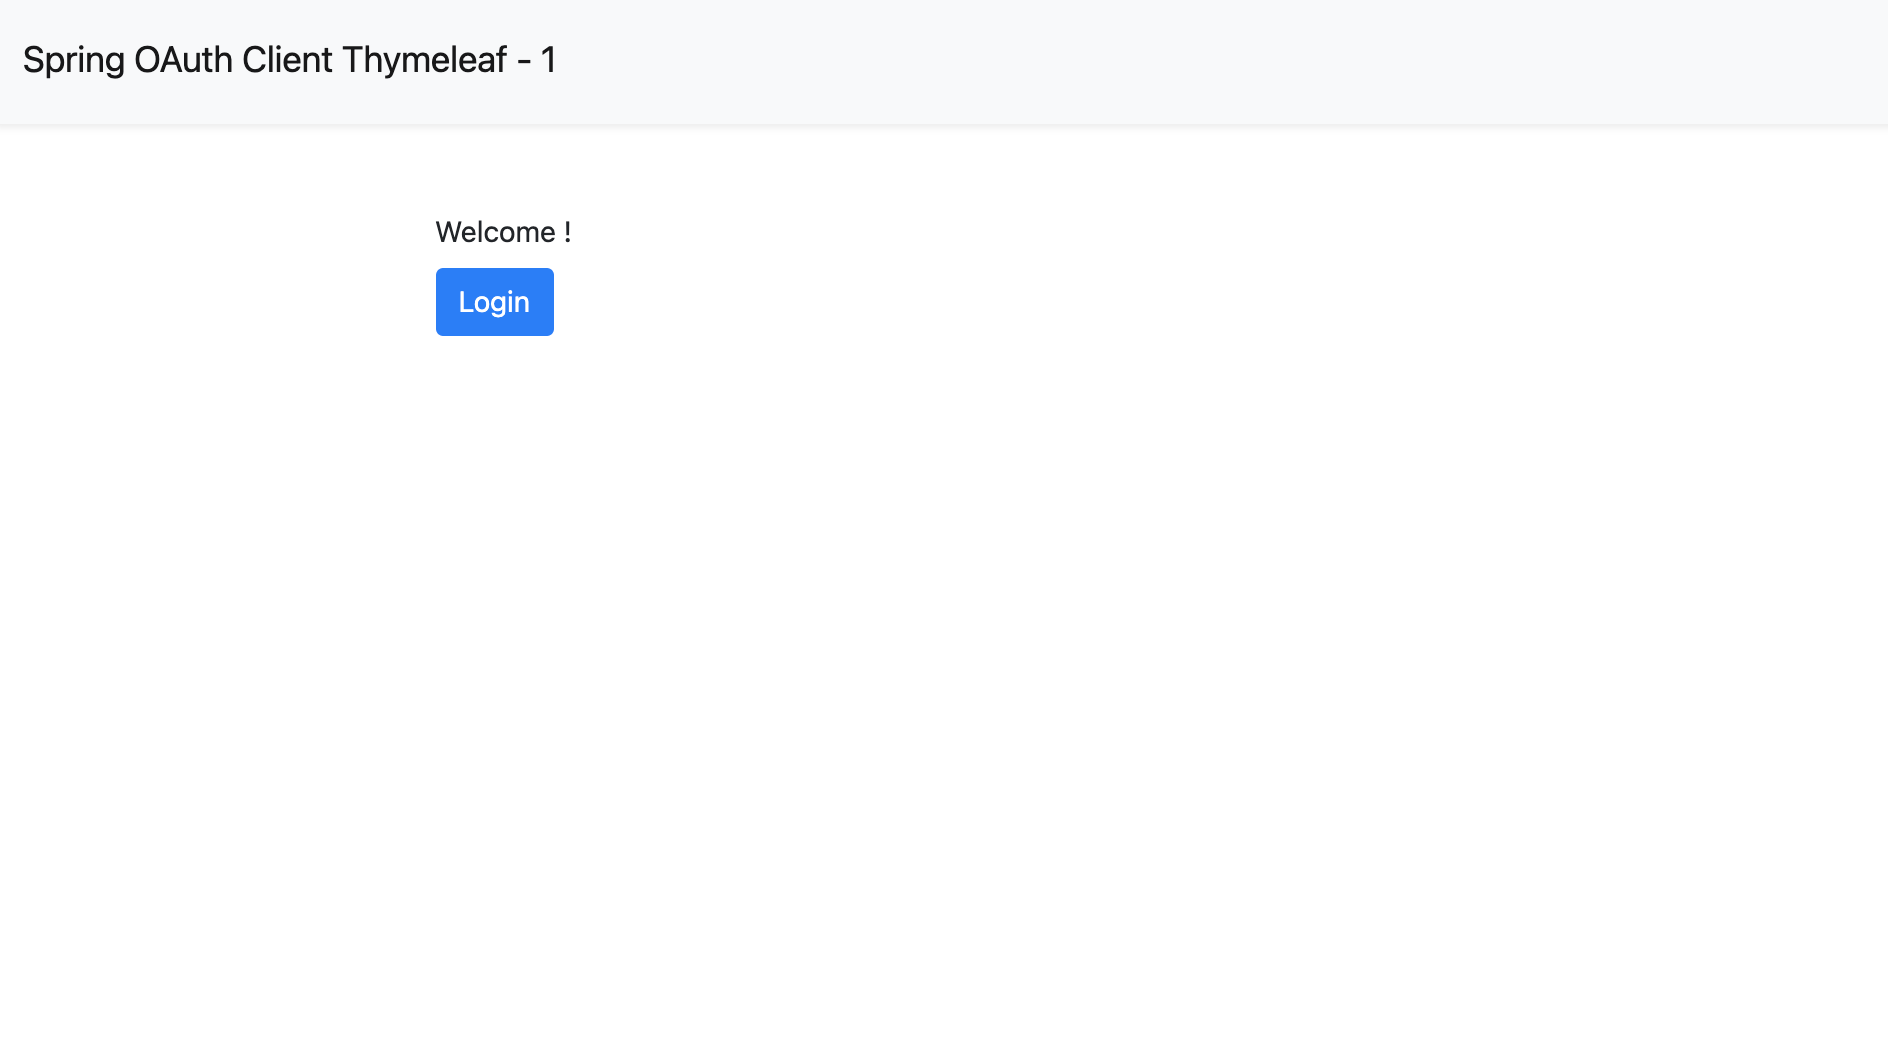
หากคุณเข้าชมหน้า root ของคุณ คุณจะเห็นการตั้งค่าแอปพลิเคชัน Casdoor
คลิกปุ่ม login และหน้าจะเปลี่ยนเส้นทางคุณไปยังหน้าล็อกอินของ Casdoor 
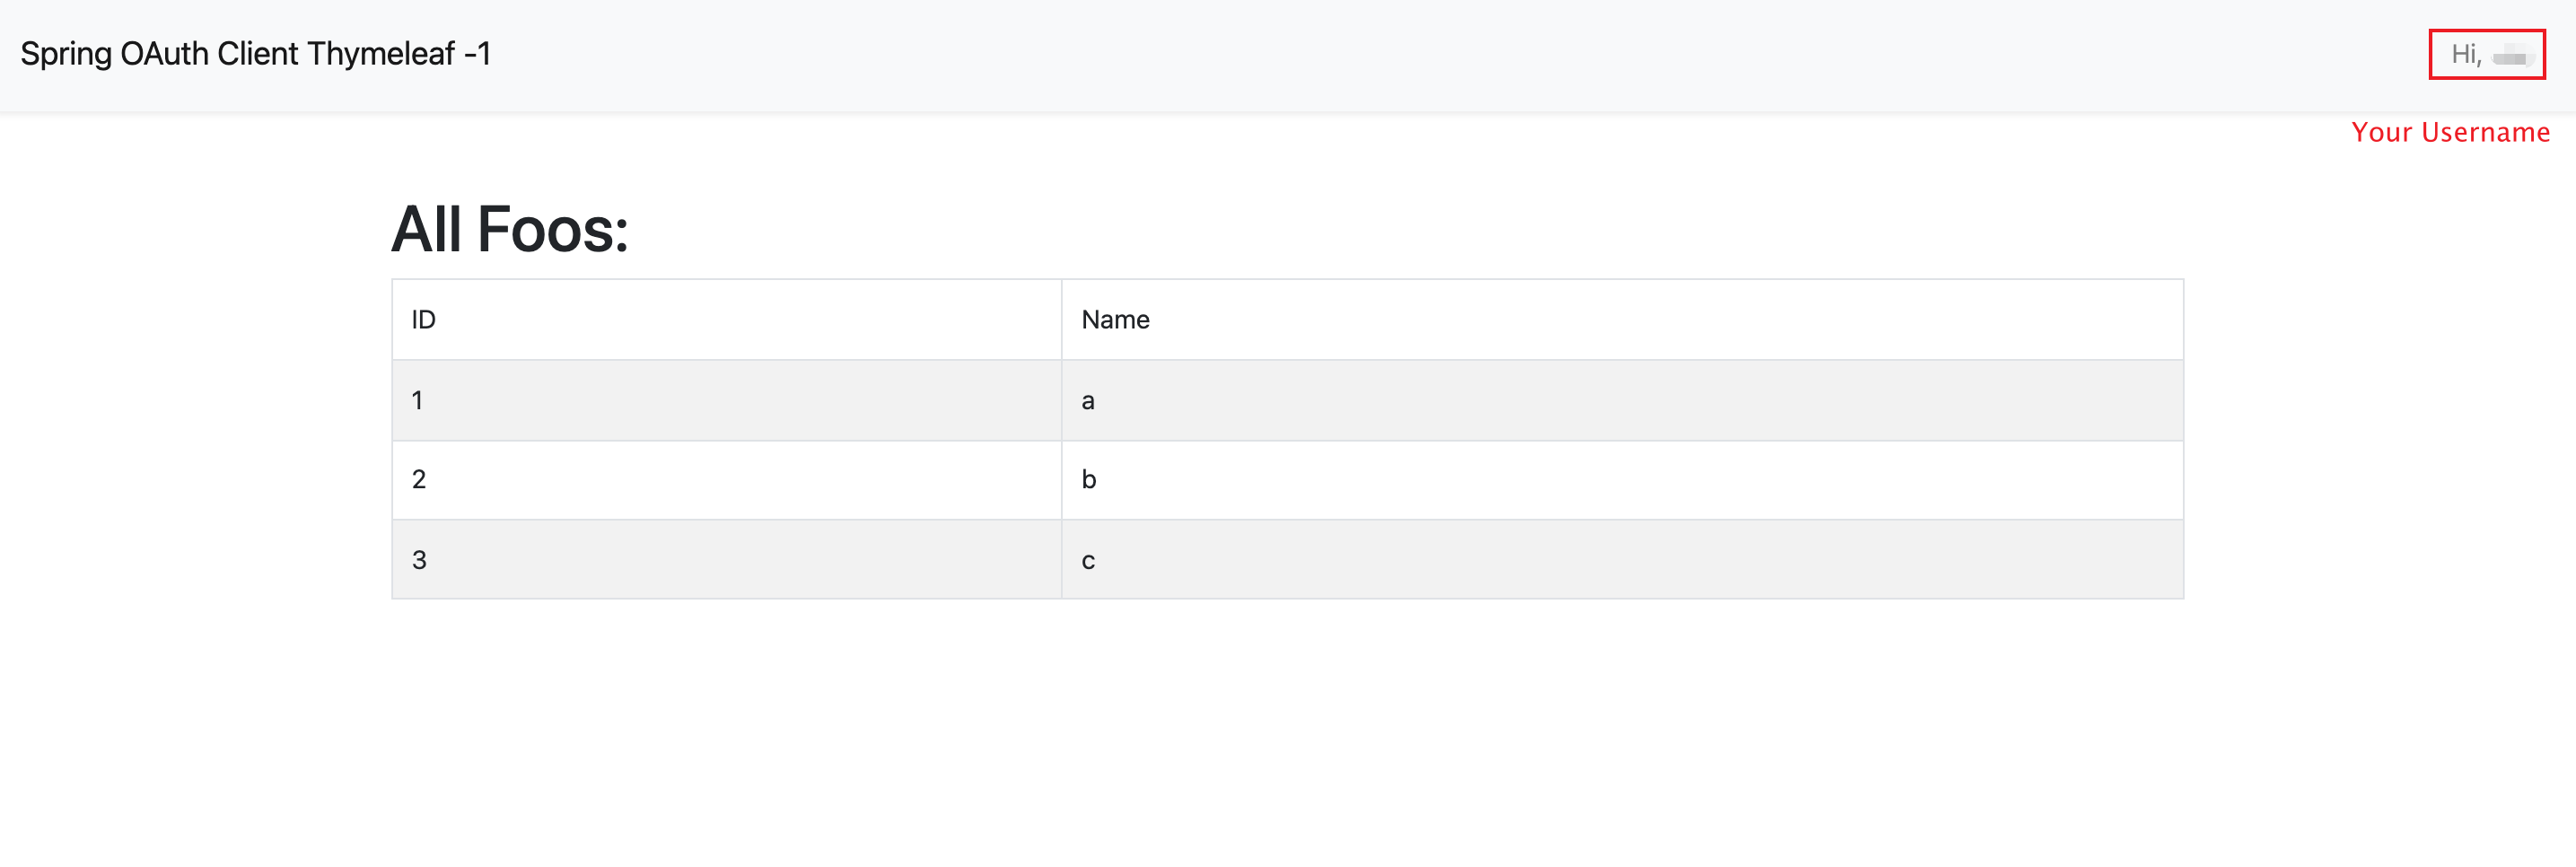
หลังจากล็อกอินแล้ว หน้าจะเปลี่ยนเส้นทางคุณไปยัง /foos 