Spring Security OAuth
Casdoor는 IDP로서 OIDC 프로토콜을 사용하여 다양한 애플리케이션에 연결할 수 있습니다. 이 가이드에서는 Spring Security를 예로 들어 OIDC를 사용하여 애플리케이션에 연결하는 방법을 보여줍니다.
1단계: Casdoor 배포
먼저, Casdoor를 배포해야 합니다.
Casdoor 공식 문서를 참조하여 서버 설치를 확인할 수 있습니다.
Casdoor를 성공적으로 배포한 후, 확인해야 할 사항:
- Casdoor 서버는 http://localhost:8000에서 실행 중입니다.
- 선호하는 브라우저를 열고 http://localhost:7001을 방문하면 Casdoor의 로그인 페이지를 볼 수 있습니다.
admin과123을 입력하여 로그인 기능이 잘 작동하는지 확인합니다.
이제 아래 단계를 따라 자신의 앱에서 Casdoor 기반 로그인 페이지를 빠르게 구현할 수 있습니다.
2단계. Casdoor 애플리케이션 구성
- 새로운 Casdoor 애플리케이션을 생성하거나 기존의 것을 사용합니다.
- 리디렉트 URL을 추가합니다(리디렉트 URL을 얻는 방법에 대한 자세한 내용은 다음 섹션에서 찾을 수 있습니다).
- 원하는 제공자를 추가하고 추가 설정을 채워주세요.
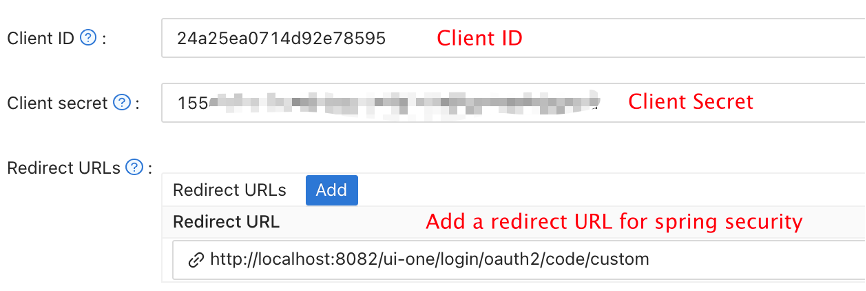
응용 프로그램 설정 페이지에서 Client ID와 Client secret 두 가지 값을 찾을 수 있습니다. 이는 위의 이미지에서 보여지는 것과 같습니다. 다음 단계에서 이 값들을 사용할 것입니다.
선호하는 브라우저를 열고 다음을 방문하세요: http://CASDOOR_HOSTNAME/.well-known/openid-configuration. 여기에서 Casdoor의 OIDC 설정을 찾을 수 있습니다.
3단계. Spring Security 구성
Spring Security는 기본적으로 OIDC를 지원합니다.
Spring Security OAuth2 클라이언트의 설정을 사용자 정의할 수 있습니다:
특히 <Client ID> 등을 자신의 Casdoor 인스턴스로 교체해야 합니다.
- application.yml
- application.properties
spring:
  security:
    oauth2:
      client:
        registration:
          casdoor:
            client-id: <Client ID>
            client-secret: <Client Secret>
            scope: <Scope>
            authorization-grant-type: authorization_code
            redirect-uri: <Redirect URL>
        provider:
          casdoor:
            authorization-uri: http://CASDOOR_HOSTNAME:7001/login/oauth/authorize
            token-uri: http://CASDOOR_HOSTNAME:8000/api/login/oauth/access_token
            user-info-uri: http://CASDOOR_HOSTNAME:8000/api/get-account
            user-name-attribute: name
spring.security.oauth2.client.registration.casdoor.client-id=<Client ID>
spring.security.oauth2.client.registration.casdoor.client-secret=<Client Secret>
spring.security.oauth2.client.registration.casdoor.scope=<Scope>
spring.security.oauth2.client.registration.casdoor.authorization-grant-type=authorization_code
spring.security.oauth2.client.registration.casdoor.redirect-uri=<Redirect URL>

spring.security.oauth2.client.provider.casdoor.authorization-uri=http://CASDOOR_HOSTNAME:7001/login/oauth/authorize
spring.security.oauth2.client.provider.casdoor.token-uri=http://CASDOOR_HOSTNAME:8000/api/login/oauth/access_token
spring.security.oauth2.client.provider.casdoor.user-info-uri=http://CASDOOR_HOSTNAME:8000/api/get-account
spring.security.oauth2.client.provider.casdoor.user-name-attribute=name
Spring Security의 기본 상황에 대해, <Redirect URL>은 http://<Your Spring Boot Application Endpoint>/<Servlet Prefix if it is configured>/login/oauth2/code/custom와 같아야 합니다. 예를 들어, 다음 데모에서 리디렉트 URL은 http://localhost:8080/login/oauth2/code/custom이어야 합니다.
casdoor 응용 프로그램에서 이를 설정해야 합니다.
코드에서 ClientRegistration을 사용하여 설정을 사용자 정의할 수도 있습니다. 매핑은 여기에서 찾을 수 있습니다
4단계: 데모 시작하기
Spring Boot 애플리케이션을 생성할 수 있습니다.
사용자가 로그인할 수 있도록
/와/login**를 제외한 모든 엔드포인트를 보호하는 설정을 추가할 수 있습니다.@EnableWebSecurity
public class UiSecurityConfig extends WebSecurityConfigurerAdapter {
@Override
protected void configure(HttpSecurity http) throws Exception {
http.authorizeRequests()
.antMatchers("/", "/login**")
.permitAll()
.anyRequest()
.authenticated()
.and()
.oauth2Login();
}
}사용자가 로그인할 수 있는 간단한 페이지를 추가할 수 있습니다.
<!DOCTYPE html>
<html lang="en">
<head>
<meta http-equiv="Content-Type" content="text/html; charset=utf-8" />
<title>Spring OAuth Client Thymeleaf - 1</title>
<link rel="stylesheet"
    href="https://stackpath.bootstrapcdn.com/bootstrap/4.1.3/css/bootstrap.min.css" />
</head>
<body>
    <nav
        class="navbar navbar-expand-lg navbar-light bg-light shadow-sm p-3 mb-5">
        <a class="navbar-brand" th:href="@{/foos/}">Spring OAuth Client
            Thymeleaf - 1</a>
    </nav>
    <div class="container">
        <label>Welcome!</label> <br /> <a th:href="@{/foos/}"
            class="btn btn-primary">Login</a>
    </div>
</body>
</html>
사용자가
login버튼을 클릭하면casdoor로 리디렉션됩니다.다음으로, 보호된 리소스를 정의할 수 있습니다.
/foos라는 엔드포인트와 표시를 위한 웹 페이지를 공개할 수 있습니다.데이터 모델
public class FooModel {
    private Long id;
    private String name;

    public FooModel(Long id, String name) {
        super();
        this.id = id;
        this.name = name;
    }
    public Long getId() {
        return id;
    }
    public void setId(Long id) {
        this.id = id;
    }
    public String getName() {
        return name;
    }
    public void setName(String name) {
        this.name = name;
    }
}
컨트롤러
@Controller
public class FooClientController {
    @GetMapping("/foos")
    public String getFoos(Model model) {
        List<FooModel> foos = new ArrayList<>();
        foos.add(new FooModel(1L, "a"));
        foos.add(new FooModel(2L, "b"));
        foos.add(new FooModel(3L, "c"));
        model.addAttribute("foos", foos);
        return "foos";
    }
}
웹 페이지
<!DOCTYPE html>
<html lang="en">
<head>
<meta http-equiv="Content-Type" content="text/html; charset=utf-8" />
<title>Spring OAuth Client Thymeleaf - 1</title>
<link rel="stylesheet"
href="https://stackpath.bootstrapcdn.com/bootstrap/4.1.3/css/bootstrap.min.css" />
</head>
<body>
<nav
class="navbar navbar-expand-lg navbar-light bg-light shadow-sm p-3 mb-5">
<a class="navbar-brand" th:href="@{/foos/}">Spring OAuth Client
Thymeleaf -1</a>
<ul class="navbar-nav ml-auto">
<li class="navbar-text">Hi, <span sec:authentication="name">preferred_username</span> </li>
</ul>
</nav>
<div class="container">
<h1>All Foos:</h1>
<table class="table table-bordered table-striped">
<thead>
<tr>
<td>ID</td>
<td>Name</td>
</tr>
</thead>
<tbody>
<tr th:if="${foos.empty}">
<td colspan="4">No foos</td>
</tr>
<tr th:each="foo : ${foos}">
<td>
<span th:text="${foo.id}">ID</span>
</td>
<td>
<span th:text="${foo.name}">Name</span>
</td>
</tr>
</tbody>
</table>
</div>
</body>
</html>
모든 웹 페이지 템플릿은 resources/templates 아래에 위치해야 합니다.
5단계: 데모를 시도해보세요!
먼저, 선호하는 브라우저를 열고 직접 /foos를 방문해볼 수 있습니다. 자동으로 Casdoor의 로그인 페이지로 리디렉션됩니다. 거기에서 또는 루트 페이지에서 로그인할 수 있습니다.
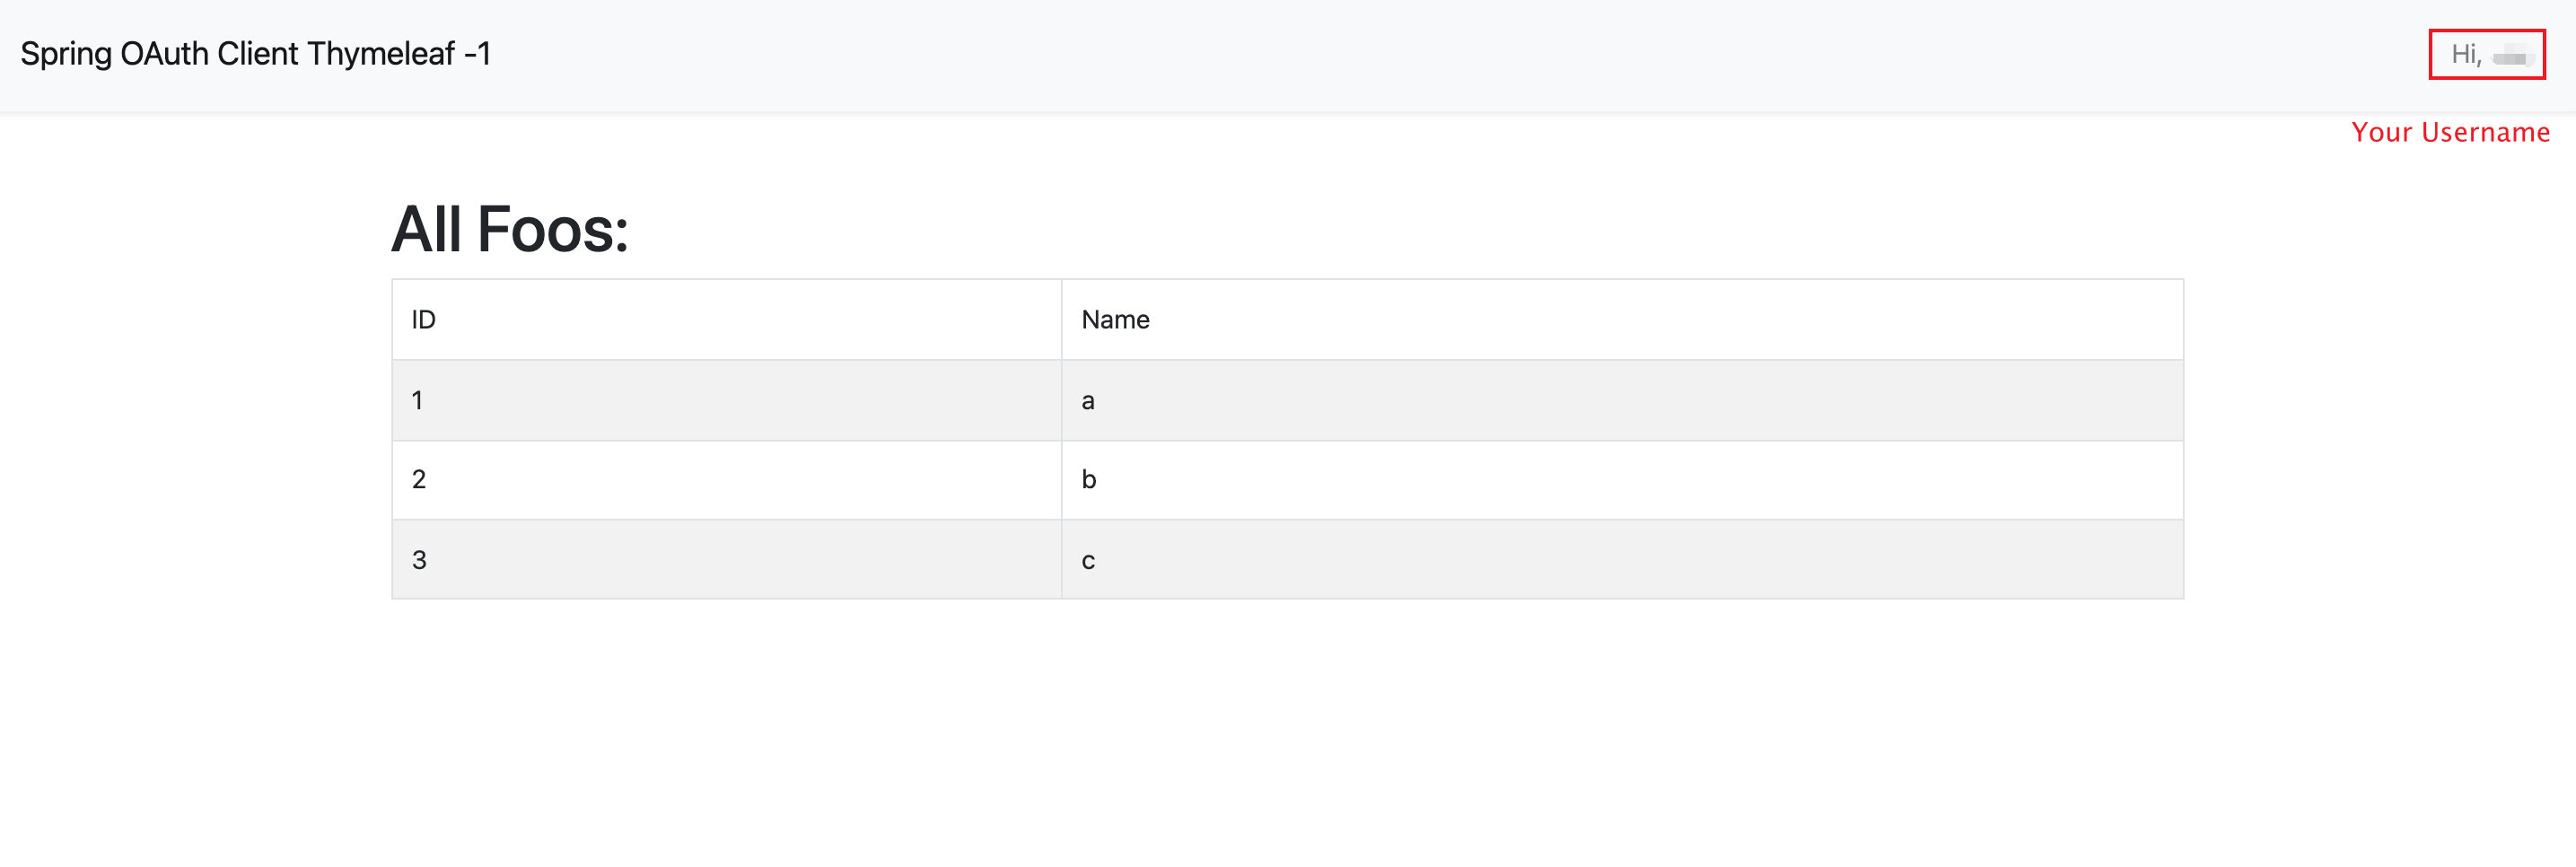
루트 페이지를 방문하면 Casdoor 응용 프로그램 설정을 볼 수 있습니다.
login 버튼을 클릭하면 페이지가 Casdoor의 로그인 페이지로 리디렉션됩니다. 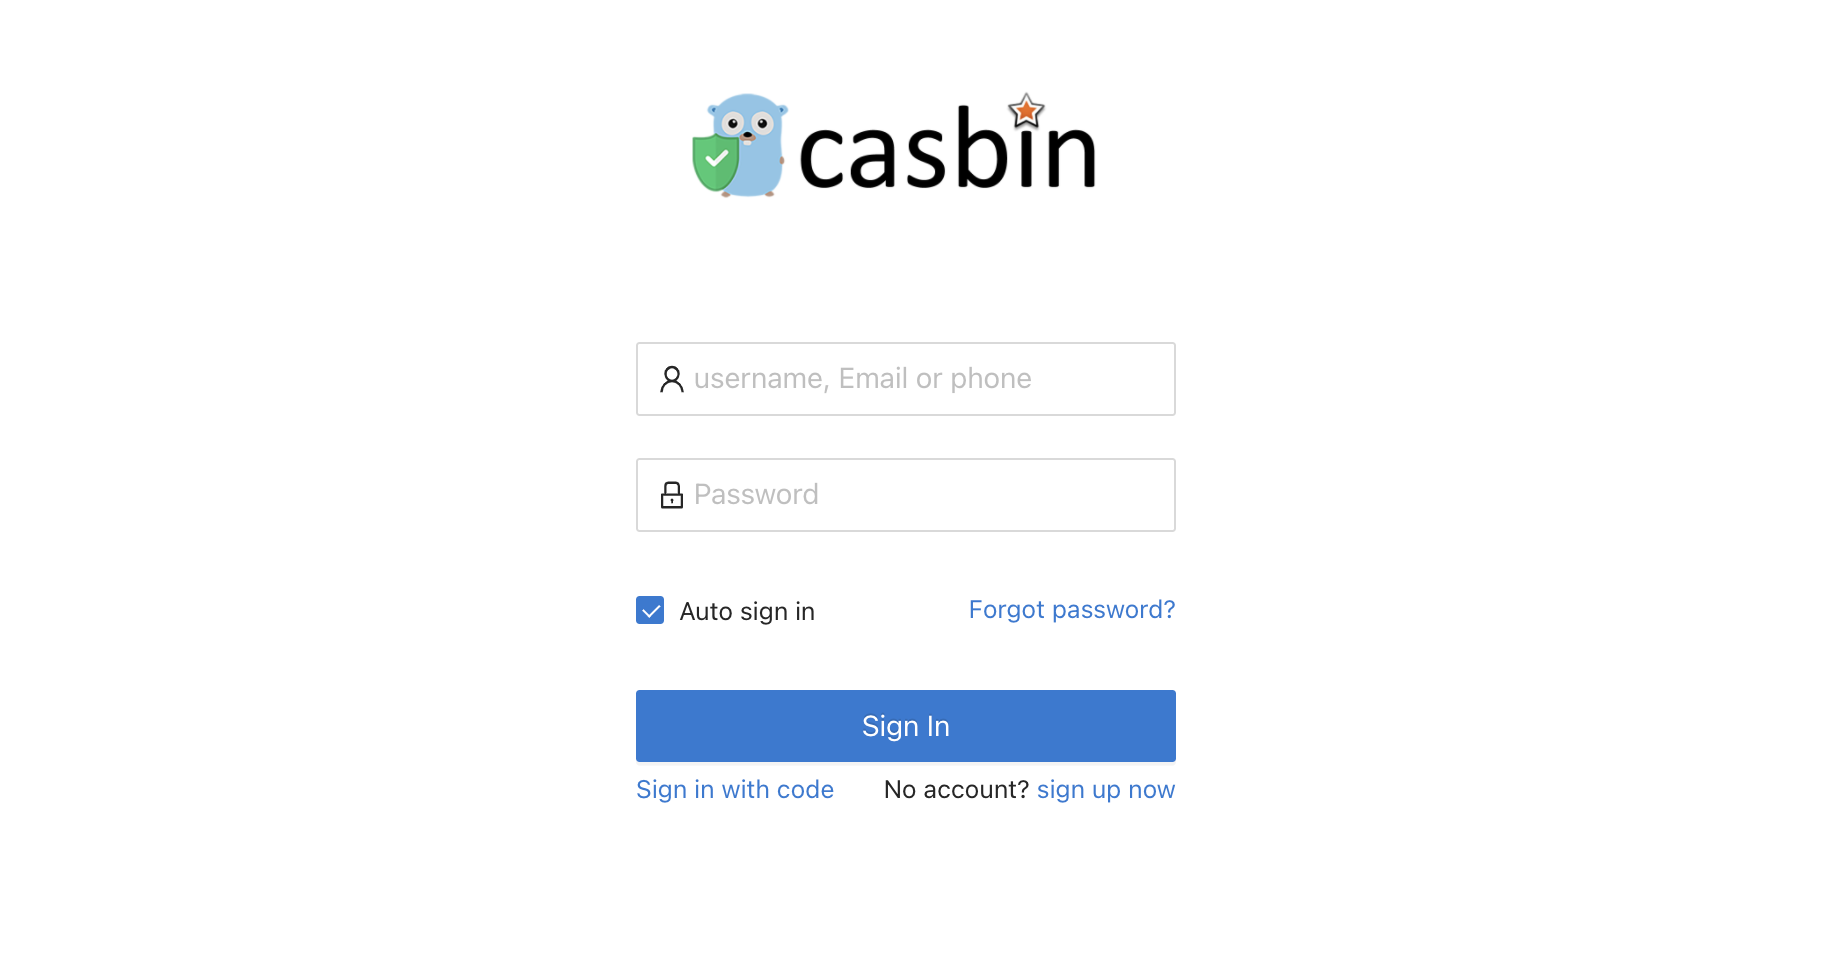
로그인 한 후, 페이지는 /foos로 리디렉션됩니다.