Nginx
Enable OpenID Connect-based single sign-on for applications proxied by NGINX Plus using Casdoor as the identity provider (IdP).
This guide explains how to enable single sign-on (SSO) for applications that are being proxied by NGINX Plus. The solution uses OpenID Connect as the authentication mechanism, with Casdoor as the identity provider (IdP), and NGINX Plus as the relying party.
See also: NGINX Plus OpenID Connect on GitHub.
Prerequisites
The instructions assume that you have the following:
-
A running Casdoor server. See Server installation and Try with Docker.
-
An NGINX Plus subscription and NGINX Plus R15 or later. For installation instructions, see the NGINX Plus Admin Guide.
-
The NGINX JavaScript module, which is required for handling the interaction between NGINX Plus and the IdP. After installing NGINX Plus, install the module using the appropriate command for your operating system.
For Debian and Ubuntu:
sudo apt install nginx-plus-module-njsFor CentOS, RHEL, and Oracle Linux:
sudo yum install nginx-plus-module-njs -
The following directive should be included in the top-level (“main”) configuration context in /etc/nginx/nginx.conf in order to load the NGINX JavaScript module:
load_module modules/ngx_http_js_module.so;
Configuring Casdoor
Note: The following procedure reflects the Casdoor GUI at the time of publication, but the GUI is subject to change. Use this guide as a reference and adapt to the current Casdoor GUI as necessary.
To create a Casdoor client for NGINX Plus in the Casdoor GUI, follow these steps:
-
Log in to your Casdoor account at
http://your-casdoor-url.com/login/. -
In the top navigation column, click Application. On the Application page that opens, click the Add button in the upper left corner.

-
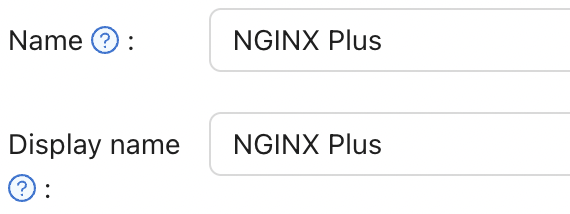
On the Edit Application page that opens, change the value in the Name and Display name fields to the name of the application for which you’re enabling SSO. Here, we’re using NGINX Plus.
In the Redirect URLs field, type the URL of the NGINX Plus instance including the port number, and ending in /_codexch (in this guide it is https://your-site-url.com:443/_codexch).
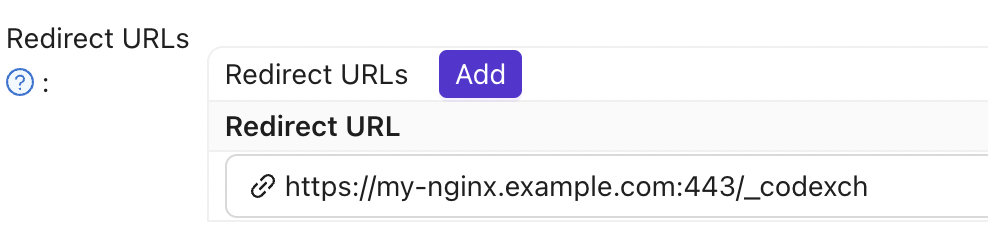
Notes:
- For production, we strongly recommend that you use SSL/TLS (port 443).
- The port number is mandatory even when you’re using the default port for HTTP (80) or HTTPS (443).
-
Record the Client ID and Client Secret; you will use them in Step 4 of Configuring NGINX Plus.

-
Click Roles in the top navigation column, then click the Add button in the upper left corner of the page that opens.

-
On the Add page that opens, type a value in the Name and Display Name fields (here it is nginx-casdoor-role) and click the Save button.

-
In the top navigation column, click Users. On the Users page that opens, either click Edit to edit one of the existing users or click the Add button in the upper left corner to create a new user.
-
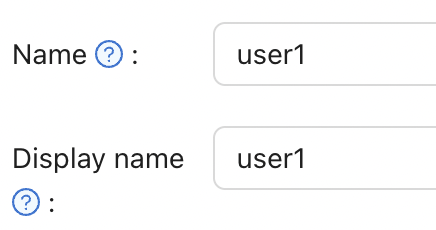
On the Add page that opens, modify the Name and Display Name as you like (here it is user1).
Select NGINX Plus in the Signup application.

In the Managed accounts field, select NGINX Plus in Application and fill in the username and password.

-
Go back to the Roles page and click Edit on the nginx-casdoor-role row. In the opened page, in the Sub users field, select the username you just created (here it is built-in/user1).

Configuring NGINX Plus
To configure NGINX Plus as the OpenID Connect relying party, follow these steps:
-
Start by creating a clone of the nginx-openid-connect GitHub repository:
git clone https://github.com/nginxinc/nginx-openid-connect -
Copy the following files from the clone to the /etc/nginx/conf.d directory:
- frontend.conf
- openid_connect.js
- openid_connect.server_conf
- openid_connect_configuration.conf
-
Retrieve the URLs for the authorization endpoint, token endpoint, and JSON Web Key (JWK) file from the Casdoor configuration. Open a terminal and execute the following
curlcommand, piping the output to the indicatedpythoncommand to generate a readable configuration format. For brevity, we have truncated the output to display only the relevant fields.curl http://<casdoor-server-address>/.well-known/openid-configuration | python -m json.tool
{
"authorization_endpoint": "https://<casdoor-server-address>/login/oauth/authorize",
"...":"...",
"token_endpoint": "http://<casdoor-server-address>/api/login/oauth/access_token",
"...":"...",
"jwks_uri": "http://<casdoor-server-address>/.well-known/jwks",
"...":"...",
} -
Open /etc/nginx/conf.d/openid_connect_configuration.conf using your preferred text editor. Modify the "default" parameter value for each of the following map directives with the specified values:
map $host $oidc_authz_endpoint– Use the value of theauthorization_endpointfrom Step 3 (in this guide,https://<casdoor-server-address>/login/oauth/authorize)map $host $oidc_token_endpoint– Use the value of thetoken_endpointfrom Step 3 (in this guide,http://<casdoor-server-address>/api/login/oauth/access_token)map $host $oidc_client– Use the value in the Client ID field from Step 4 of Configuring Casdoormap $host $oidc_client_secret– Use the value in the Client Secret field from Step 2 of Configuring Casdoormap $host $oidc_hmac_key– Use a unique, long, and secure phrase
-
Configure the JWK file based on the version of NGINX Plus being used:
- In NGINX Plus R17 and later, NGINX Plus can directly read the JWK file from the URL specified as
jwks_uriin Step 3. Make the following changes to /etc/nginx/conf.d/frontend.conf:- Comment out (or remove) the auth_jwt_key_file directive.
- Uncomment the auth_jwt_key_request directive. (The parameter
/_jwks_urirefers to the value of the$oidc_jwt_keyfilevariable, which will be set in the next step.) - Update the "default" parameter of the
map $host $oidc_jwt_keyfiledirective to the value obtained from thejwks_urifield in Step 3 (in this guide,http://<casdoor-server-address>/.well-known/jwks).
- In NGINX Plus R16 and earlier, or if preferred, the JWK file must be located on the local disk. Follow these steps:
- Copy the JSON contents from the JWK file specified in the
jwks_urifield in Step 3 (in this guide,http://<casdoor-server-address>/.well-known/jwks) to a local file (e.g.,/etc/nginx/my_casdoor_jwk.json). - In /etc/nginx/conf.d/openid_connect_configuration.conf, change the "default" parameter of the
map $host $oidc_jwt_keyfiledirective to the path of the local file.
- Copy the JSON contents from the JWK file specified in the
- In NGINX Plus R17 and later, NGINX Plus can directly read the JWK file from the URL specified as
-
Ensure that the user specified in the user directive within the NGINX Plus configuration file (usually /etc/nginx/nginx.conf) has read permissions for the JWK file.
Testing
Open a browser and enter the address of your NGINX Plus instance. Then, attempt to log in using the credentials of a user who has been assigned the NGINX Plus role.

Troubleshooting
See the Troubleshooting section in the nginx-openid-connect repository.