Hasura
Deploy Casdoor first (see Server installation). Then configure the application and Hasura as below.
Configure Casdoor application
- Create or use an existing Casdoor application.
- Add a redirect URL:
http://CASDOOR_HOSTNAME/login
- Copy the client ID; we will need it in the following steps.
Add a user in Casdoor
Create a user and assign a role to the application.
Go to Users → Add user to open the new-user page.
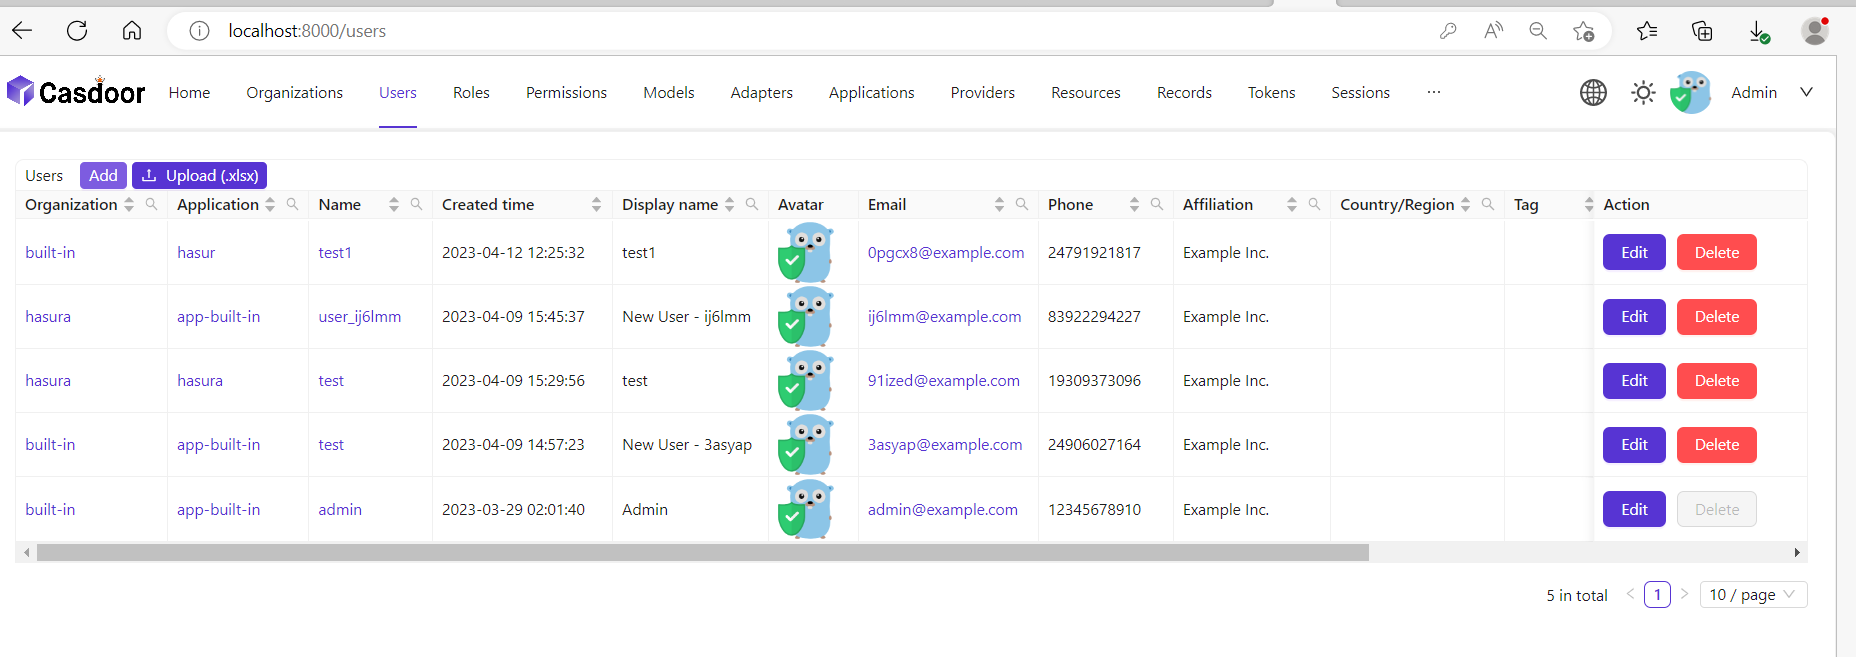
Save the user after adding a username and adding the organization Hasura (other details are optional).
Set a password via "Manage your password".
Choose a password for your user and confirm it.
Build the Hasura App
Start the Hasura by Docker or Hasura Cloud.
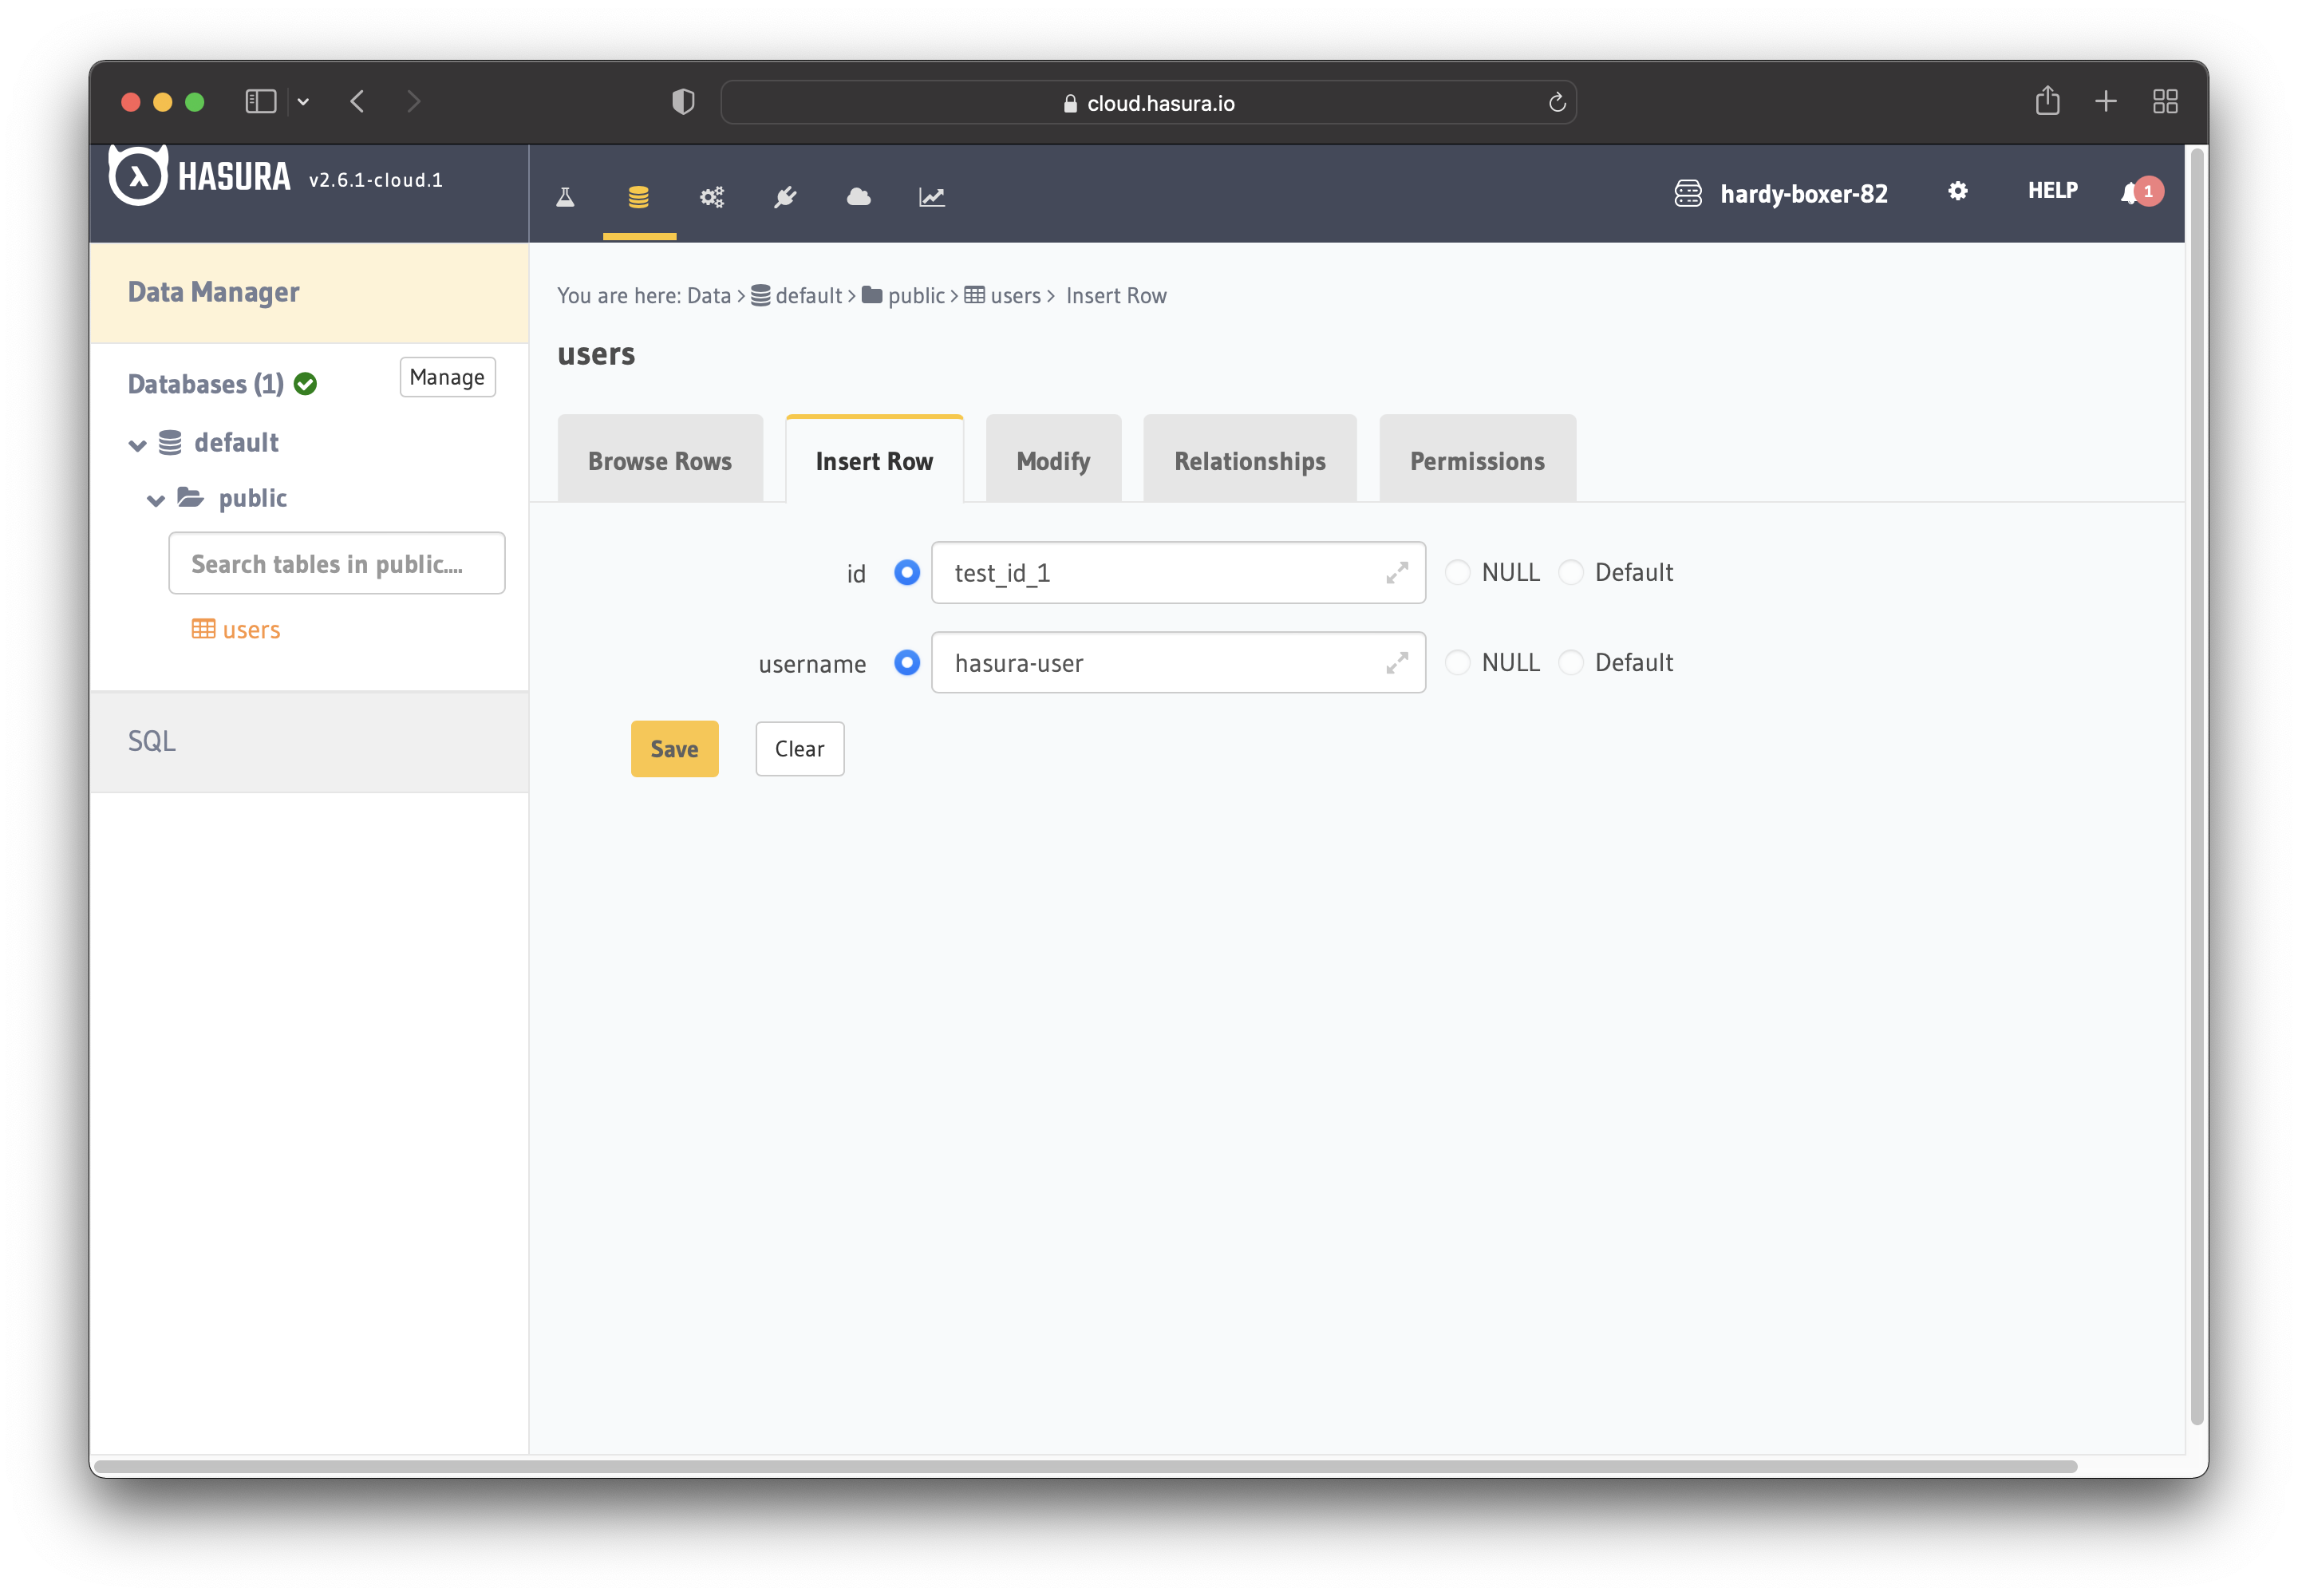
Now create a users table with the following columns:
idof type Text (Primary Key)usernameof type Text
Refer to the image below for reference.

The next step is to create a user role for the app. Users should be able to see only their records but not other people's records.
Configure the user role as shown in the image below. For more information, read about configuring permission rules in Hasura.
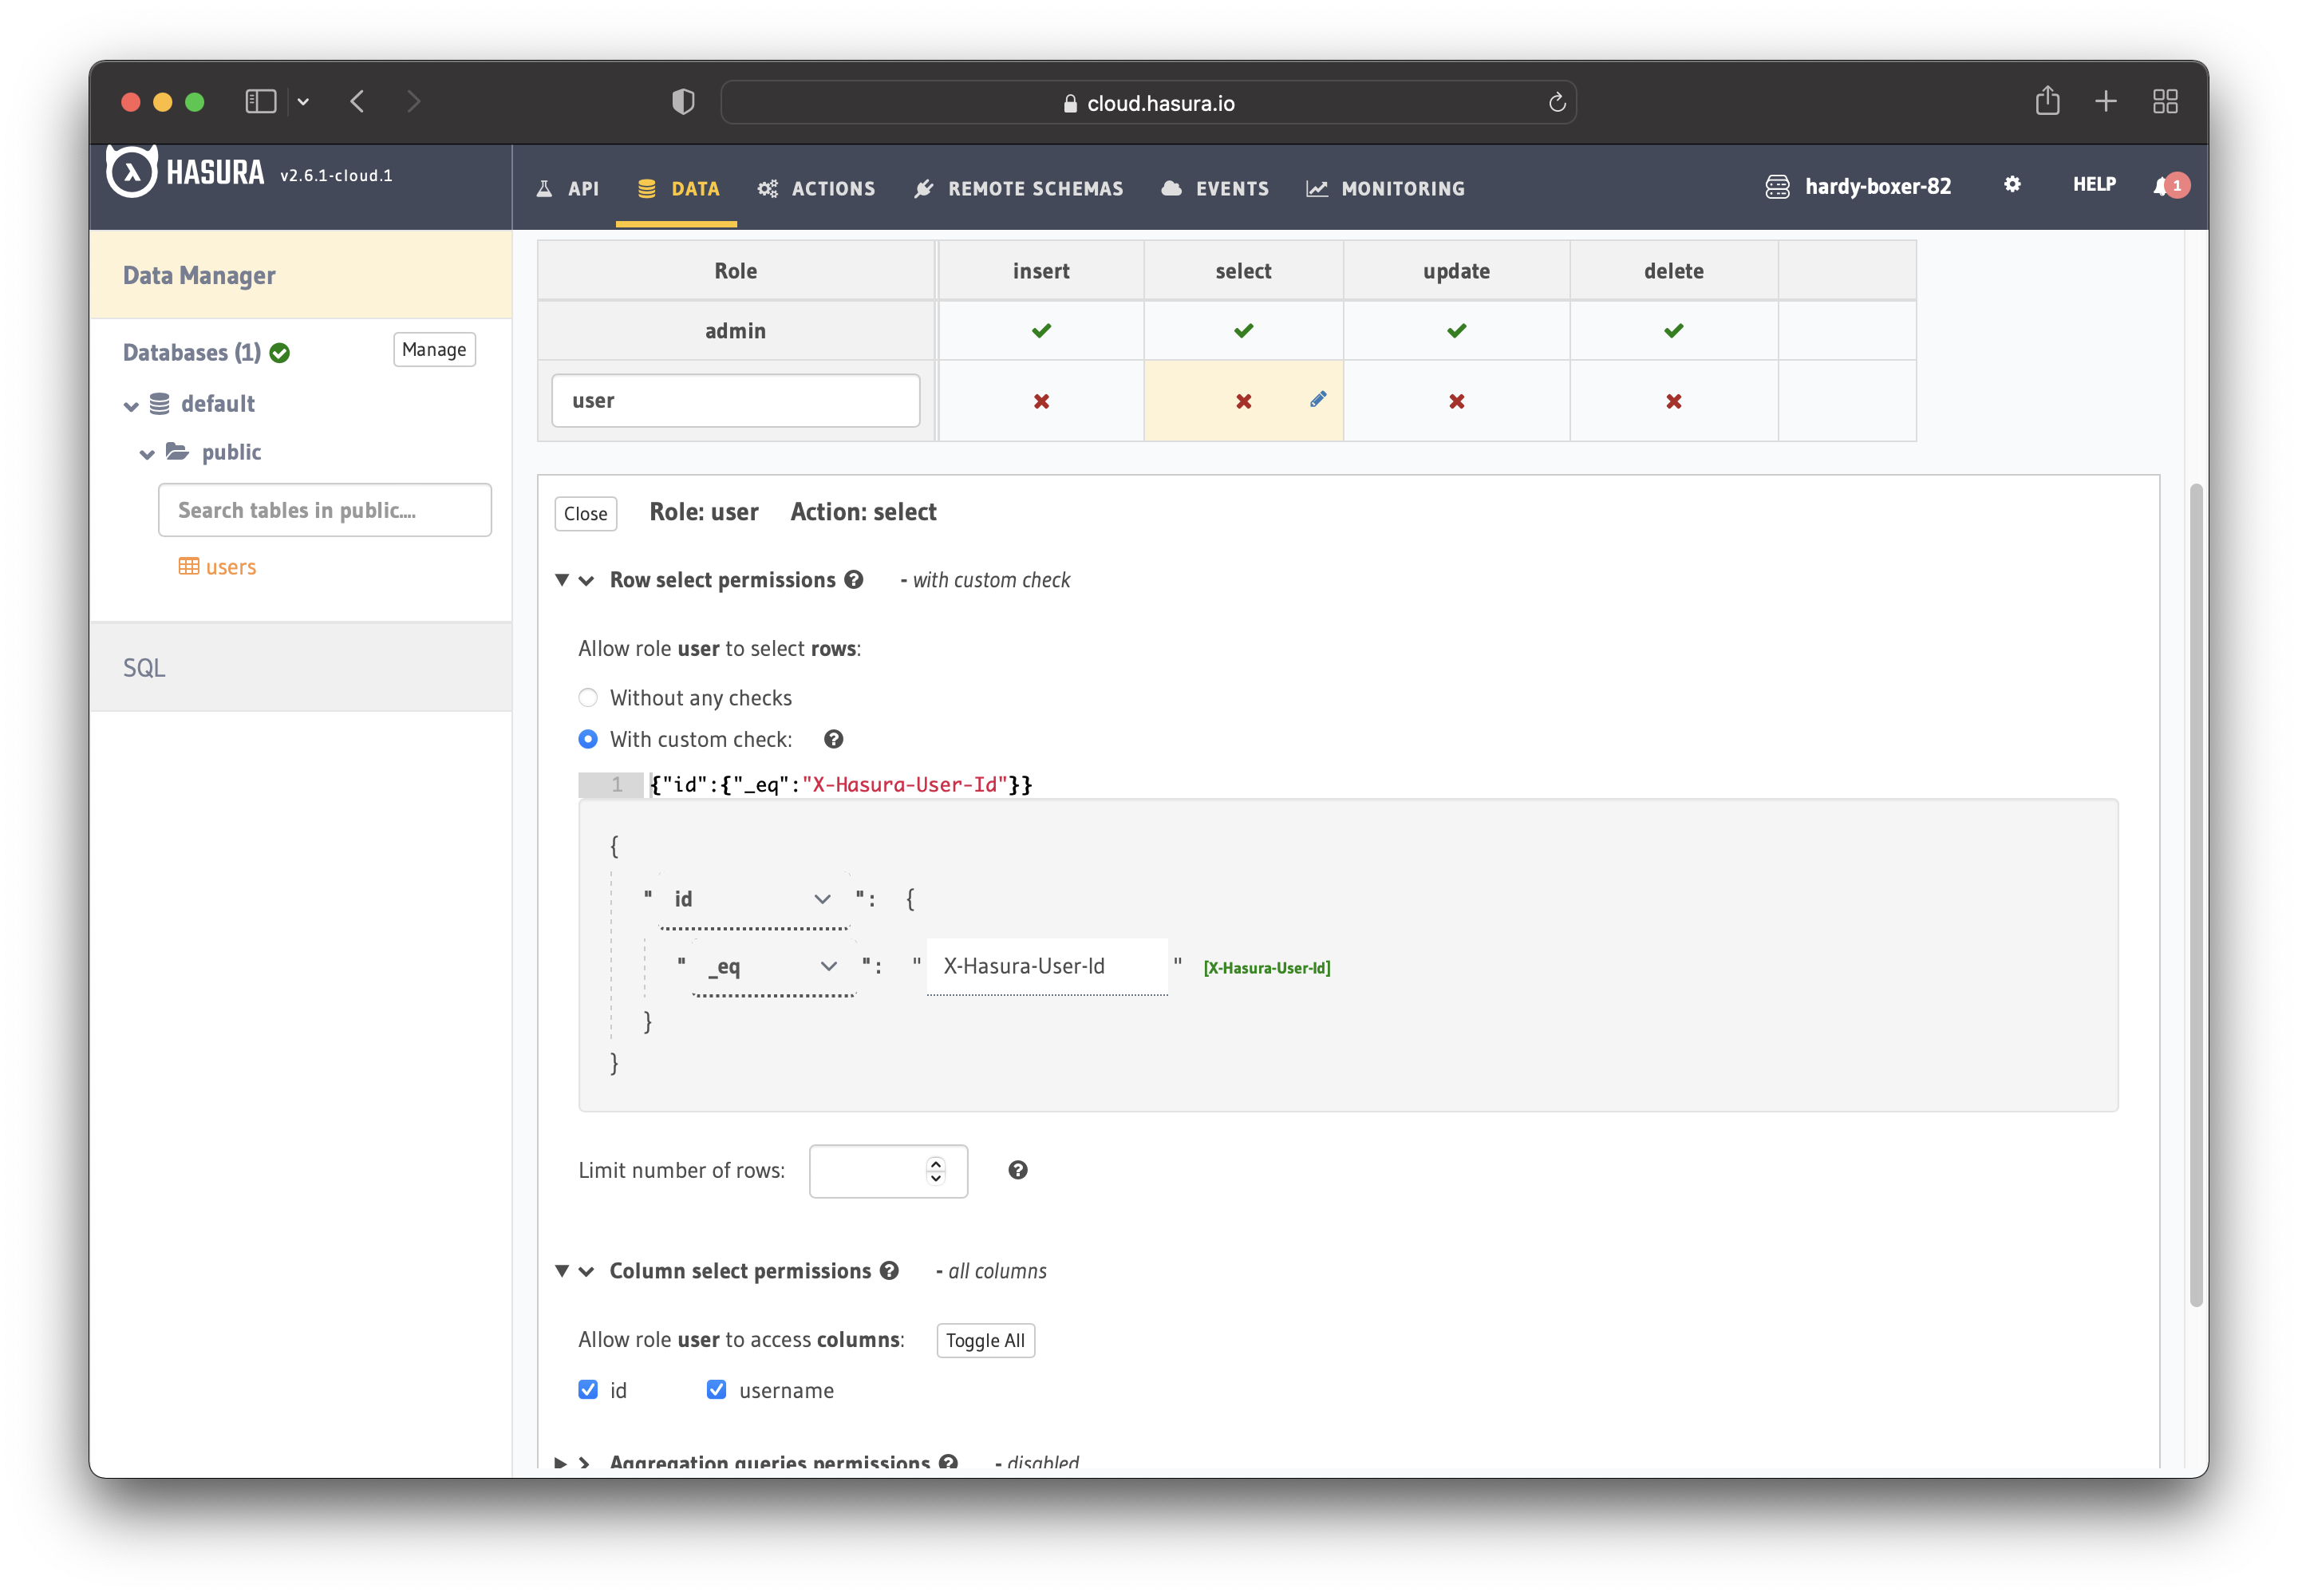
This way, users cannot read other people's records. They can only access theirs.
For testing purposes, add a dummy user. This is to ensure that when you use the JWT token, you only see your user's details and not other users' details.
Set JWT_SECRET in Hasura.
Configure Hasura with Casdoor
Add HASURA_GRAPHQL_JWT_SECRET to Hasura.
To do so, go to the Hasura docker-compose.yaml and then add the new HASURA_GRAPHQL_JWT_SECRET as below.
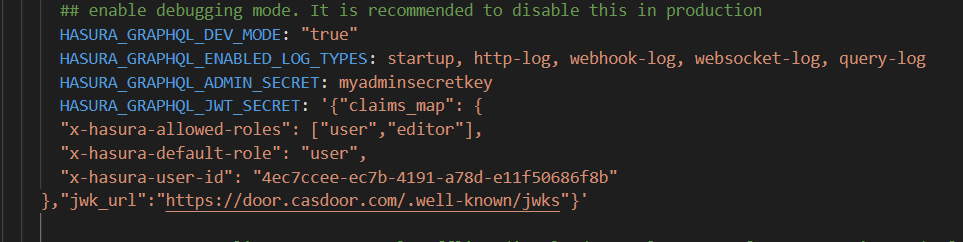
The HASURA_GRAPHQL_JWT_SECRET should be in the following format. Remember to change <Casdoor endpoint> to your own Casdoor's URL (like https://door.casdoor.com)
HASURA_GRAPHQL_JWT_SECRET: '{"claims_map": {
      "x-hasura-allowed-roles": {"path": "$.roles"},
      "x-hasura-default-role": {"path": "$.roles[0]"},
      "x-hasura-user-id": {"path": "$.id"}
    },"jwk_url":"<Casdoor endpoint>/.well-known/jwks"}'
Save the change and reload the docker.
Retrieve the JWT Token
With no client implementation, obtain an access token by calling:
http://localhost:8000/login/oauth/authorize?client_id=<client ID>&response_type=code&redirect_uri=http%3A%2F%2Flocalhost%3A8080%2Flogin&scope=read&state=app-built-in<public certificate>>
Change client ID to the ID you copied before and input the public certificate of Casdoor, from the Casdoor Certs page.
Then input the username and password you created for Hasura before.
Click "Sign in"

Go back to the Casdoor/Token page.
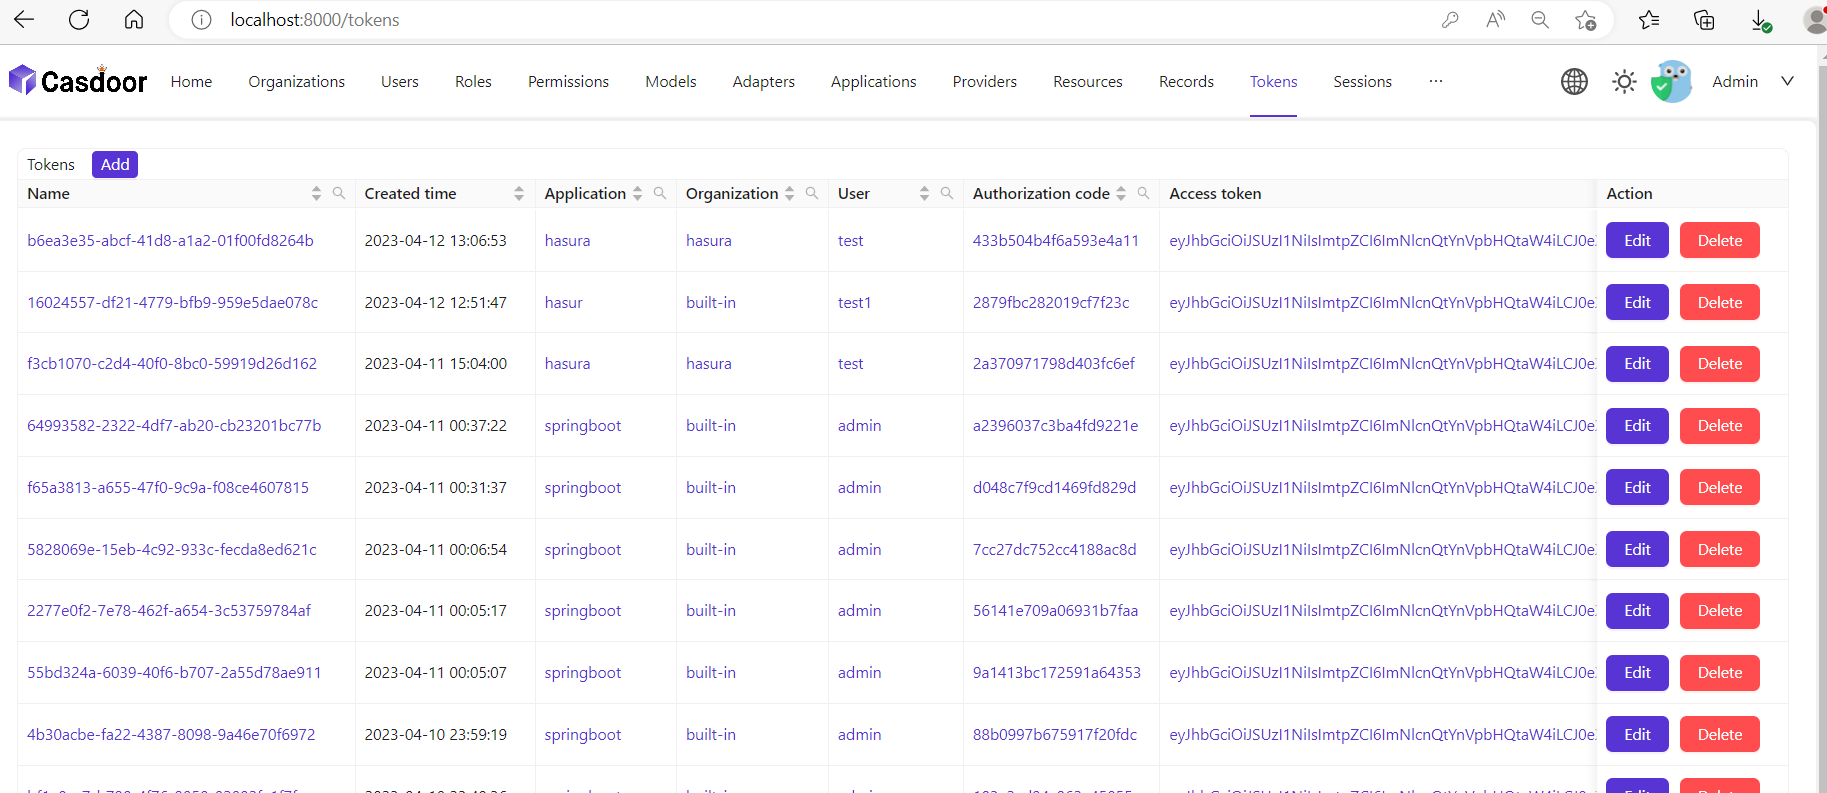
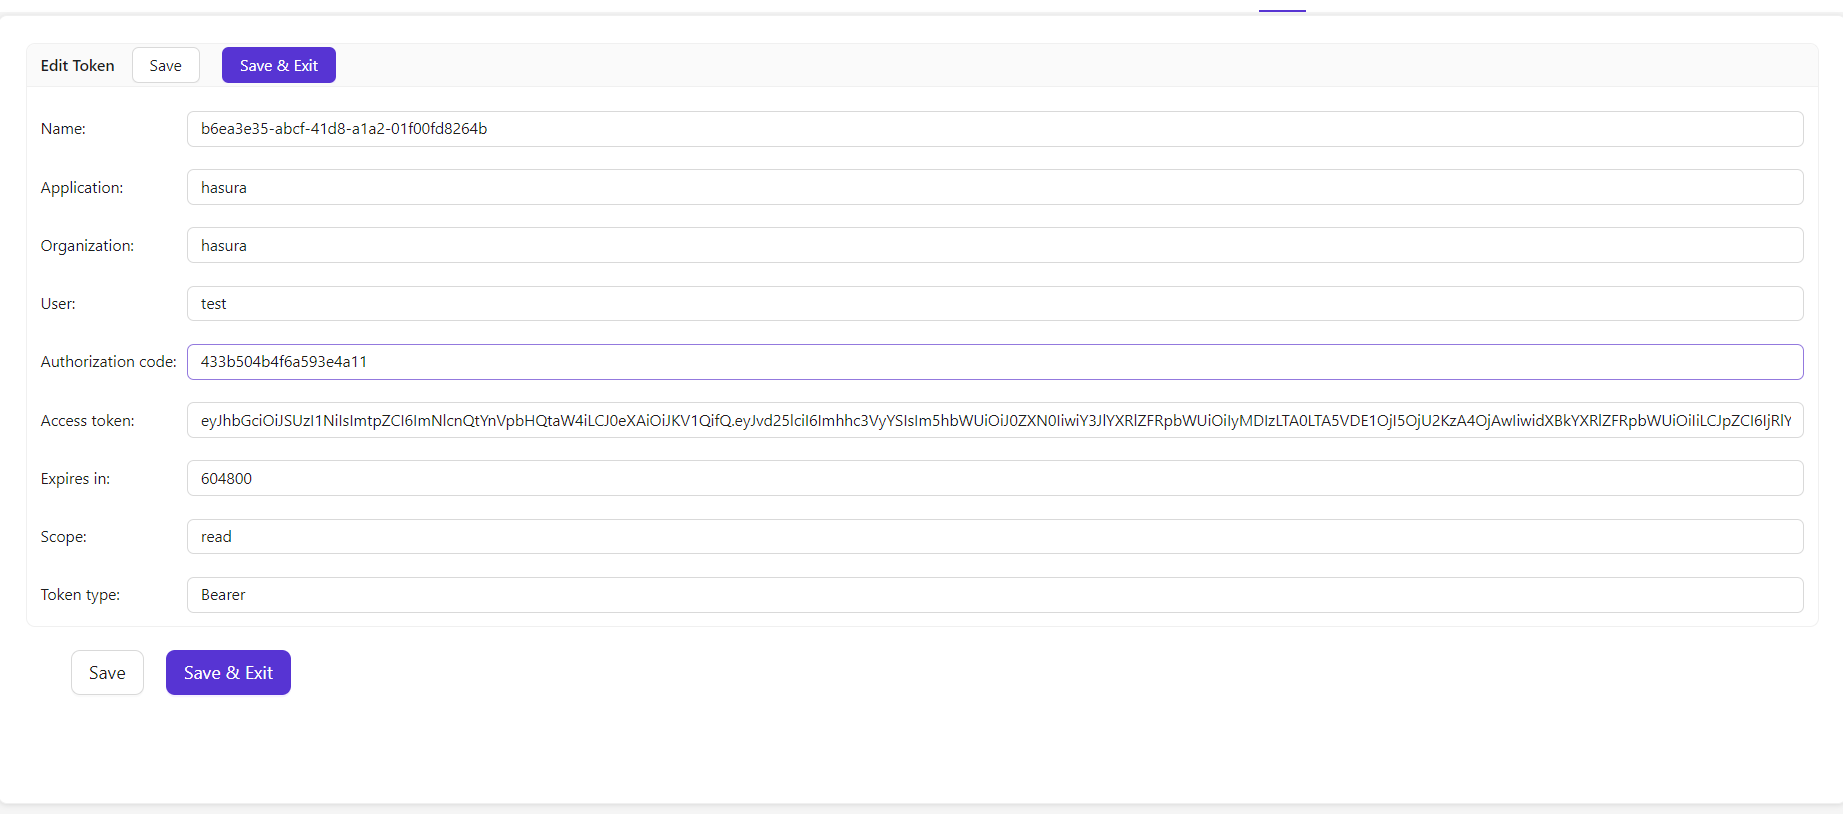
Find the Username you input before, then click "edit"
Copy the Access Token
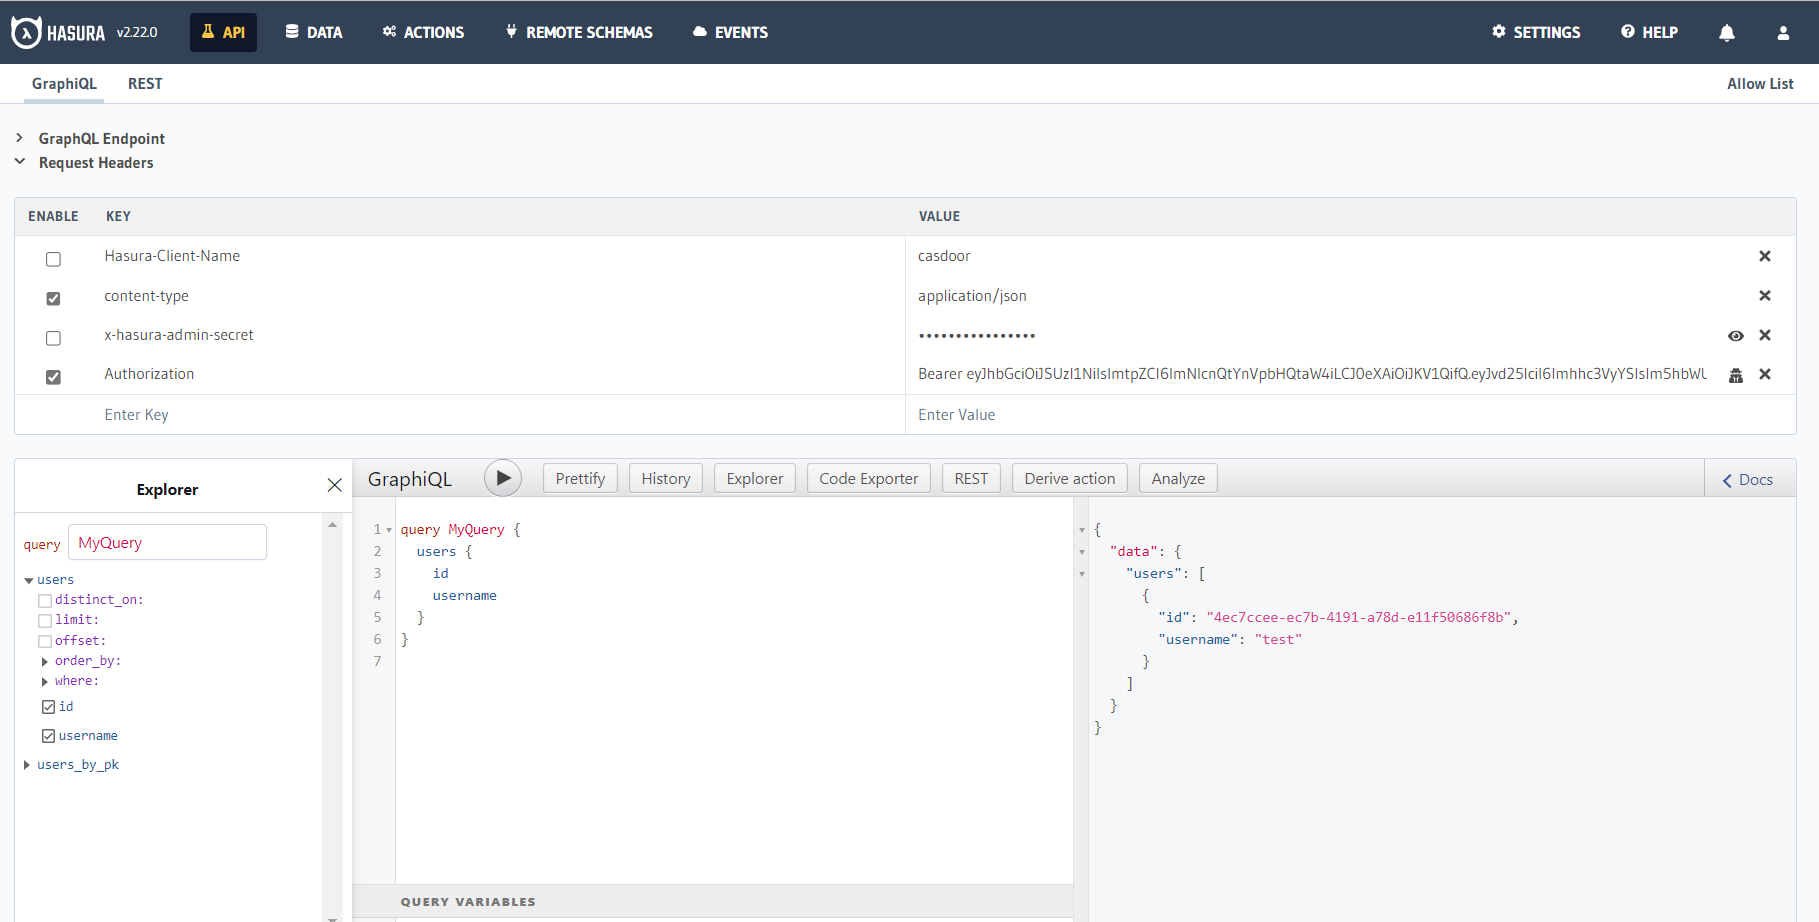
Use the access token for authenticated requests; Hasura returns the matching user instead of all users.