Keycloak
The JBoss Keycloak system is a widely used and open-source identity management system that supports integration with applications via SAML and OpenID Connect. It can also operate as an identity broker between other providers such as LDAP or other SAML providers and applications that support SAML or OpenID Connect.
Here is an example of how to configure a new client entry in Keycloak and configure Casdoor to use it to allow UI login by Keycloak users who are granted access via Keycloak configuration.
Configure Keycloak
For this example, let's make the following configuration choices and assumptions:
- Assume that you are running Casdoor in dev mode locally. The Casdoor UI is available at
http://localhost:7001and the server is available athttp://localhost:8000. Replace with the appropriate URL as needed. - Assume that you are running Keycloak locally. The Keycloak UI is available at
http://localhost:8080/auth. - Based on that, the SP ACS URL for this deployment will be:
http://localhost:8000/api/acs. - Our SP Entity ID will use the same URL:
http://localhost:8000/api/acs.
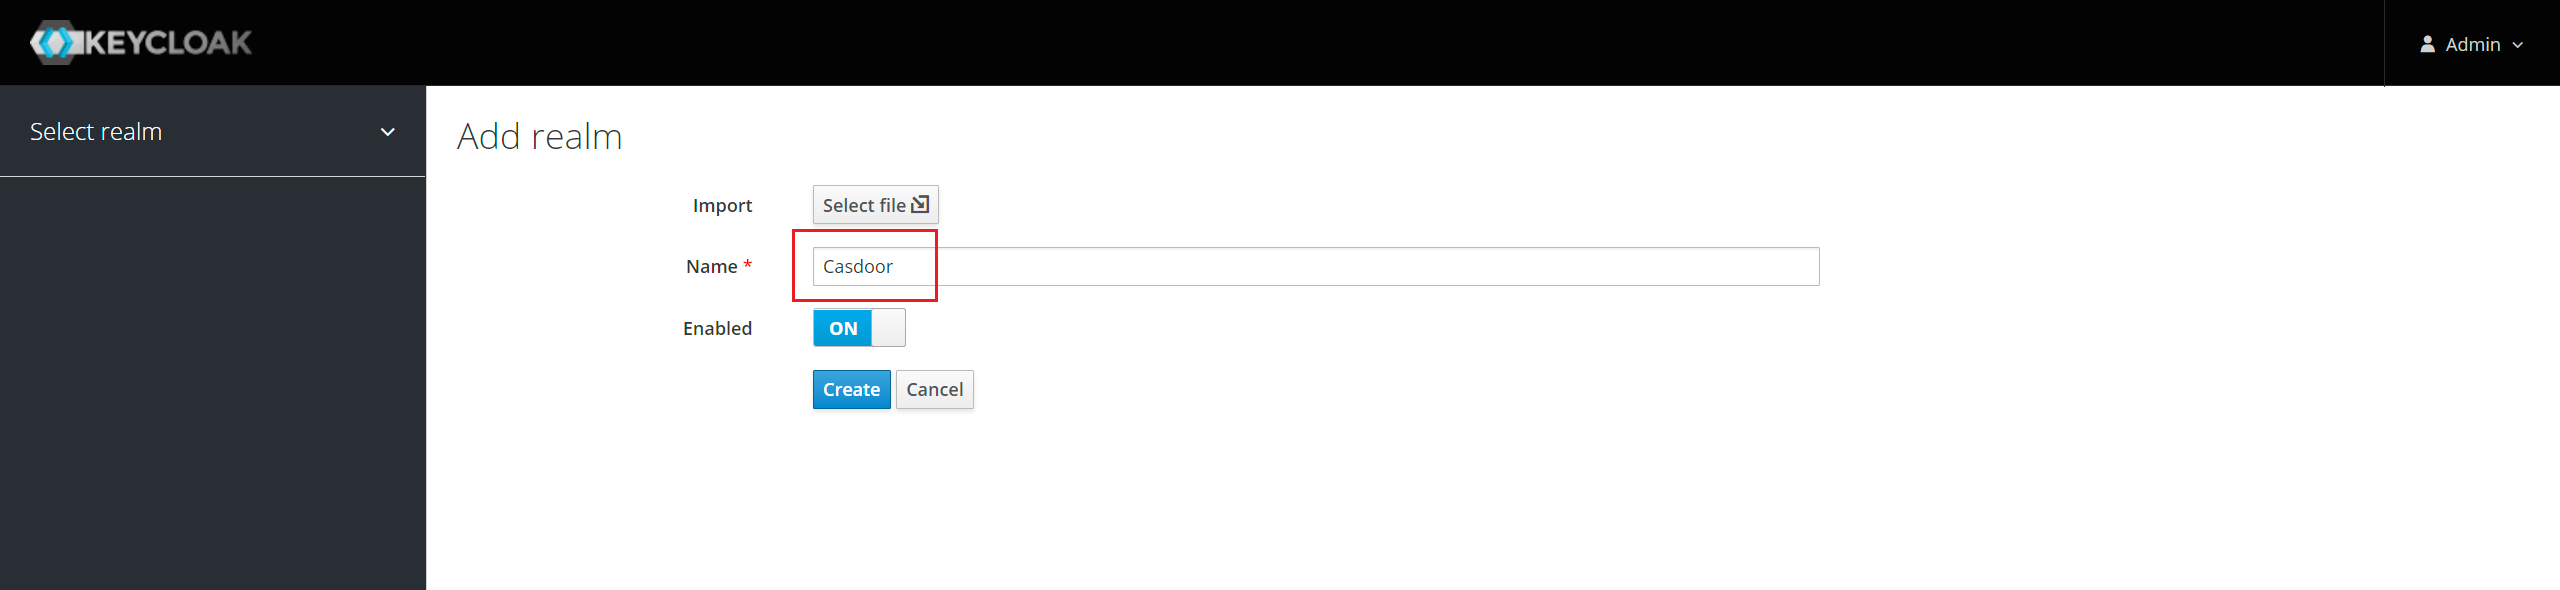
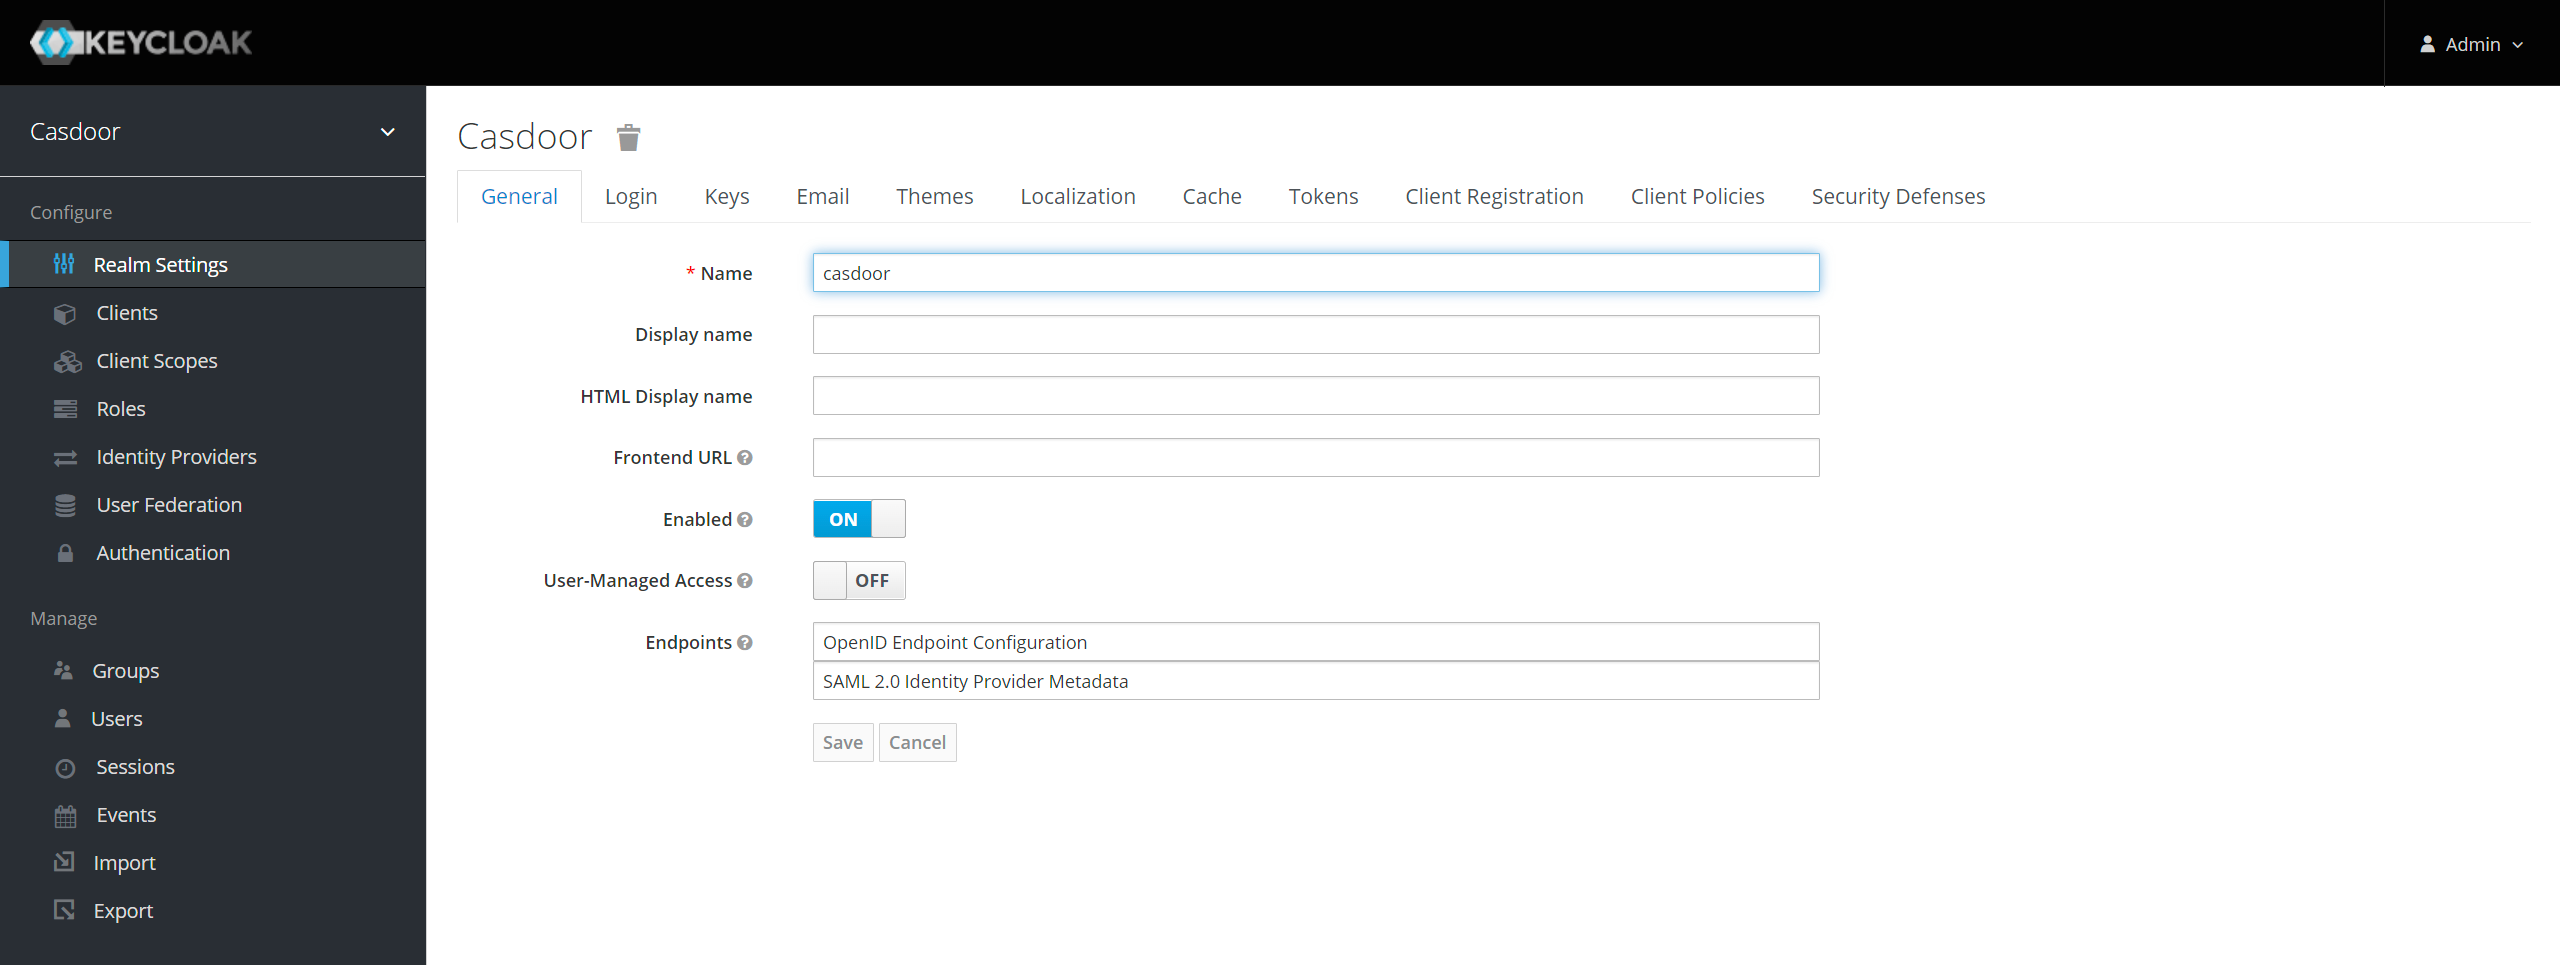
You can use the default realm or create a new realm.
Add a client entry in Keycloak
For more details about Keycloak Clients, refer to the Keycloak documentation.
Click Clients in the menu and then click Create to go to the Add Client page. Fill in the fields as follows:
- Client ID:
http://localhost:8000/api/acs- This will be the SP Entity ID used in the Casdoor configuration later. - Client Protocol:
saml. - Client SAML Endpoint:
http://localhost:8000/api/acs- This URL is where you want the Keycloak server to send SAML requests and responses. Generally, applications have one URL for processing SAML requests. Multiple URLs can be set in the Settings tab of the client.
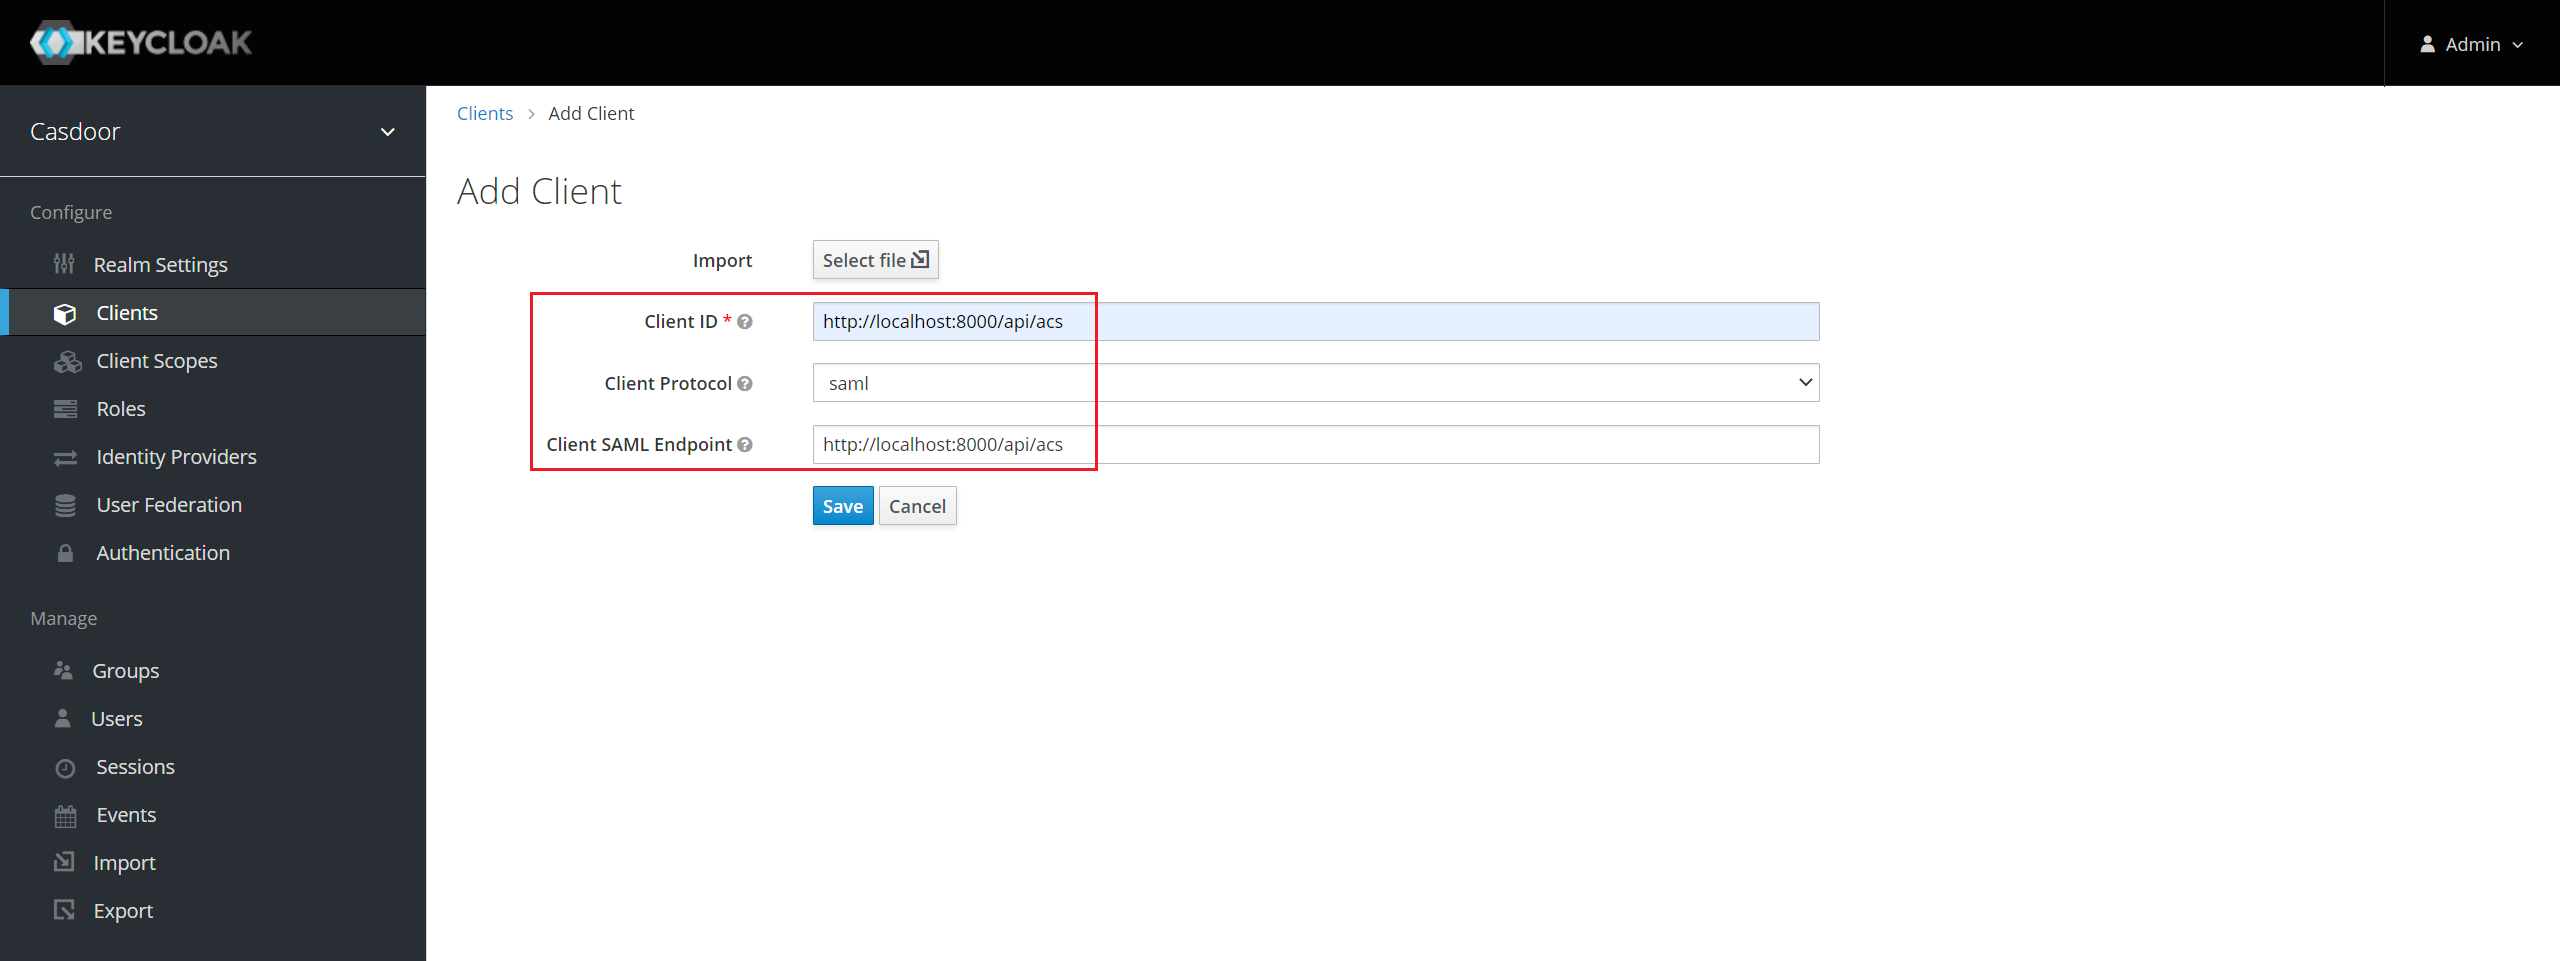
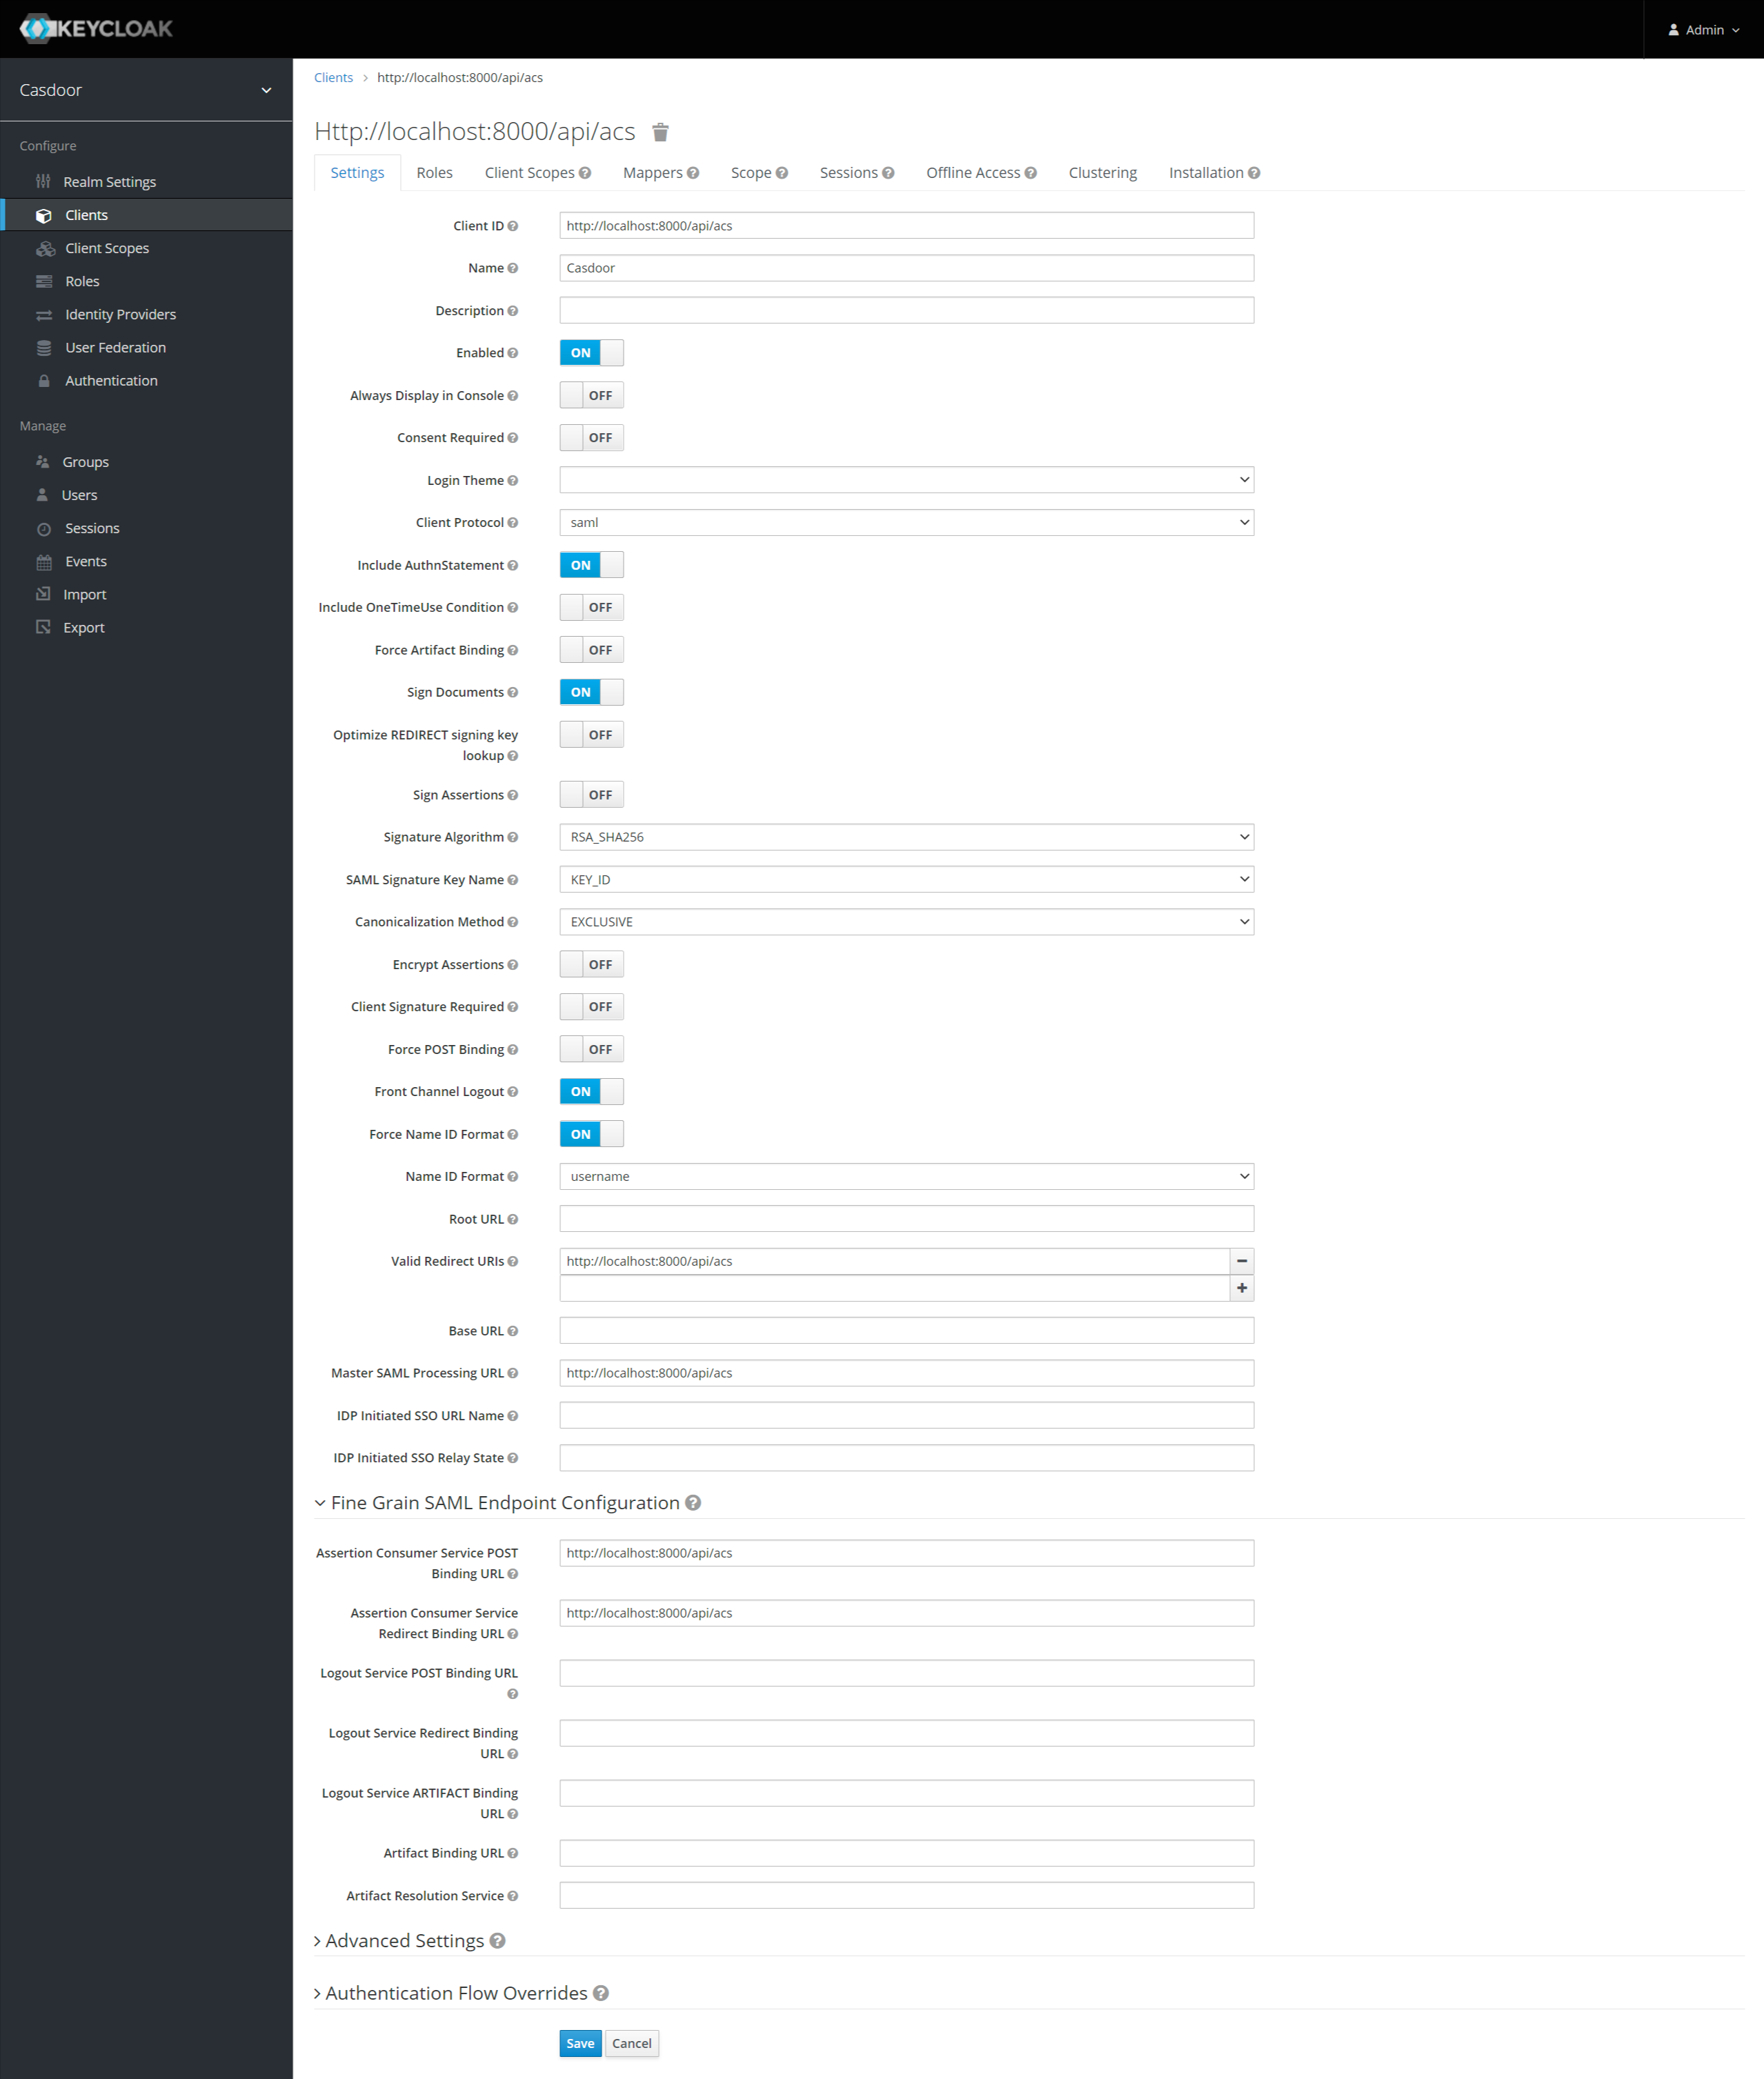
Click Save. This action creates the client and brings you to the Settings tab.
The following are part of the settings:
- Name -
Casdoor. This is only used to display a friendly name to Keycloak users in the Keycloak UI. You can use any name you prefer. - Enabled - Select
on. - Include Authn Statement - Select
on. - Sign Documents - Select
on. - Sign Assertions - Select
off. - Encrypt Assertions - Select
off. - Client Signature Required - Select
off. - Force Name ID Format - Select
on. - Name ID Format - Select
username. - Valid Redirect URIs - Add
http://localhost:8000/api/acs. - Master SAML Processing URL -
http://localhost:8000/api/acs. - Fine Grain SAML Endpoint Configuration
- Assertion Consumer Service POST Binding URL -
http://localhost:8000/api/acs. - Assertion Consumer Service Redirect Binding URL -
http://localhost:8000/api/acs.
- Assertion Consumer Service POST Binding URL -
Save the configuration.
If you want to sign the authn request, you need to enable the Client Signature Required option and upload the certificate generated by yourself. The private key and certificate used in Casdoor, token_jwt_key.key and token_jwt_key.pem, are located in the object directory. In Keycloak, you need to click the Keys tab, click the Import button, select Archive Format as Certificate PEM, and upload the certificate.
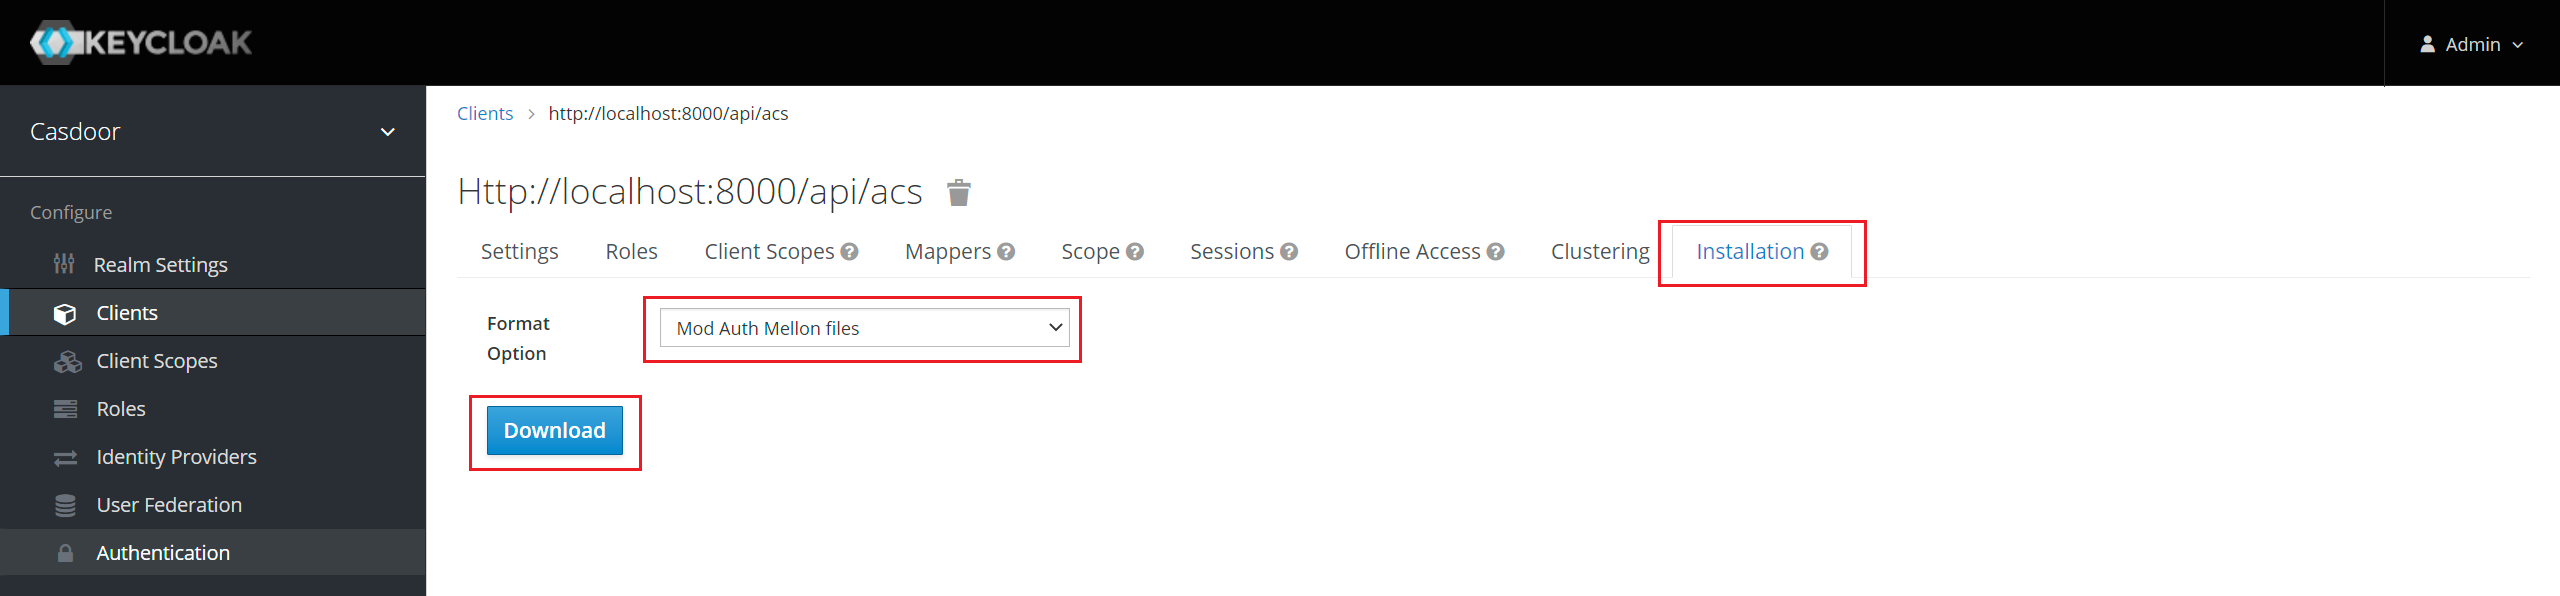
Click Installation tab.
For Keycloak <= 5.0.0, select Format Option - SAML Metadata IDPSSODescriptor and copy the metadata.
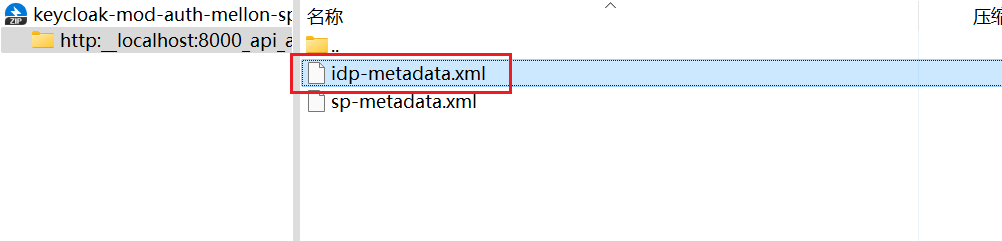
For Keycloak 6.0.0+, select Format Option - Mod Auth Mellon files and click Download. Unzip the downloaded.zip, locate idp-metadata.xml, and copy the metadata.
Configure in Casdoor
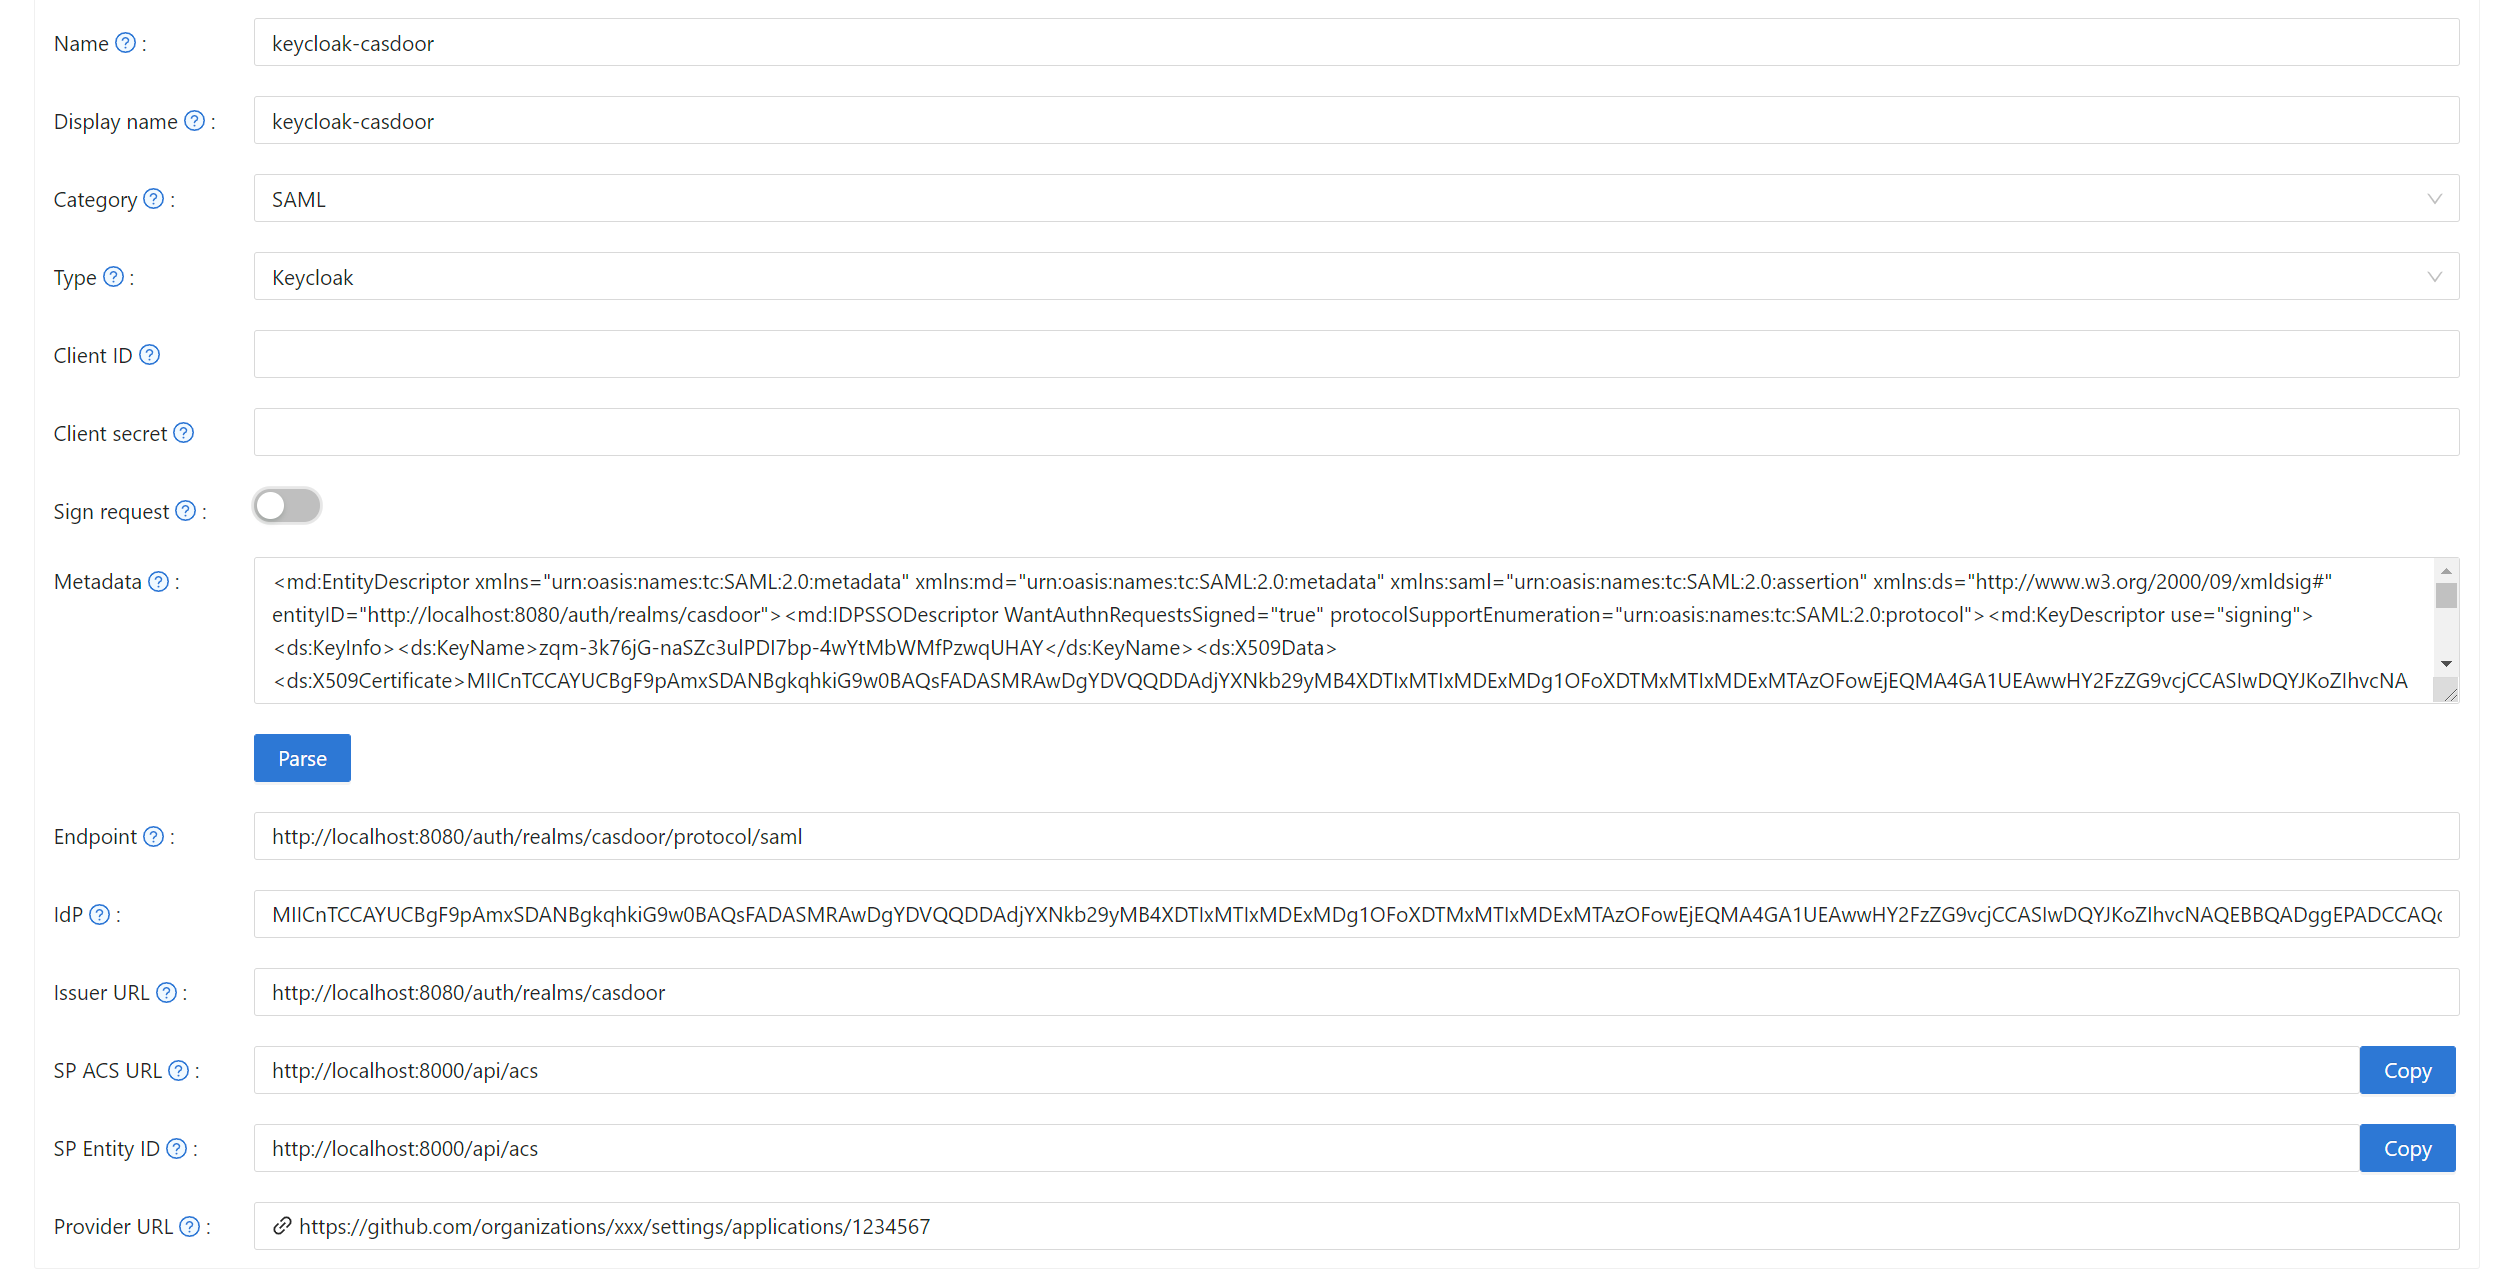
Create a new provider in Casdoor.
Select category as SAML, type as Keycloak. Copy the content of metadata and paste it into the Metadata field. The values of Endpoint, IdP, and Issuer URL will be generated automatically after clicking the Parse button. Finally, click the Save button.
If you enable the Client Signature Required option in Keycloak and upload the certificate, please enable the Sign request option in Casdoor.
Edit the application you want to configure in Casdoor. Select the provider you just added and click the Save button.

Validate the effect
Go to the application you just configured and you will find a Keycloak icon on the login page.
Click the icon and you will be redirected to the Keycloak login page. After successful authentication, you will be logged into Casdoor.