Casdoor를 위한 Electron 앱 예제
Casdoor의 통합 기능을 보여주는 Electron 앱 예제.
예제 실행 방법
초기화
문자열 타입의 6개의 매개변수를 초기화해야 합니다:
| 이름 | 설명 | 경로 |
|---|---|---|
| serverUrl | Casdoor 서버 URL | src/App.js |
| clientId | Casdoor 애플리케이션의 클라이언트 ID | src/App.js |
| appName | Casdoor 애플리케이션의 이름 | src/App.js |
| redirectPath | 제공되지 않은 경우 Casdoor 애플리케이션에 대한 리디렉션 URL의 경로는 /callback이 될 것입니다 | src/App.js |
| clientSecret | Casdoor 애플리케이션의 클라이언트 비밀번호 | src/App.js |
| casdoorServiceDomain | Casdoor 서버 URL | public/electron.js |
이 매개변수를 설정하지 않으면 이 프로젝트는 기본 Casdoor 서버로 Casdoor 온라인 데모를 사용하고 기본 Casdoor 애플리케이션으로 Casnode를 사용합니다.
사용 가능한 명령어
프로젝트 디렉토리에서 다음을 실행할 수 있습니다:
npm run dev 또는 yarn dev
Electron 앱을 빌드하고 이 앱을 실행합니다.
npm run make 또는 yarn make
애플리케이션을 패키지화하고 배포합니다. 패키지가 위치할 out 폴더를 생성합니다:
// Example for macOS out/
├── out/make/zip/darwin/x64/casdoor-electron-example-darwin-x64-1.0.0.zip
├── ...
└── out/casdoor-electron-example-darwin-x64/casdoor-electron-example.app/Contents/MacOS/casdoor-electron-example
미리보기
이 Electron 애플리케이션을 실행하면 새 창이 데스크톱에 나타납니다. 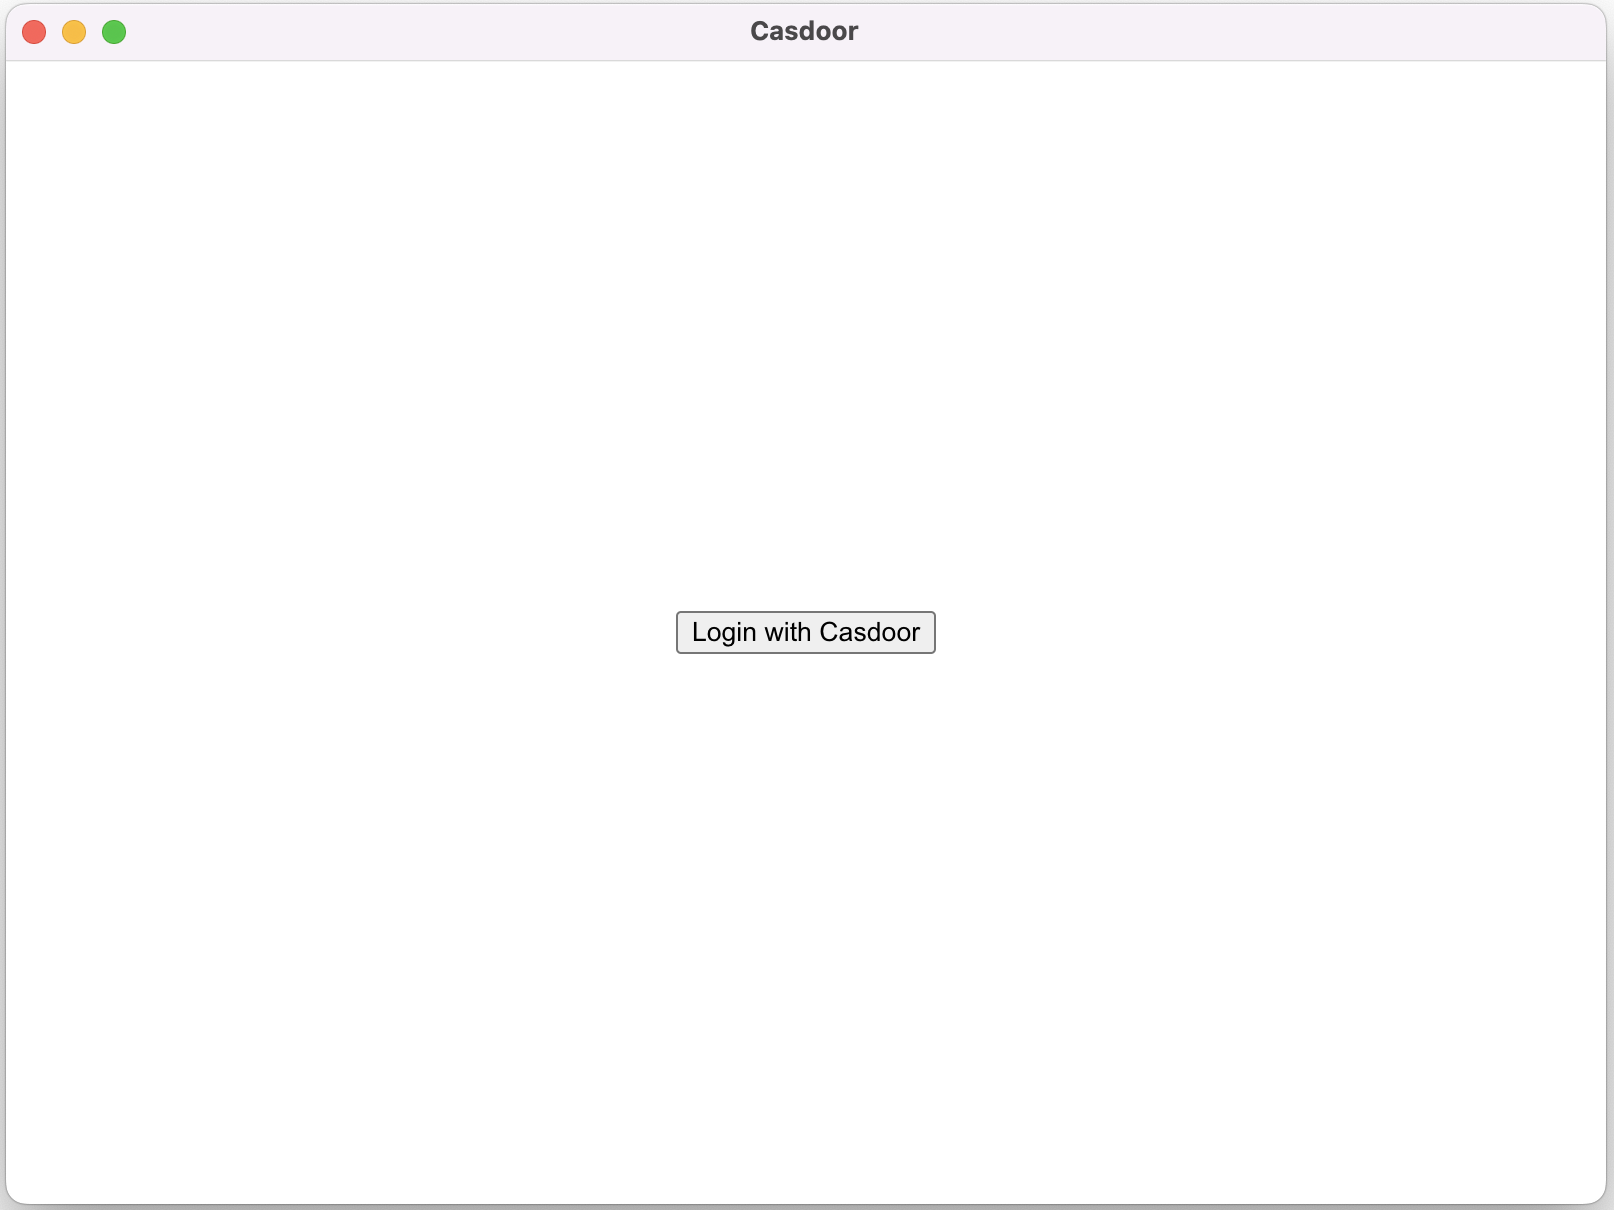
Login with Casdoor 버튼을 클릭하면 기본 브라우저가 자동으로 열리고 로그인 페이지가 표시됩니다. 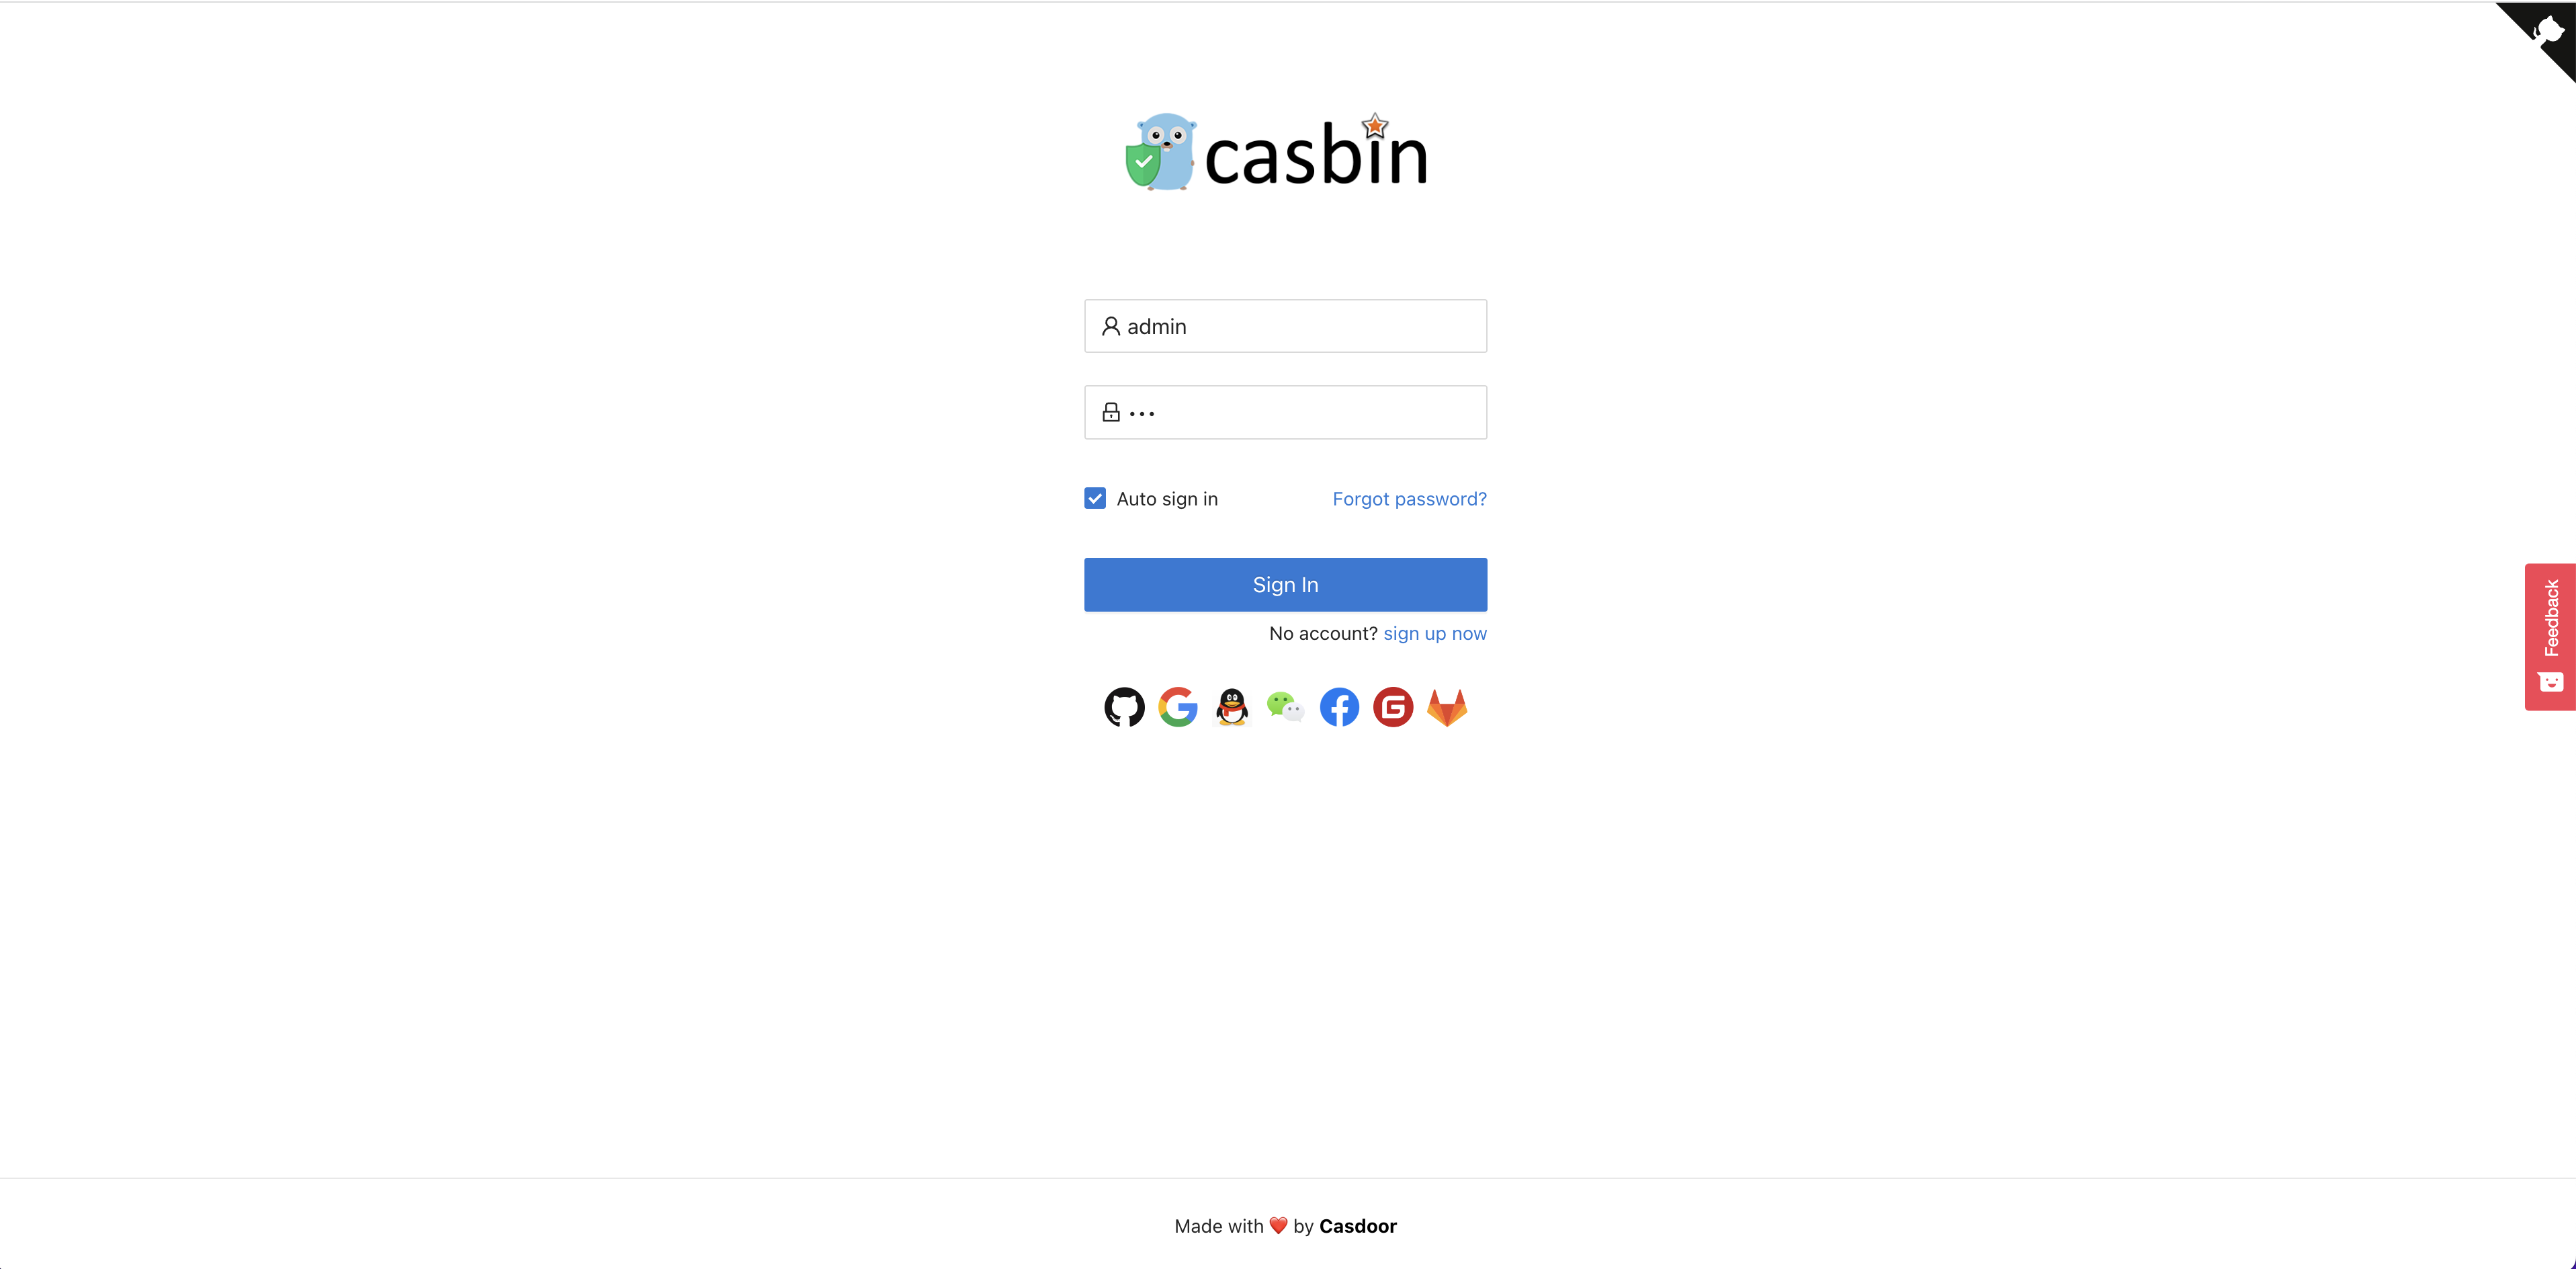 로그인에 성공하면 Electron 애플리케이션이 열리고 사용자 이름이 애플리케이션에 표시됩니다.
 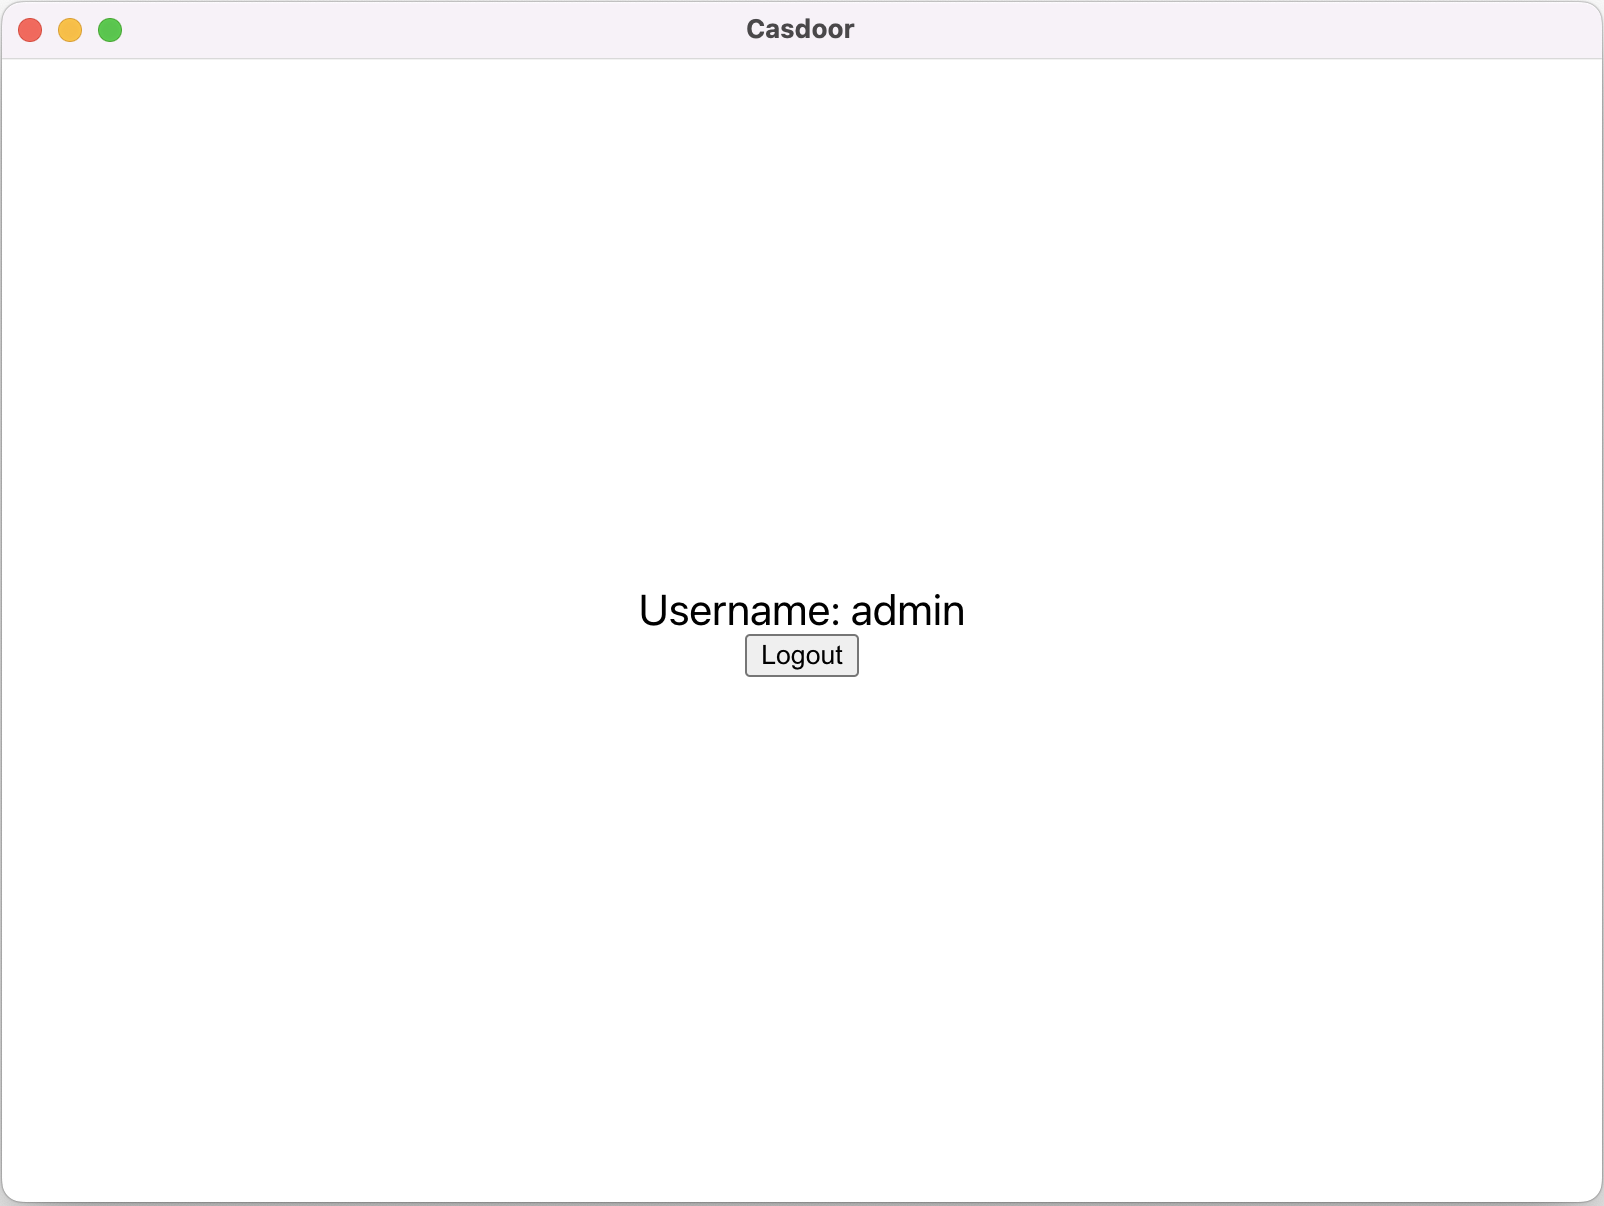 아래의 gif 이미지에서 전체 과정을 미리 볼 수 있습니다.
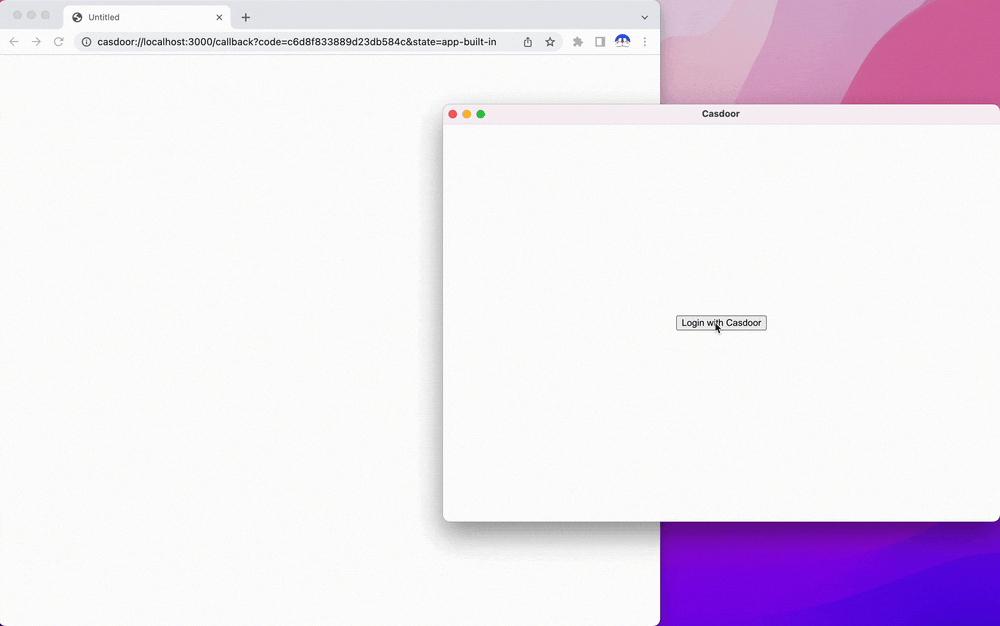
통합 단계
사용자 정의 프로토콜 설정
먼저, casdoor라는 사용자 정의 프로토콜을 설정해야 합니다.
const protocol = "casdoor";

if (process.defaultApp) {
  if (process.argv.length >= 2) {
    app.setAsDefaultProtocolClient(protocol, process.execPath, [
      path.resolve(process.argv[1]),
    ]);
  }
} else {
  app.setAsDefaultProtocolClient(protocol);
}
이렇게 하면 브라우저가 Electron 애플리케이션을 열고 로그인 정보를 Electron 애플리케이션으로 전송할 수 있습니다.
브라우저에서 로그인 URL을 엽니다
const serverUrl = "https://door.casdoor.com";
const appName = "app-casnode";
const redirectPath = "/callback";
const clientId = "014ae4bd048734ca2dea";
const clientSecret = "f26a4115725867b7bb7b668c81e1f8f7fae1544d";

const redirectUrl = "casdoor://localhost:3000" + redirectPath;

const signinUrl = `${serverUrl}/login/oauth/authorize?client_id=${clientId}&response_type=code&redirect_uri=${encodeURIComponent(redirectUrl)}&scope=profile&state=${appName}&noRedirect=true`;

shell.openExternal(signinUrl); //Open the login url in the browser
첫 다섯 개의 매개변수를 변경할 수 있습니다.
열린 애플리케이션 이벤트를 듣습니다
브라우저를 통해 성공적으로 로그인하면 브라우저가 Electron 애플리케이션을 엽니다. 따라서, 애플리케이션 열기 이벤트를 수신해야 합니다.
const gotTheLock = app.requestSingleInstanceLock();
const ProtocolRegExp = new RegExp(`^${protocol}://`);

if (!gotTheLock) {
  app.quit();
} else {
  app.on("second-instance", (event, commandLine, workingDirectory) => {
    if (mainWindow) {
      if (mainWindow.isMinimized()) mainWindow.restore();
      mainWindow.focus();
      commandLine.forEach((str) => {
        if (ProtocolRegExp.test(str)) {
          const params = url.parse(str, true).query;
          if (params && params.code) {
            store.set("casdoor_code", params.code);
            mainWindow.webContents.send("receiveCode", params.code);
          }
        }
      });
    }
  });
  app.whenReady().then(createWindow);

  app.on("open-url", (event, openUrl) => {
    const isProtocol = ProtocolRegExp.test(openUrl);
    if (isProtocol) {
      const params = url.parse(openUrl, true).query;
      if (params && params.code) {
        store.set("casdoor_code", params.code);
        mainWindow.webContents.send("receiveCode", params.code);
      }
    }
  });
}
브라우저에서 casdoor_code 또는 params.code라는 코드를 얻을 수 있습니다.
코드를 분석하고 사용자 정보를 얻습니다
async function getUserInfo(clientId, clientSecret, code) {
  const { data } = await axios({
    method: "post",
    url: authCodeUrl,
    headers: {
      "content-type": "application/json",
    },
    data: JSON.stringify({
      grant_type: "authorization_code",
      client_id: clientId,
      client_secret: clientSecret,
      code: code,
    }),
  });
  const resp = await axios({
    method: "get",
    url: `${getUserInfoUrl}?accessToken=${data.access_token}`,
  });
  return resp.data;
}

ipcMain.handle("getUserInfo", async (event, clientId, clientSecret) => {
  const code = store.get("casdoor_code");
  const userInfo = await getUserInfo(clientId, clientSecret, code);
  store.set("userInfo", userInfo);
  return userInfo;
});
마지막으로, OAuth 문서 페이지를 따라 코드를 분석하고 사용자 정보를 얻을 수 있습니다.