MinIO
MinIO supports external identity management using an OpenID Connect (OIDC)-compatible provider. This document covers the configuration of Casdoor as an identity provider to support MinIO.
Step 1: Deploy Casdoor & MinIO
First, deploy Casdoor.
See Server installation.
After a successful deployment, make sure that:
- The Casdoor server is running on
http://localhost:8000. - Open your favorite browser and visit
http://localhost:7001to see the login page of Casdoor. - Test the login functionality by entering
adminand123.
Implement a Casdoor-based login in your app with the following steps.
Deploy MinIO: MinIO quickstart. Install the mc client: MinIO mc.
Step 2: Configure Casdoor Application
-
Create a new Casdoor application or use an existing one.
-
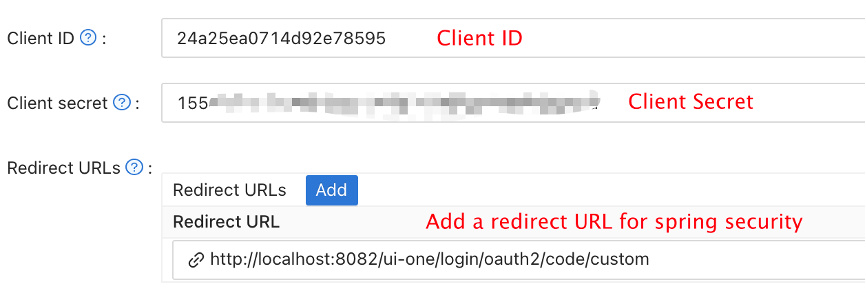
Add your redirect URL.
-
Add the provider you want and provide any necessary settings.
Note Client ID and Client secret for the next step. OIDC discovery:
http://<CASDOOR_HOSTNAME>/.well-known/openid-configuration. -
This step is necessary for MinIO. As MinIO needs to use a claim attribute in JWT for its policy, you should configure it in Casdoor as well. Currently, Casdoor uses
tagas a workaround for configuring MinIO's policy.
See MinIO policy-based access control for supported policies.
Step 3: Configure MinIO
Start a MinIO server, for example:
export MINIO_ROOT_USER=minio
export MINIO_ROOT_PASSWORD=minio123
minio server /mnt/export
Use --console-address to set the console address and port.
Next, add a service alias using the MinIO client mc.
mc alias set myminio <Your console address> minio minio123
Now, configure the OpenID Connect of MinIO. For Casdoor, the command will be:
mc admin config set myminio identity_openid config_url="http://CASDOOR_HOSTNAME/.well-known/openid-configuration" client_id=<client id> client_secret=<client secret> claim_name="tag"
See the MinIO OpenID identity management docs for more parameters.
Once successfully set, restart the MinIO instance.
mc admin service restart myminio
Step 4: Try the demo!
Now, open your MinIO console in the browser and click on Login with SSO.
You are redirected to the Casdoor login page; after sign-in, back to MinIO and logged in. You then see the buckets and objects available to you.
If the Casdoor frontend and backend use different ports, the redirect may hit the backend and show 404. Point the redirect URL to the frontend port so the login page loads correctly.