AWS Client VPN (SAML)
This guide configures Casdoor as a SAML identity provider for AWS Client VPN.
Prerequisites
- AWS account with permission to configure the service
- Amazon VPC with an EC2 instance (VPC setup, EC2); in the instance security group, allow ICMP from the VPC CIDR for testing
- A private certificate in AWS Certificate Manager (ACM) (import guide)
- Windows or Mac with AWS Client VPN installed
Configure the SAML application in Casdoor
- Set Redirect URL to
urn:amazon:webservices:clientvpn.

- Set SAML reply URL to
http://127.0.0.1:35001.
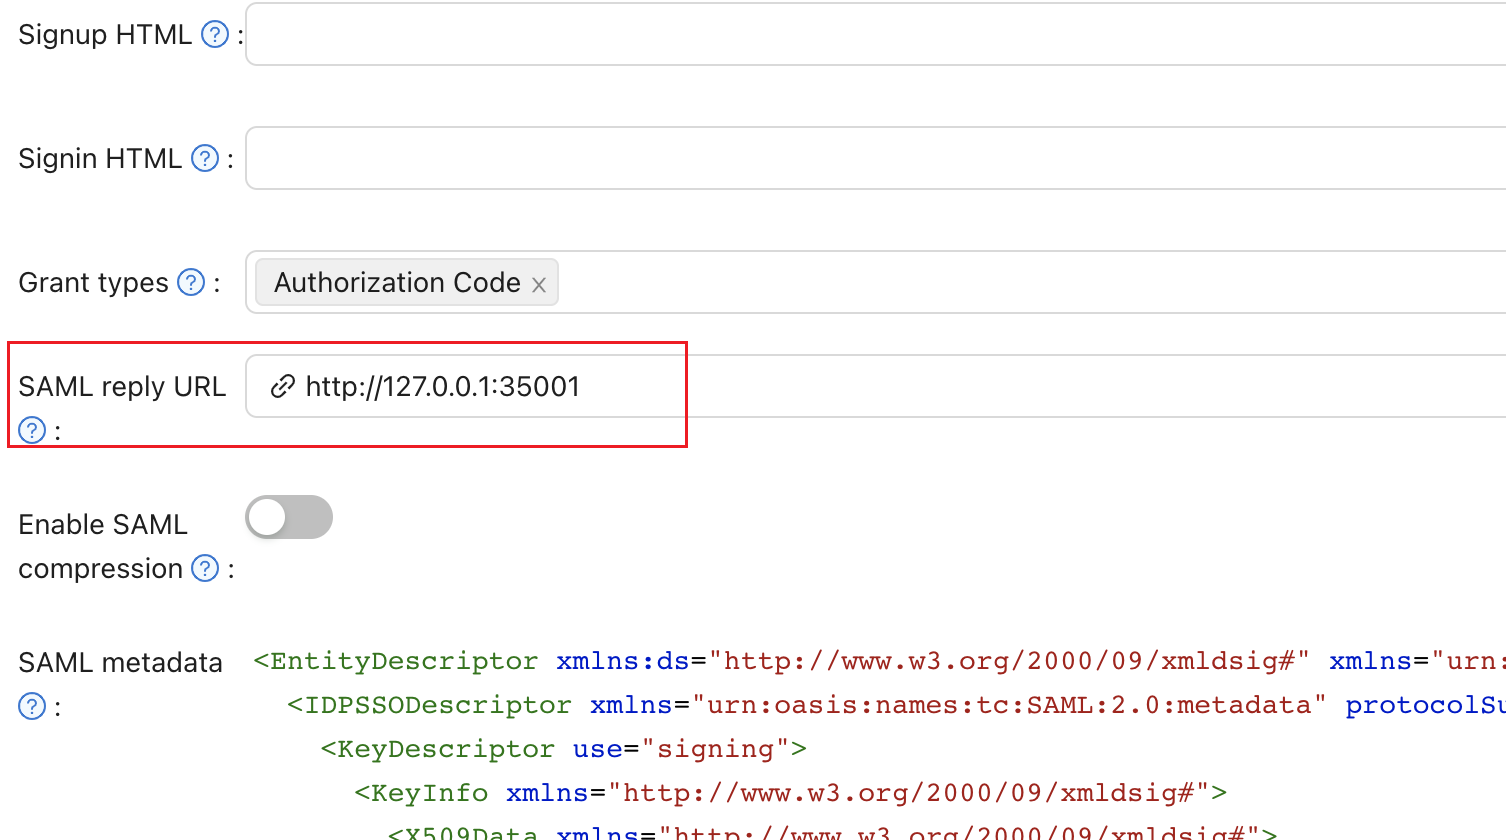
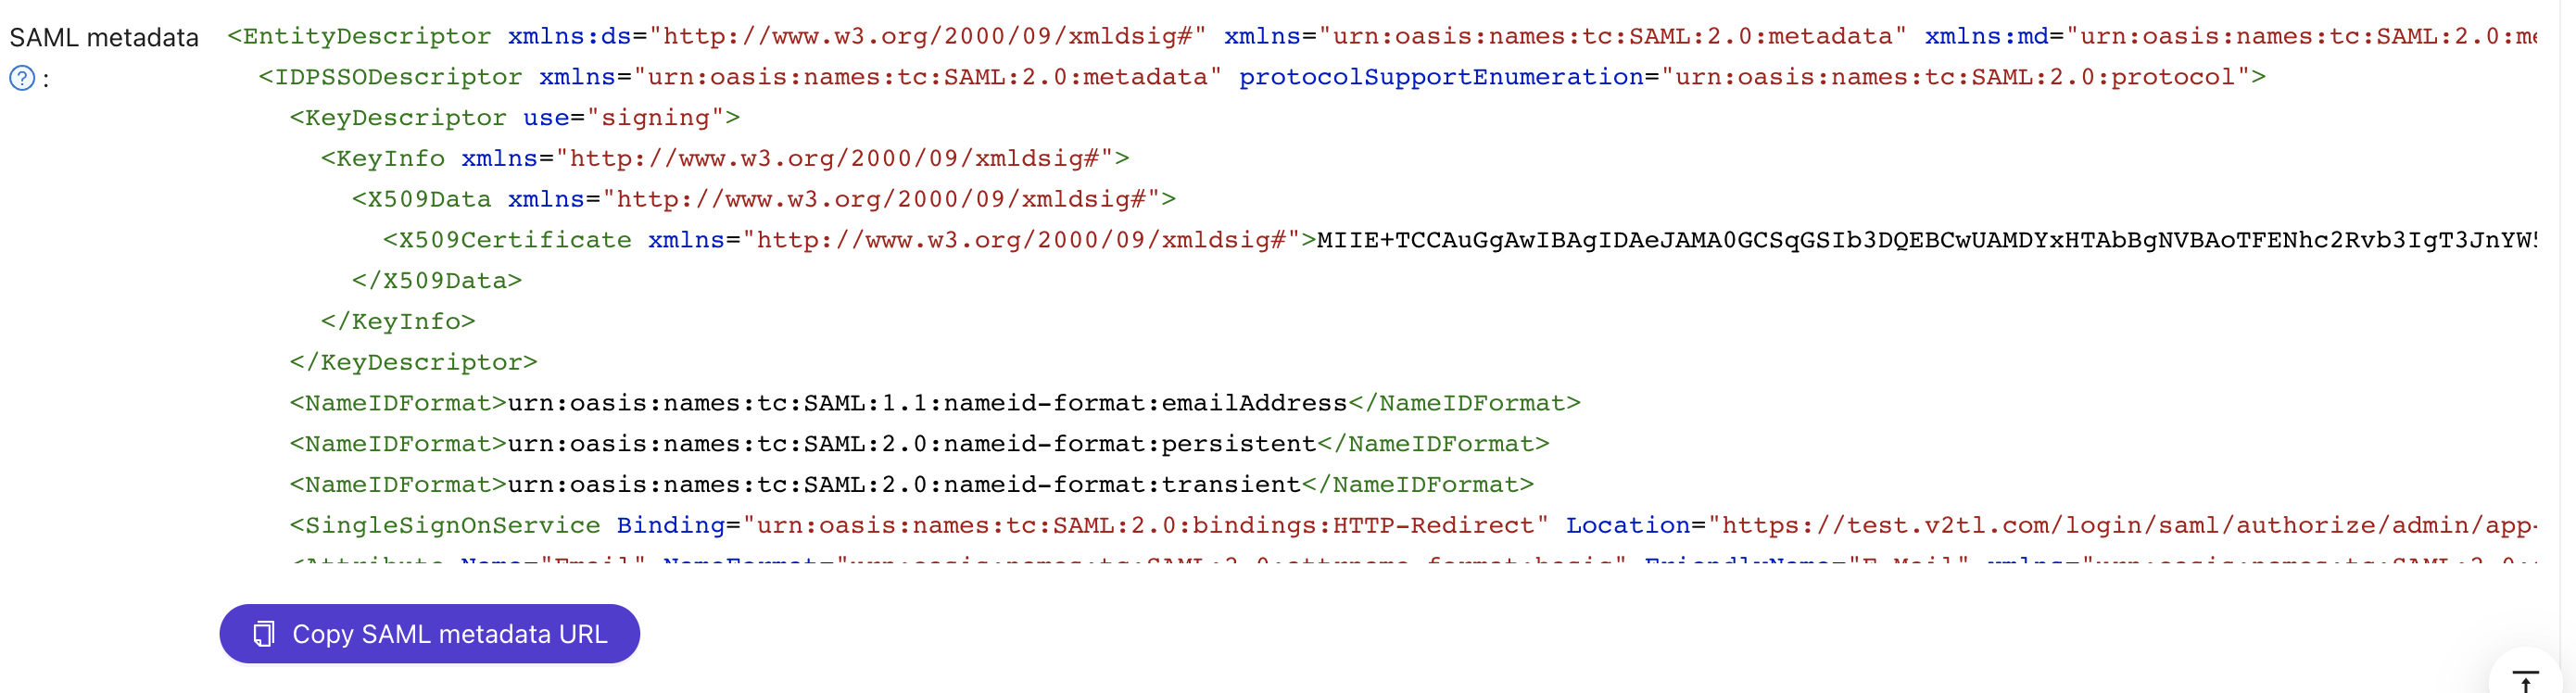
- Save the SAML metadata as an XML file for the next step.
Configure AWS
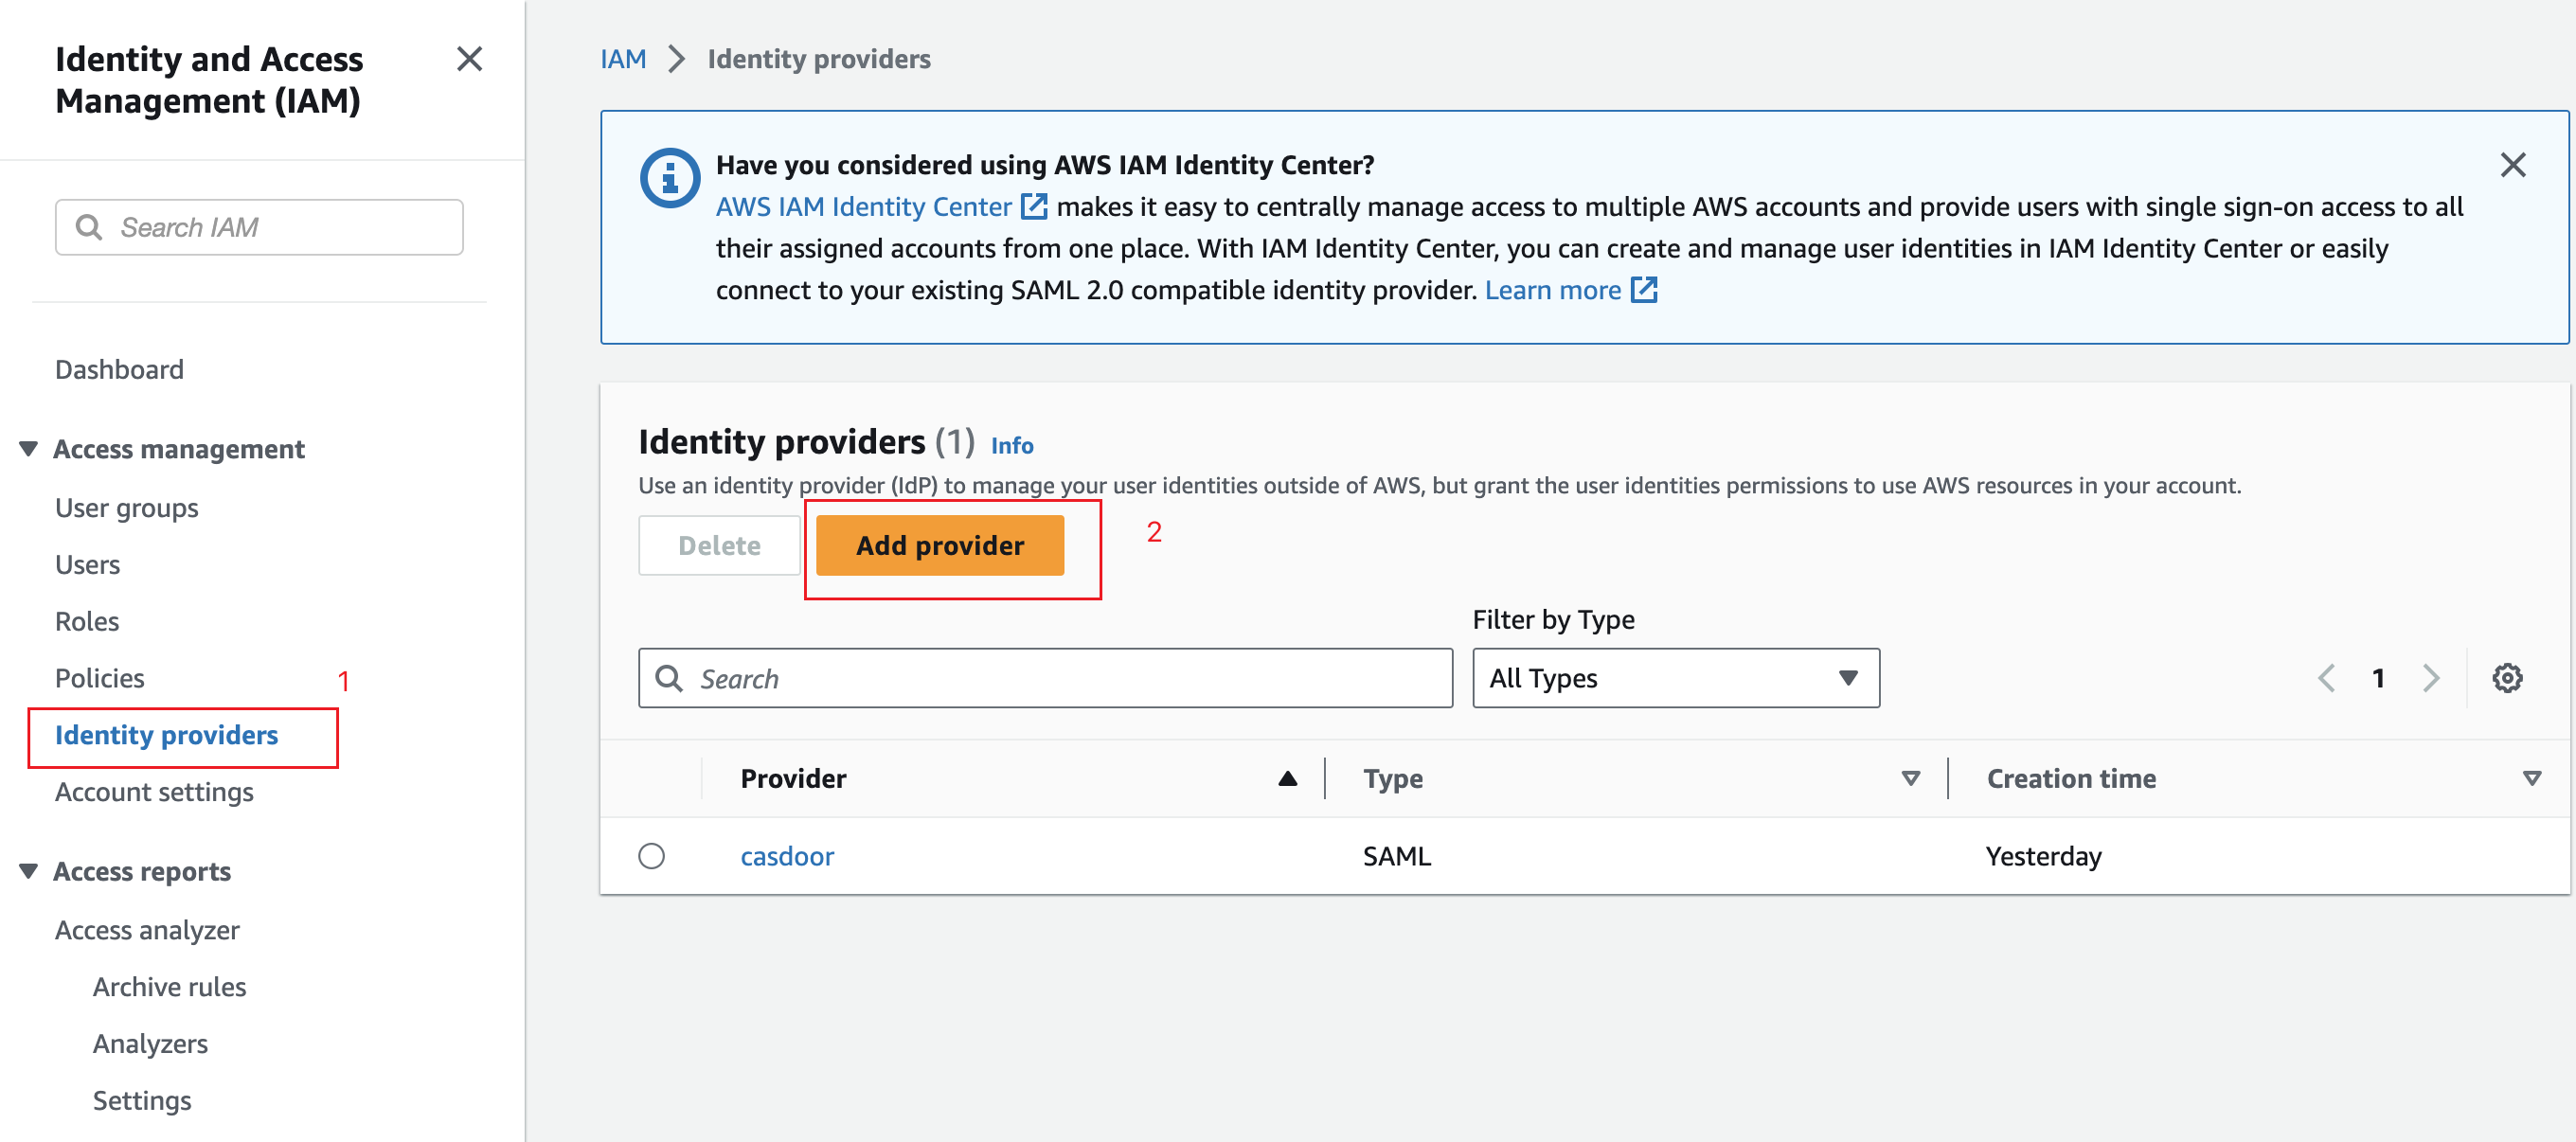
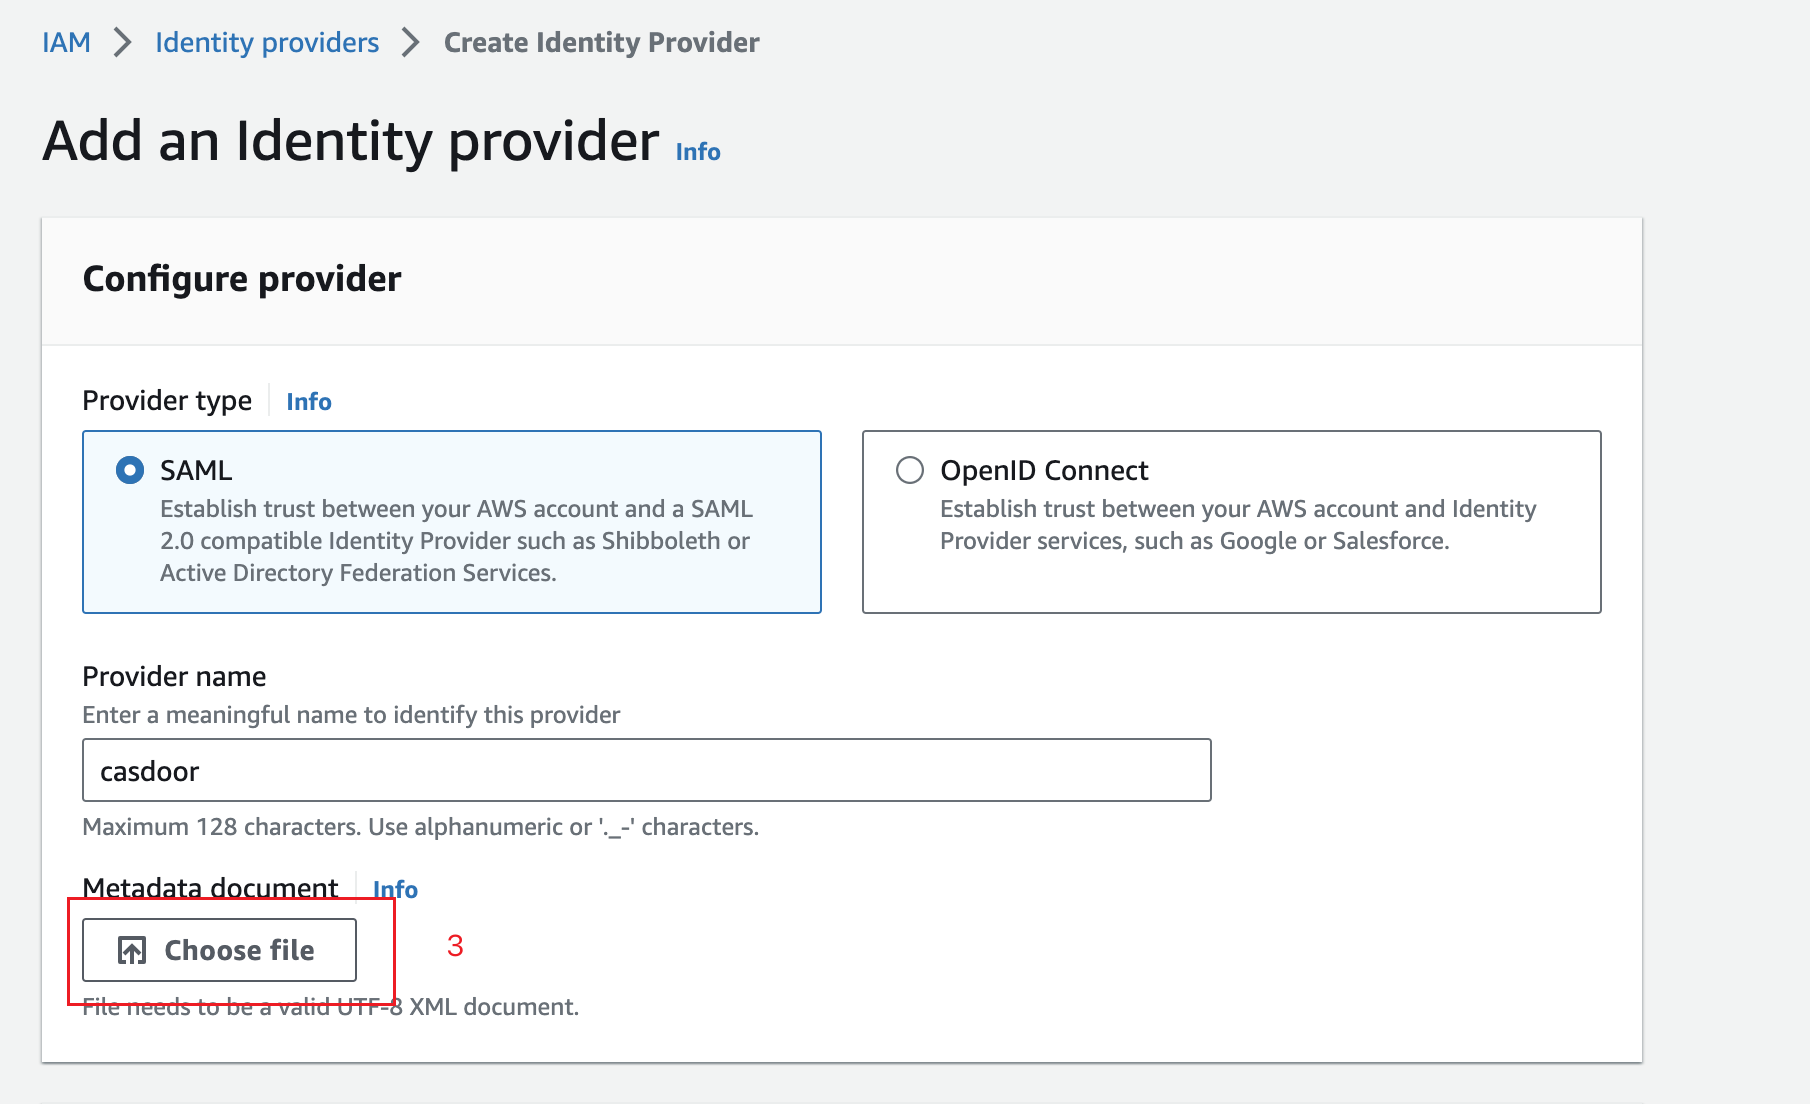
Add Casdoor as an identity provider
- In the IAM console, open Identity providers → Create provider.
- Choose SAML, give the provider a name, and upload the metadata file from Casdoor.
- Click Next step → Create.
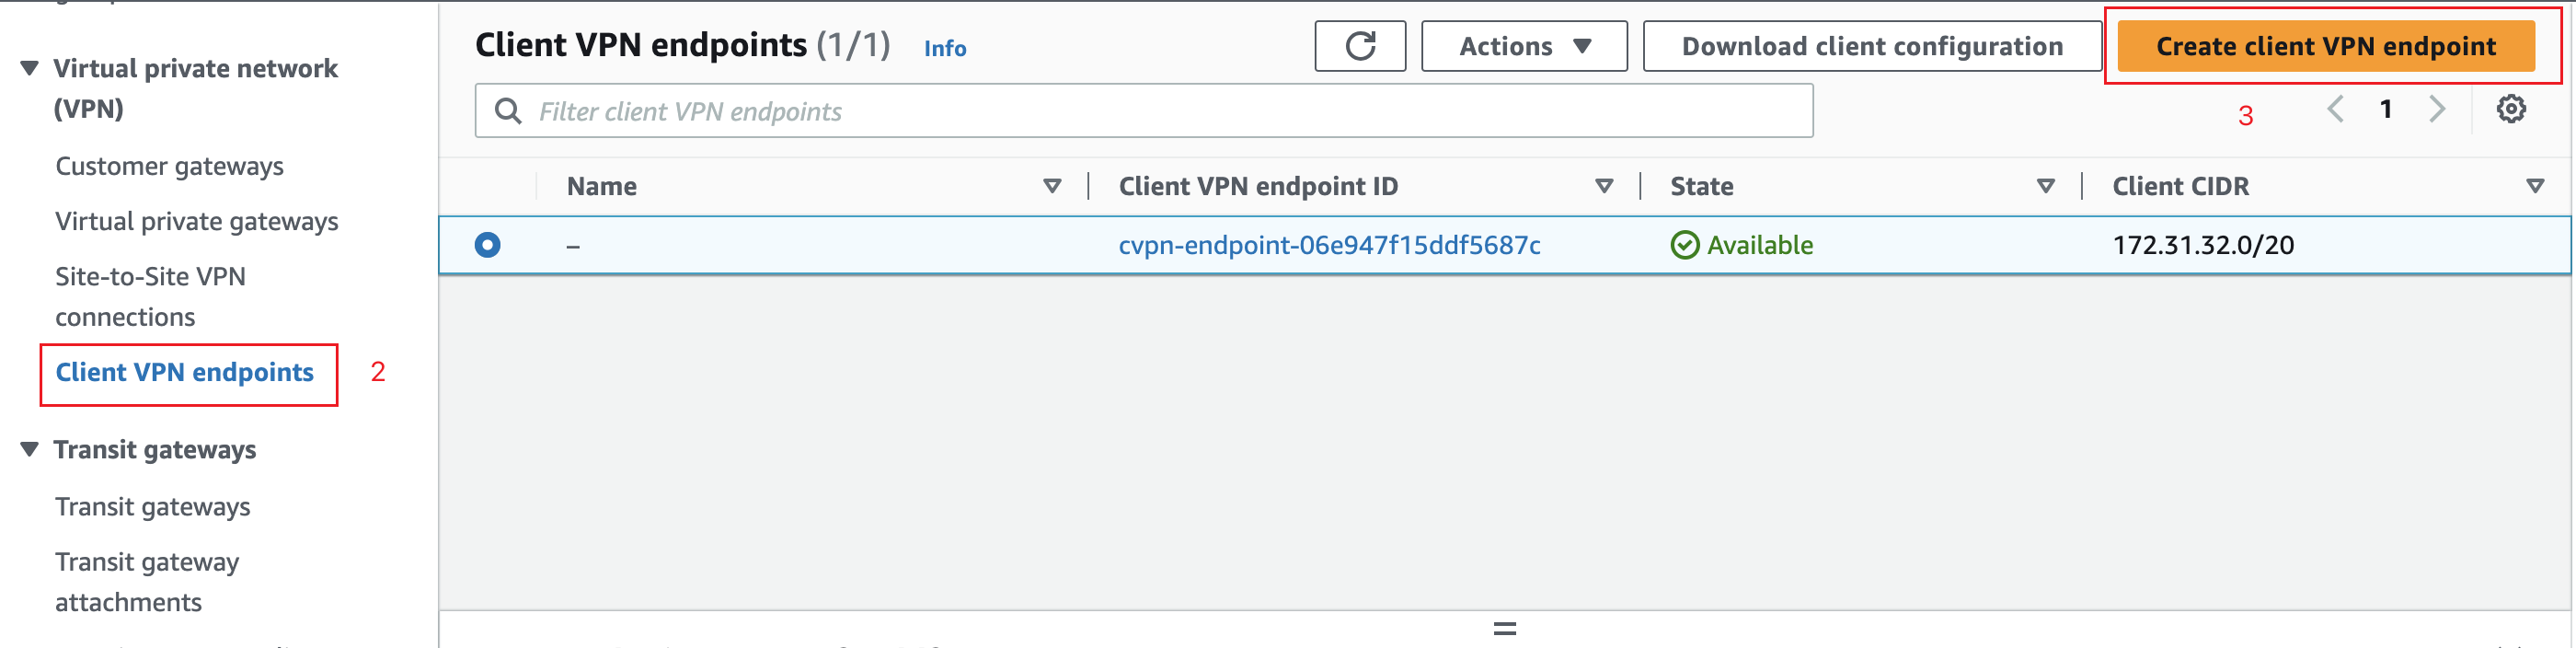
Create a Client VPN endpoint
- In VPC → Client VPN Endpoints → Create Client VPN Endpoint.
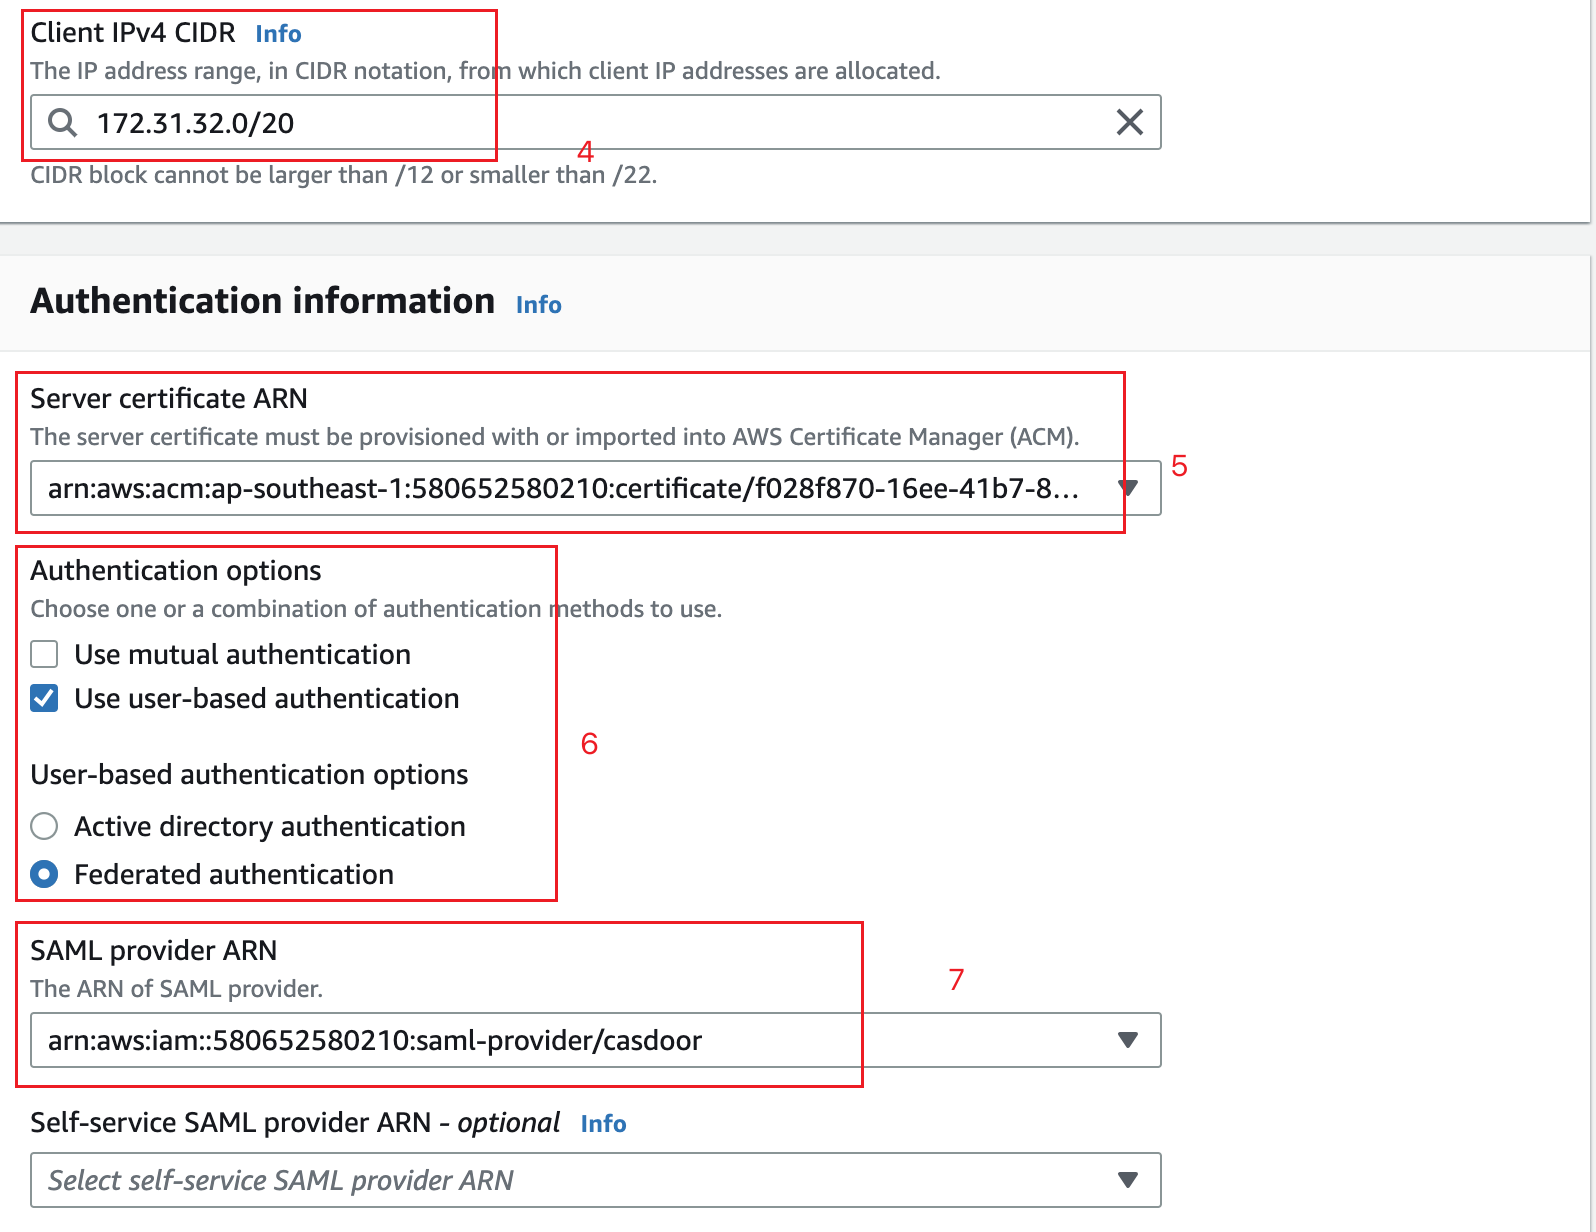
- Set Client IPv4 CIDR for remote users.
- Select your Server certificate (from ACM).
- Under Authentication, choose User-based authentication → Federated authentication.
- Select the SAML identity provider you created.
- Click Create Client VPN Endpoint.
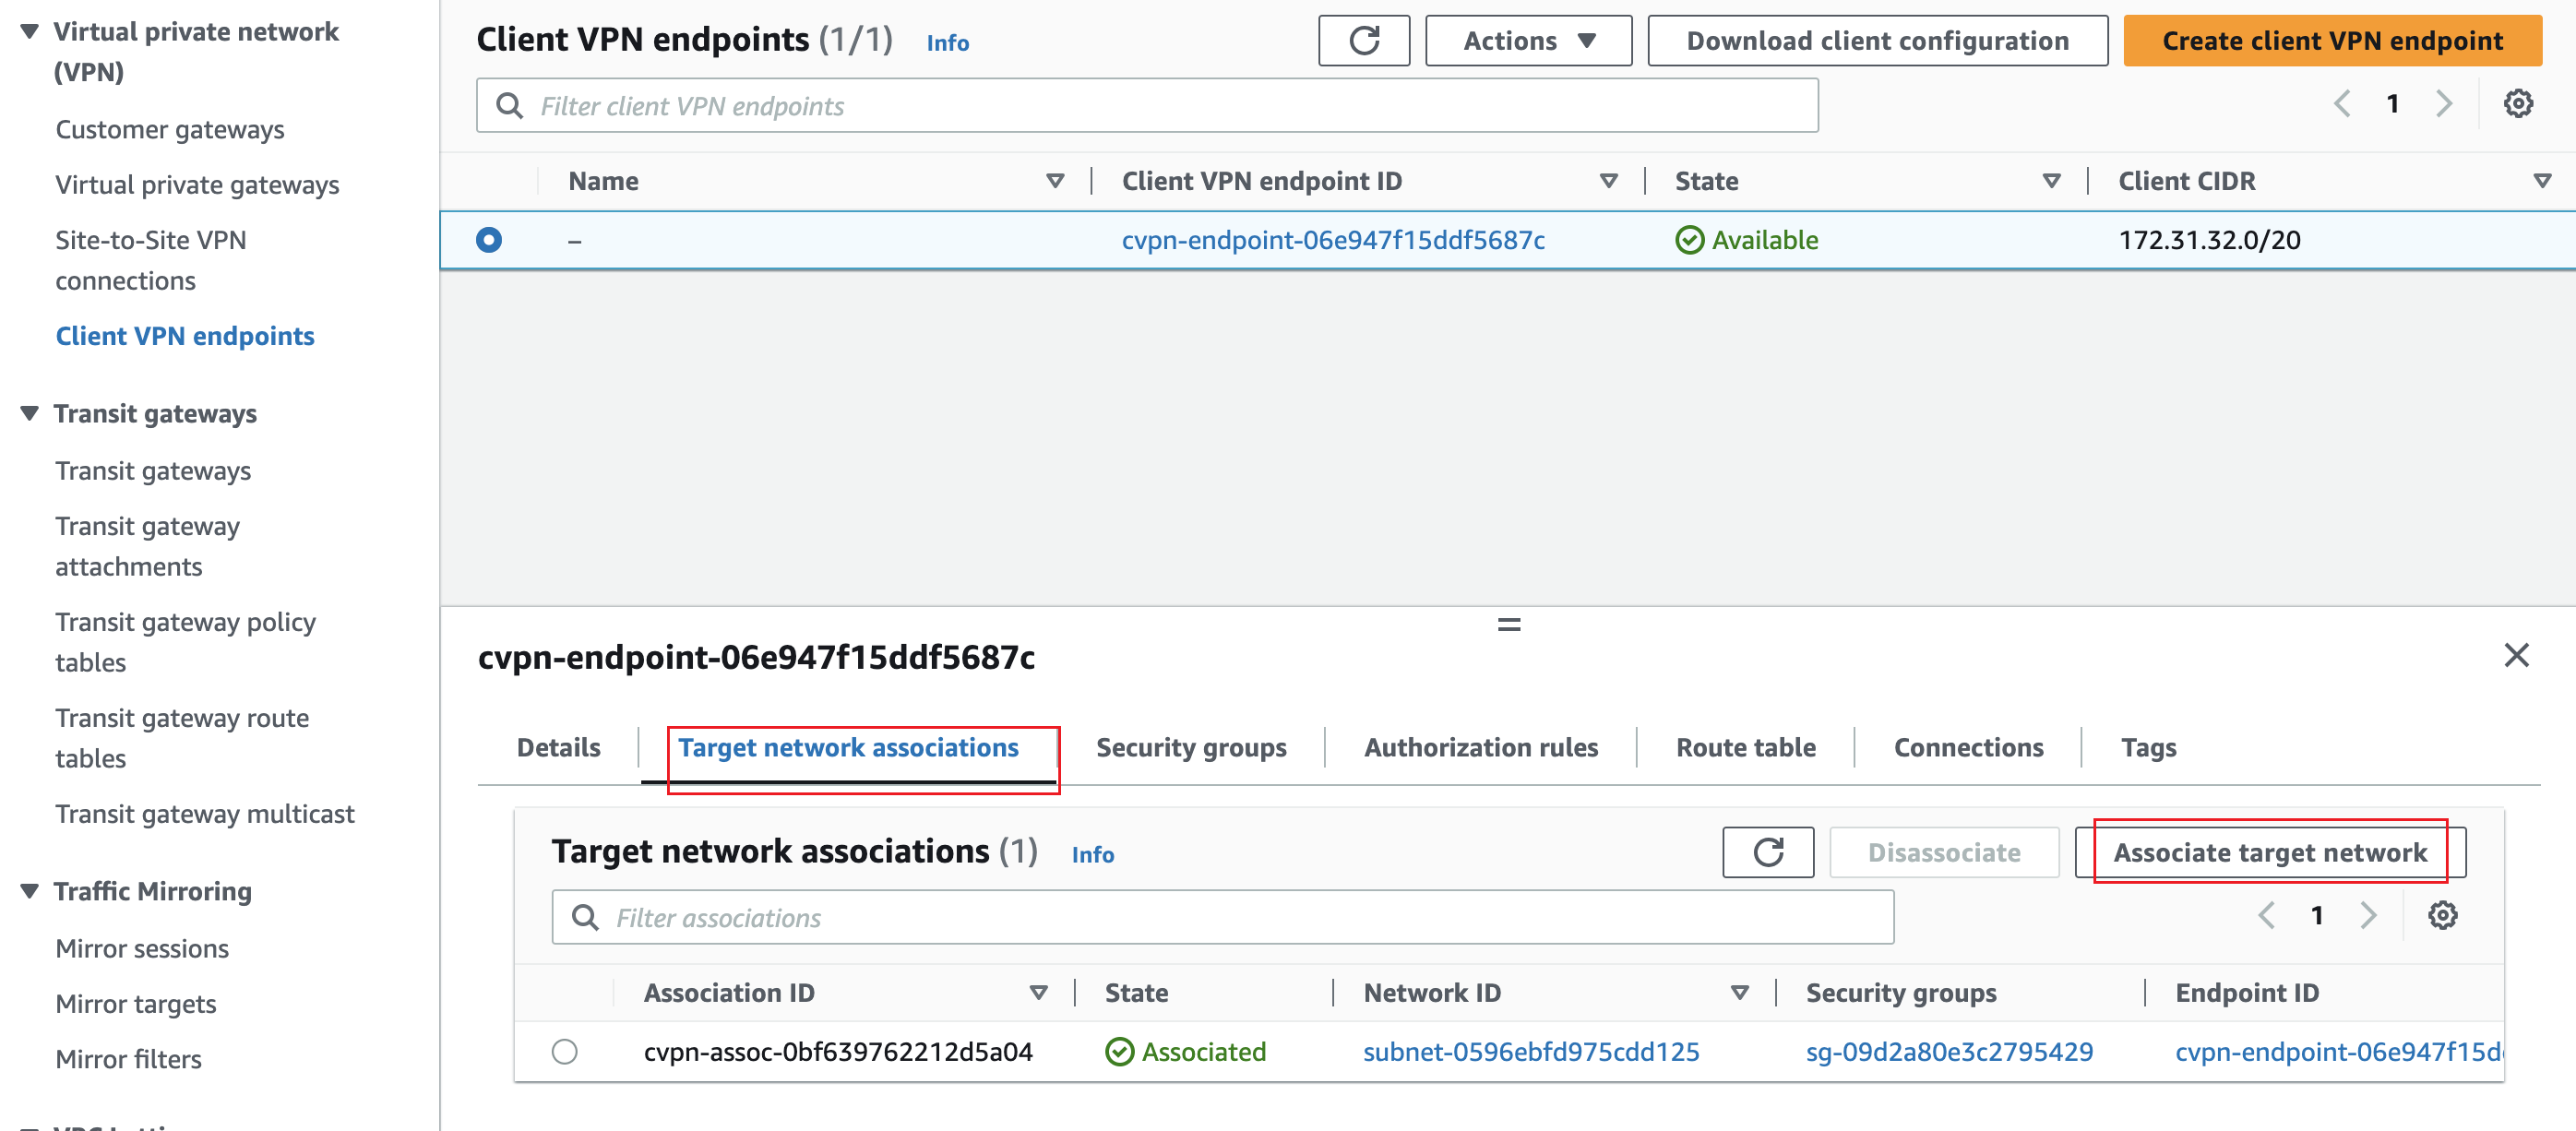
Associate the VPN with a VPC
- In the endpoint, open Target network associations → Associate target network.
- Select the VPC and subnet.
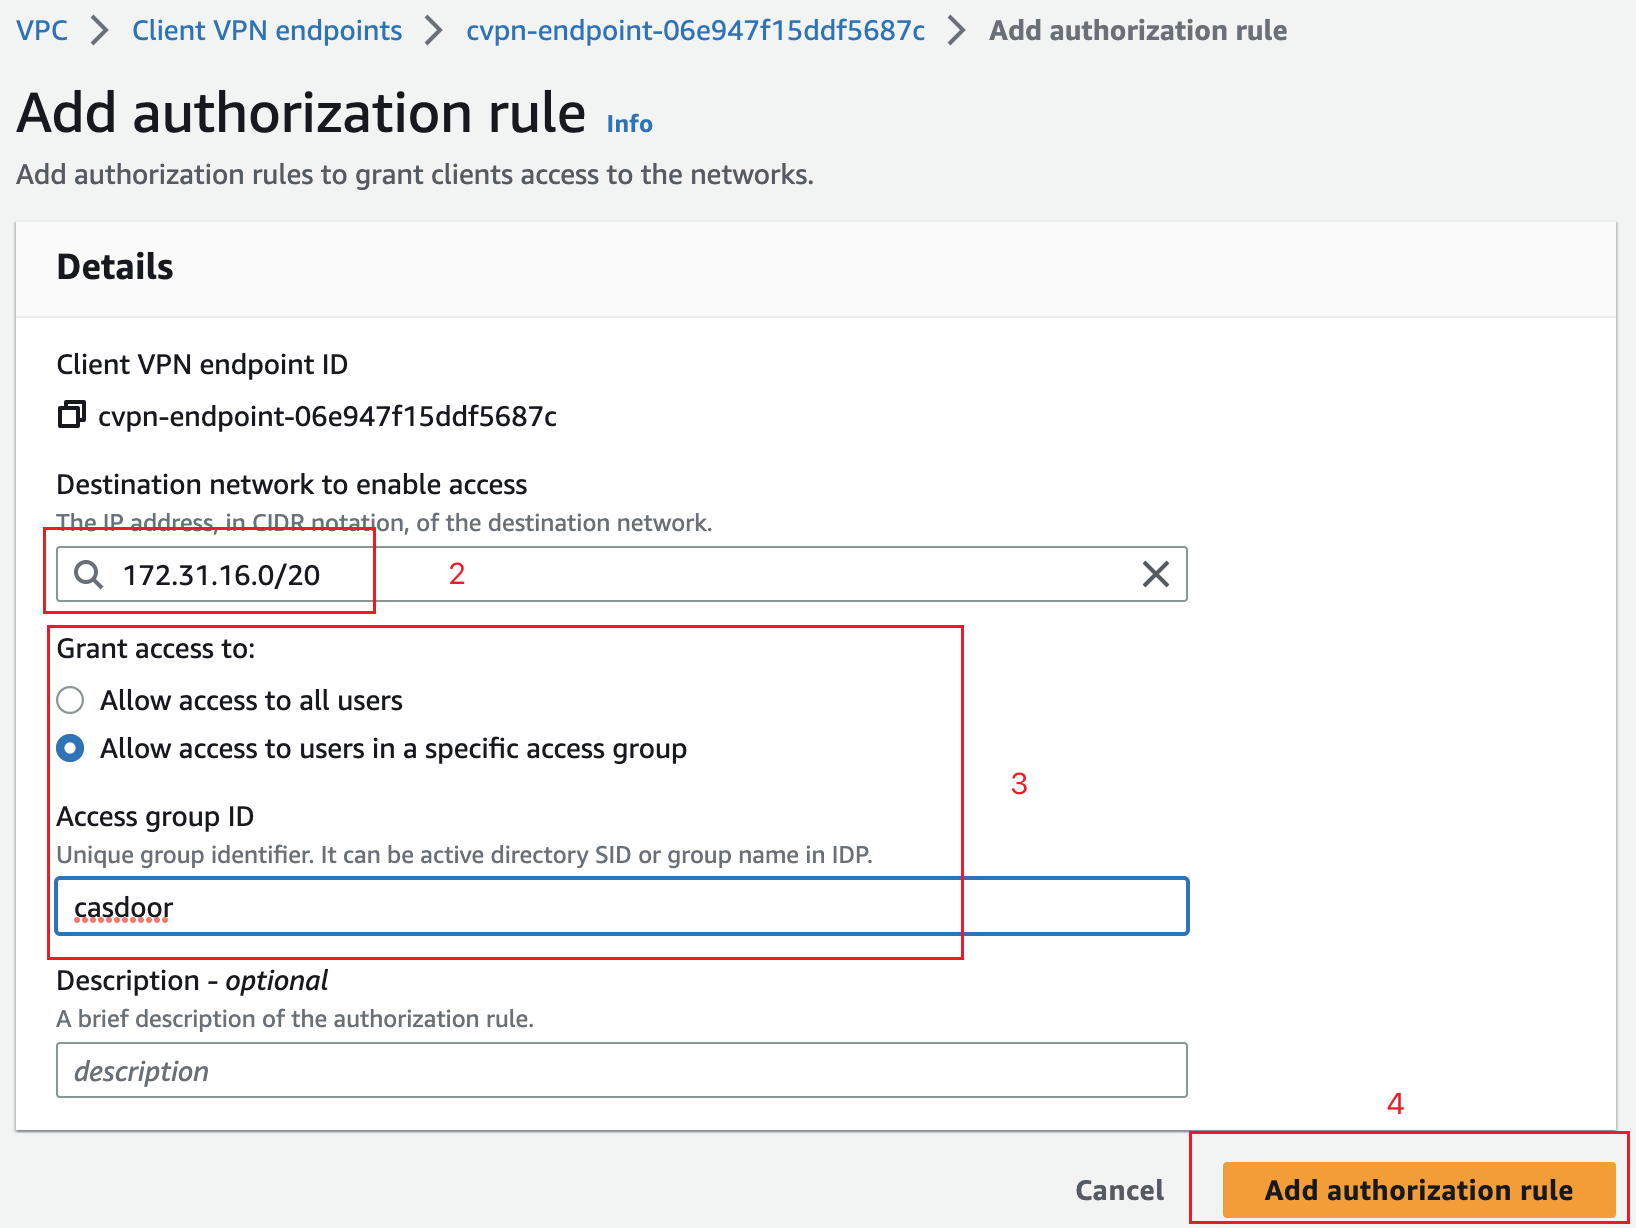
Authorization rules (optional)
- Open Authorization rules → Add authorize rule.
- Set Destination network (e.g.
172.31.16.0/20for your EC2). - Under Grant access to, choose Allow access to users in a specific access group and enter the group name (e.g.
casdoor). - Add the rule.
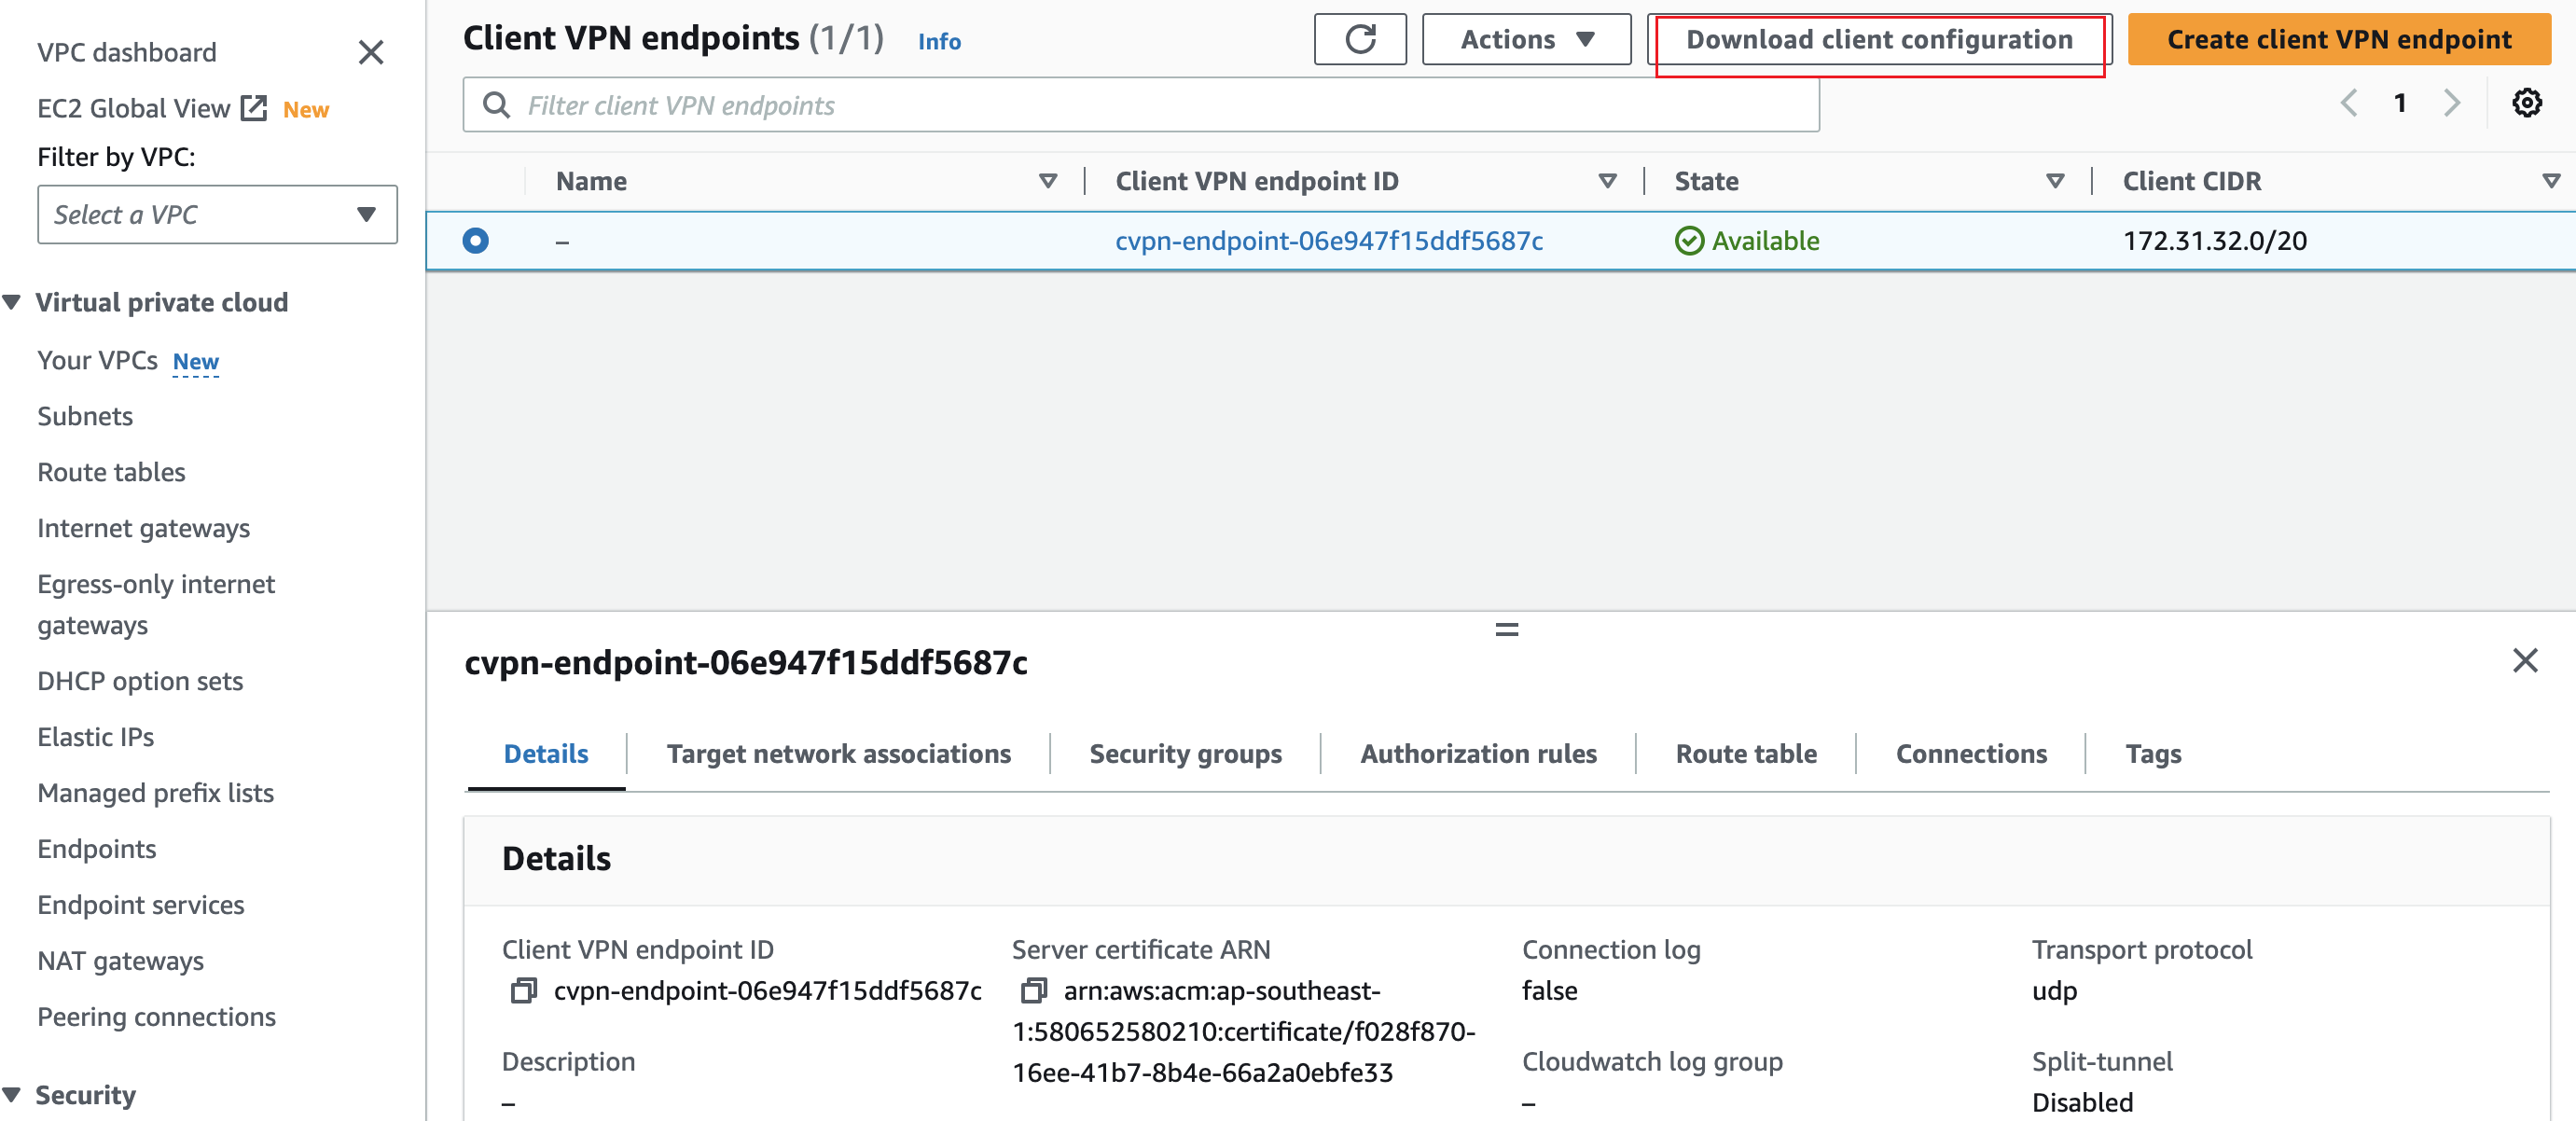
Connect to Client VPN
- Select the endpoint (state: Available) → Download Client Configuration.
- In the AWS Client VPN app: File → Manage Profiles → Add Profile → select the downloaded file.
- Select the profile and click Connect.